Main Walkthrough
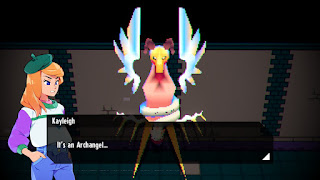
The main quest of Cassette Beasts - or at least the one that will lead you to the end credits - Land of Confusion will take you the entirety of the game to complete. Starting shortly after you complete the intro, Land of Confusion will pit you against the many Archangels of New Wirral, most of which are a cut above the average monster. Without a strong, well-developed team of transformations you won't stand a chance of completing Land of Confusion.
Land of Confusion is not a quest you need to fully complete. Each time you defeat an Archangel you'll receive a clue as to the location of a hidden train station, and you can figure out where it is without every clue. That said, you will need to defeat every Archangel to see the entirety of Land of Confusion, and fight an optional boss at the end.
The segments of Land of Confusion can be completed in whatever order you like. Many of them will take you into high-level territory, however, so you may want to tackle these areas in the order laid out below.
Glowcester Road Station (Archangel Poppetox)
Located in New Wirral Park. To unveil Glowcester Road Station you'll need to complete a simple rock-placement puzzle in the northeast of the park. Inside the station you'll find a short dungeon, and completing it will open the path to Platform B, where you'll fight Archangel Poppetox.
Located in Mourningtown, a settlement on the plateau of Autumn Hill. This station plays a role in Kayleigh's personal quest, I Ran So Far Away, which you'll unlock by fighting a Cultist enemy with Kayleigh as your partner. Making your way through Mourningtown with Kayleigh at your side will bring you to Platform B, where you'll fight Archangel Mourningstar.
Located in Falldown Mall, a dungeon on the cliffs of Eastham Woods. This station plays a role in Meredith's personal quest, All I Ever Needed, which you'll unlock by recruiting Meredith and spending some time with her. Complete Falldown Mall and you'll drop down onto Platform B, where you'll fight Archangel Nowhere Monarch.
Located on Thirstaton Lake, to the north of Harbourtown. To reveal Waterloop Station you'll need to follow a path of buttons from the beaches of Lakeside to the entrance of the station. Once inside you'll need to unlock Platform B via several connected puzzles. Reach the platform to fight Archangel Heckahedron.
Located in Cherry Meadow. In the rough center of the meadow you'll find a man investigating claims of a tiny Dominoth in the region. Grab a blue magnetic block from the north and bring it to the man - specifically a blue tile near the man - to reveal the entrance to Cherry Cross Station. Once inside you'll need to complete a dungeon with a growing / shrinking mechanic to reach Platform B, where you'll fight Archangel Alice.
Located in Lost Hearts Graveyard. In the graveyard is a small courtyard you'll need to unlock by turning red Magikrab statues to blue. Once inside the courtyard, check the graves for a switch that will reveal the entrance to Aldgrave Tomb Station. The dungeon within is a maze that requires some memorization to complete. Reach Platform B and you'll fight Archangel Lamento Mori.
Located in The 'Titania' Shipwreck, on the north end of Cast Isle Shore. This station is the setting for Viola's personal quest, Everybody's Looking For Something, and you'll need her along as a partner to see it through. You'll need to complete several puzzles inside the ship to lower the water level and reveal the entrance to Bard Street Station. Enter Platform B to fight Archangel Robin Goodfellow.
Located on the peak of Mt. Wirral. You'll need to climb the steep cliffs of the mountain and make your way through Mt. Wirral Caves to reach the top. Platform B is simple to reach once you enter the station, and inside you'll fight Archangel Babelith.
The only Archangel location not tied to a station. the Landkeeper HQ is found in The Marshes. To learn its whereabouts you'll need to complete Acting On Your Best Behaviour, Eugene's personal quest, which sends you on a hunt for Landkeeper Offices throughout New Wirral. Once you enter the Landkeeper HQ you'll battle their leader, Archangel Mammon.

Night's Bridge StationOnce you've collected enough clues you'll discover that the entrance to the final train station is hidden atop Falldown Mall. Stand on the mall's roof for a little over a minute and the door will appear. Complete the two-part dungeon inside and you'll battle the final boss of Cassette Beasts. (We'll keep their identity a secret. Check the guide for this area if you want to know in advance.)
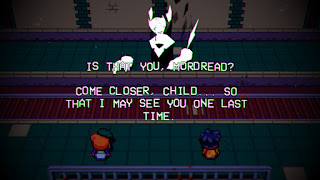
Once you've defeated every other Archangel in the game - which may or may not include the Archangel in Felix's personal quest, Don't You Want Me - you'll hear of a rumour, Eerie Singing, that points you back to Harbourtown Station, the first station you visited in the game. Check it out and you'll discover that a certain someone wants a rematch.
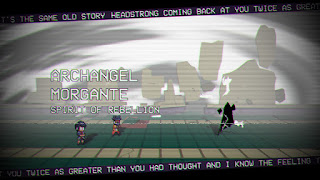
Archangel Morgante
Recommended Level: 70+
Traitor! Kinda, anyway. This rematch was always in the cards, and Morgante is much more powerful this time around. Don't expect the same tutorial-style battle that you got last time. Morgante uses the following attacks:
- Smack, a normal melee attack
- Unstoppable Conviction, a melee attack against a single target
- Lightning Wit, a Lightning attack against your whole party that buffs Morgante's attacks
- Bottomless Courage, an Earth attack against your whole party that buffs Morgante's defenses
- Cunning Determination, a Water attack against your whole party that buffs Morgante's Evasion
- Boundless Energy, an Ice attack against your whole party that buffs Morgante's AP buildup
- Creative Endeavour, a Plant attack against your whole party
- Neutralize, which rids Morgante of status ailments
- Heartfelt Melody, which revives Morgante at 25% of her health once you defeat her (Passive)
- Coda Morgana, a OHKO against your whole party (full AP only)
This fight is painful but straightforward. Morgante will smack your party around with some very powerful attacks, elemental and otherwise, and unless you have some very strong monsters you'll need to heal almost every round. Once Morgante reaches full AP she will use Coda Morgana, which will instantly wipe out any character - monster and avatar - unless you take steps to protect them.
Fusion is more or less not an option in this battle, so Fuse your monsters immediately. Next, take steps to apply AP Drain to Morgante, so her AP won't build up as quickly, as well as status ailments like Poison and Burn. That done, hit Morgante with your strongest attacks and keep a close eye on her AP. Once it hits the peak, throw up a Wall - any kind will do - to avoid taking damage from Coda Morgana. Repeat the process, healing your Fusion as necessary. Morgante will enjoy heavy buffs this entire battle, but you need to focus on dealing damage most of the time, so you'll just have to ignore them.
Perhaps the trickiest part of this fight is resisting the urge to hit Morgante too often. You're going to need 20% of your health to throw up a Wall each turn, and if you lack the necessary HP the move will fail and you'll get wiped out. At most you'll get two hits in per turn, and you'll need to either heal or use Wall on the other turns. Bring along lots of Rewinds so you can keep your Fusion healthy, and make sure you account for Morgante's revival, as she essentially has 125% health to chew up.
(Having trouble with this fight? Use an attack move that inflicts lots of damage as well as a status ailment. In my case I used Toxic Jab the entire time. The Poison ailment did more damage than my attacks.)
Defeating Morgante will earn you Fused Material, an Olive-Up!, and a bunch of materials, as well as a Stamina boost. Morgante will leave behind some cryptic words regarding the other Archangels, and if you check the train station platforms where you fought them you'll discover that they're back. The battles are more or less the same as the first time around, though you'll find the Archangels inflated to level 100. You'll earn lots of experience, Fused Material, and Olive-Ups! for defeating them again.
Main Walkthrough

