

Recommended Level: 25+
Unlocked: Complete This Is The World We Live In, defeat a Cultist
In order to trigger this quest you need to travel to either New Wirral Park or Autumn Hill with Kayleigh as your partner. In both places - especially on Autumn Hill - you'll find Cultists who will attack you if you come within their line of sight. Kayleigh will reveal a kinship with the Cultist when you defeat them, and the next time you camp at a bonfire she'll reveal that she used to belong to their community.
With the quest triggered you need to pay a visit to Mourningtown, a settlement / fortress at the highest point of Autumn Hill. Getting there requires quite a bit of travel:
- Proceed to Autumn Hill from either of its New Wirral Park entrances. The quickest path is to head east from the southern-most bonfire in New Wirral Park.
- Look north of the entrance of Autumn Hill for a huge, wooden, palisade wall that's blocking your path. Check the right side of the wall for a lever that will drain the water in the pond in front of the wall, revealing a doorway. Hit the button to the south of the doorway to open it up.
- Enter the doorway. There's a button puzzle on your left. Place rocks on the bottom two buttons, then stand on the upper-right button. This will lower the palisade wall.
- Make your way north, east, and south through Autumn Hill, fighting or avoiding all the Cultists along the way. (There's a lot of stuff in Autumn Hill, as well, if you care to browse.) In the southeast you'll find stairs leading up to the central plateau, where a bonfire - and Mourningtown - awaits.

Assuming you have Kayleigh as your partner you'll be granted access to Mourningtown. Activate Mournington Crescent Station - it's a quick walk east of the entrance to Mourningtown, for the purposes of fast travel - then head inside the fort. Be ready to fight, as this is not a happy place.

Mourningtown
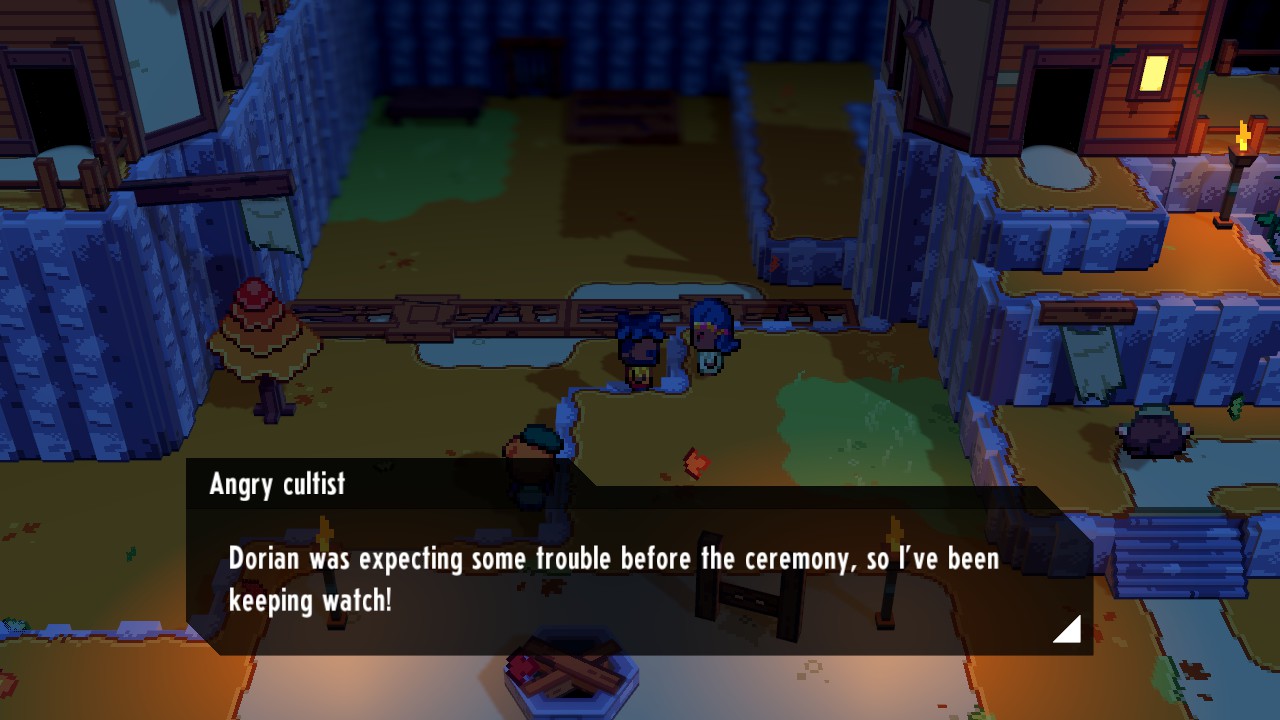
Mourningtown is full of Cultists, no surprise, and most of them are peeved that Kayleigh is back. You'll have to fight a fair number of them to get through here. Start by heading northeast, where you'll find a Keen-eyed Cultist near a hut.
Cultist
- Allseer - Metal-type - Level 26
- Allseer - Metal-type - Level 26
The hut to the right has some info on Allseer but is otherwise empty, so climb the stairs beside this first Cultist and check the hut at the top. Another Cultist will ambush you.
Cultist
- Salamagus - Fire-type - Level 26
- Pyromeleon - Fire-type - Level 26
If you exit the second hut through the doorway to the left you'll drop outside, and can skip the third Cultist, who is guarding the central path that leads north. We like to fight everybody, however, sooo...
Cultist
- Nevermort - Poison-type - Level 26
- Nevermort - Poison-type - Level 26
North of the entrance you'll find a barred door. Take a left and the camera will veer, revealing a lever to open the door that is being guarded by another Cultist. Pulling the lever will raise a bridge above the central path.
Cultist
- Thwackalope - Air-type - Level 26
- Mardiusa - Poison-type - Level 26
Re-enter the hut with the drop and you'll now find the bridge holding you up. Cross to the west, through the next hut, and out the other side. You'll find a Friendly Cultist to the north of you.
Cultist
- Masquerattle - Poison-type - Level 26
- Jormungold - Poison-type - Level 26

To the east of the Friendly Cultist you'll find a barred door and a locked gate, as well as a less-cordial Cultist guarding another hut. If you enter the hut from the left side rather than the front door you can skip the Cultist waiting inside, who will otherwise ambush you. The hut holds a chest containing a Mourningtown Key, a Defend Sticker, a Basic Tape, Pulp, and Wheat.
Cultist
- Sirenade - Air-type - Level 26
- Kittelly - Lightning-type - Level 26
Cultist
- Stardigrade - Astral-type - Level 26
You can use the Mourningtown Key to open the locked gate you passed earlier. There's a Cultist patrolling just beyond the gate.
Cultist
- Pombomb - Fire-type - Level 26

There's a bunch of water and a raised bridge on this side of the gate, and you need to lower the bridge to cross the water. Head east and you'll find a Cultist by the roof of one of the huts. Use the board behind the Cultist to cross over to the roof, which serves as a way to hop to another pathway to the south, and then onto a second roof, where you'll find a lever. The lever will activate a lift and open the locked door by the gate.
Cultist
- Terracooka - Earth-type - Level 26
- Coaldron - Earth-type - Level 26
Hit the button inside the locked door to lower the bridge(s) over the water in the north. Head back to the bonfire outside Mournington, if you need to heal, then cross the bridge. You'll finally meet Dorian, head of the Cultists, and he'll prove... uh... interesting. Dorian will reveal the entrance to the underground sections of Mournington Crescent Station. Follow him in. (Though you may also want to check the hut in the northeast of this clearing. Is that a bunch of cash beneath that bed...?)
Dorian will insist you approach the tracks inside the station first. Three guesses what will happen when you do.
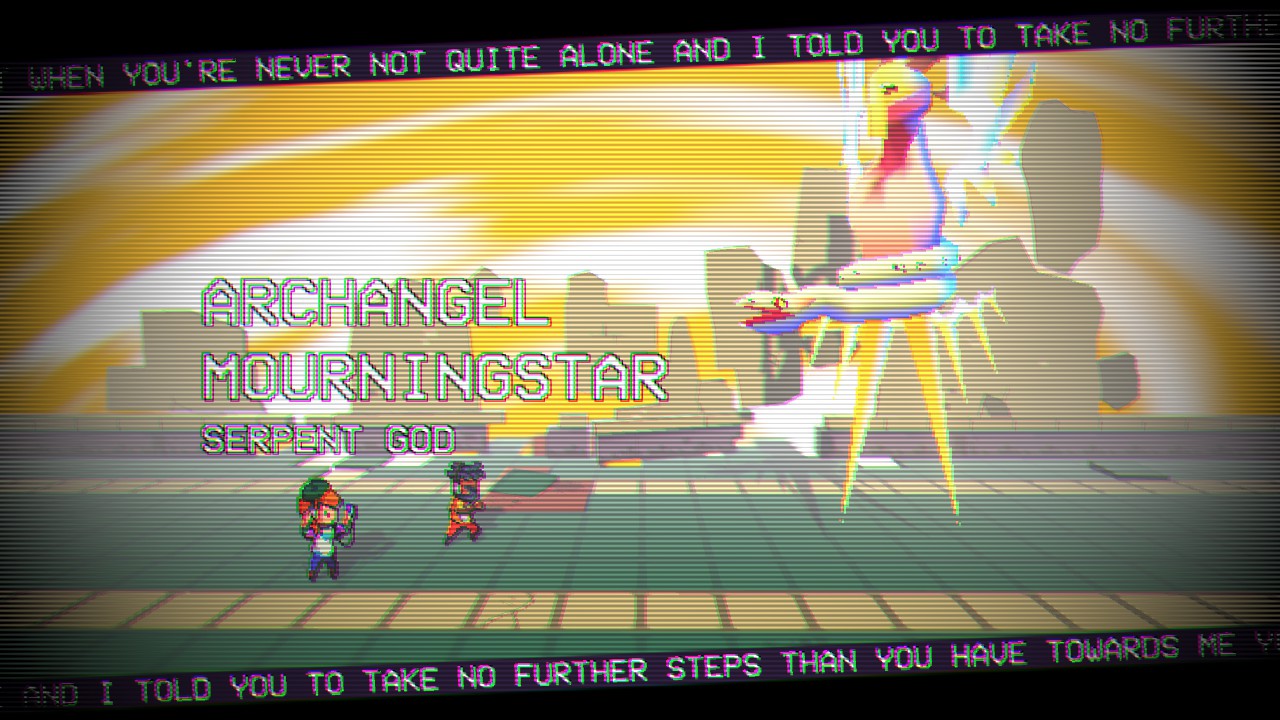
Archangel Mourningstar
Recommended Level: 30+
Ah, well... so much for Dorian. Mourningstar doesn't mess around, like all of the Archangels, though it doesn't have quite as much of an exploitable schtick as the rest. It's just tough. Mourningstar uses the following attacks:
- Retaliatory Strike, a counter against melee hits
- Temptation, which creates an Apple Tree in front of Mourningstar to absorb hits and tempt the attacker into eating an apple, inflicting some damage
- Thunder Blast, a Lightning attack against one target
- Shooting Star, an Astral attack against one target
- Broadcast, which grants Multitarget to Mourningstar
- Focus, which boosts Mourningstar's Accuracy
- Neutralize, which rids Mourningstar of status ailments
- Judgement, a heavy Lightning attack against both party members (full AP only)
Aside from a slew of painful attacks, Mourningstar's primary gimmick is Temptation, which creates an Apple Tree Wall in front of it to absorb damage. How the Apple Tree reacts to hits depends on the type of attack you use on it, ranging from simple healing to inflicting damage. It is nevertheless wise to get rid of the thing as quickly as possible, in which case Fire and Poison attacks will wither an Apple Tree quickly.
Barring that, Mourningstar is best handled with heavy ranged attacks. Given that Mourningstar likes Lightning attacks you'll find Plastic and Earth monsters to fare the best here, especially if they have high defenses. Judgement is particularly painful, so either throw out your more defensive forms to ward off the incoming damage or use Fusion to deaden the effects. Fusion will also negate the potential threat of Broadcast, which expands Mourningstar's attacks to both of your monsters.

You'll receive Fused Material, an Olive Up!, and a bunch of crafting materials for defeating Archangel Mourningstar. You'll also receive a boost to your Stamina, and Morgante's song will be filled in a little further. After some chatting your relationship with Kayleigh will deepen to the second level, and you can move on to another task.
Before you leave Mournington, however, have a look inside the encampment. With Dorian gone the Cultists will turn into a proper little community. Everyone will now be friendly, and if you speak to the nearest Cultist he'll sell you some stuff. It's a start.