Main Walkthrough

A side area that you can access shortly after entering the Rohlan Fields, the Ograne Grottos is a deep, complex section of Chained Echoes that you won't fully explore until you're almost done with the game. There's a lot to see and do in the depths, and you'll find yourself coming back to this place a number of times to complete different tasks.

There are multiple entrances to the Ograne Grottos, located throughout Valandis. We'll explore them one-by-one.

Ograne Grottos South - Rohlan Fields Entrance (1)

Loot and Materials

  • Ancient Coin
  • Bellflower
  • Bethy
  • Forgotten Lamp
  • Lava Gem
  • Moss
  • Potato-Shaped Turtle
  • Small Bat
  • Turtle-Shaped Potato
  • Used Bandage

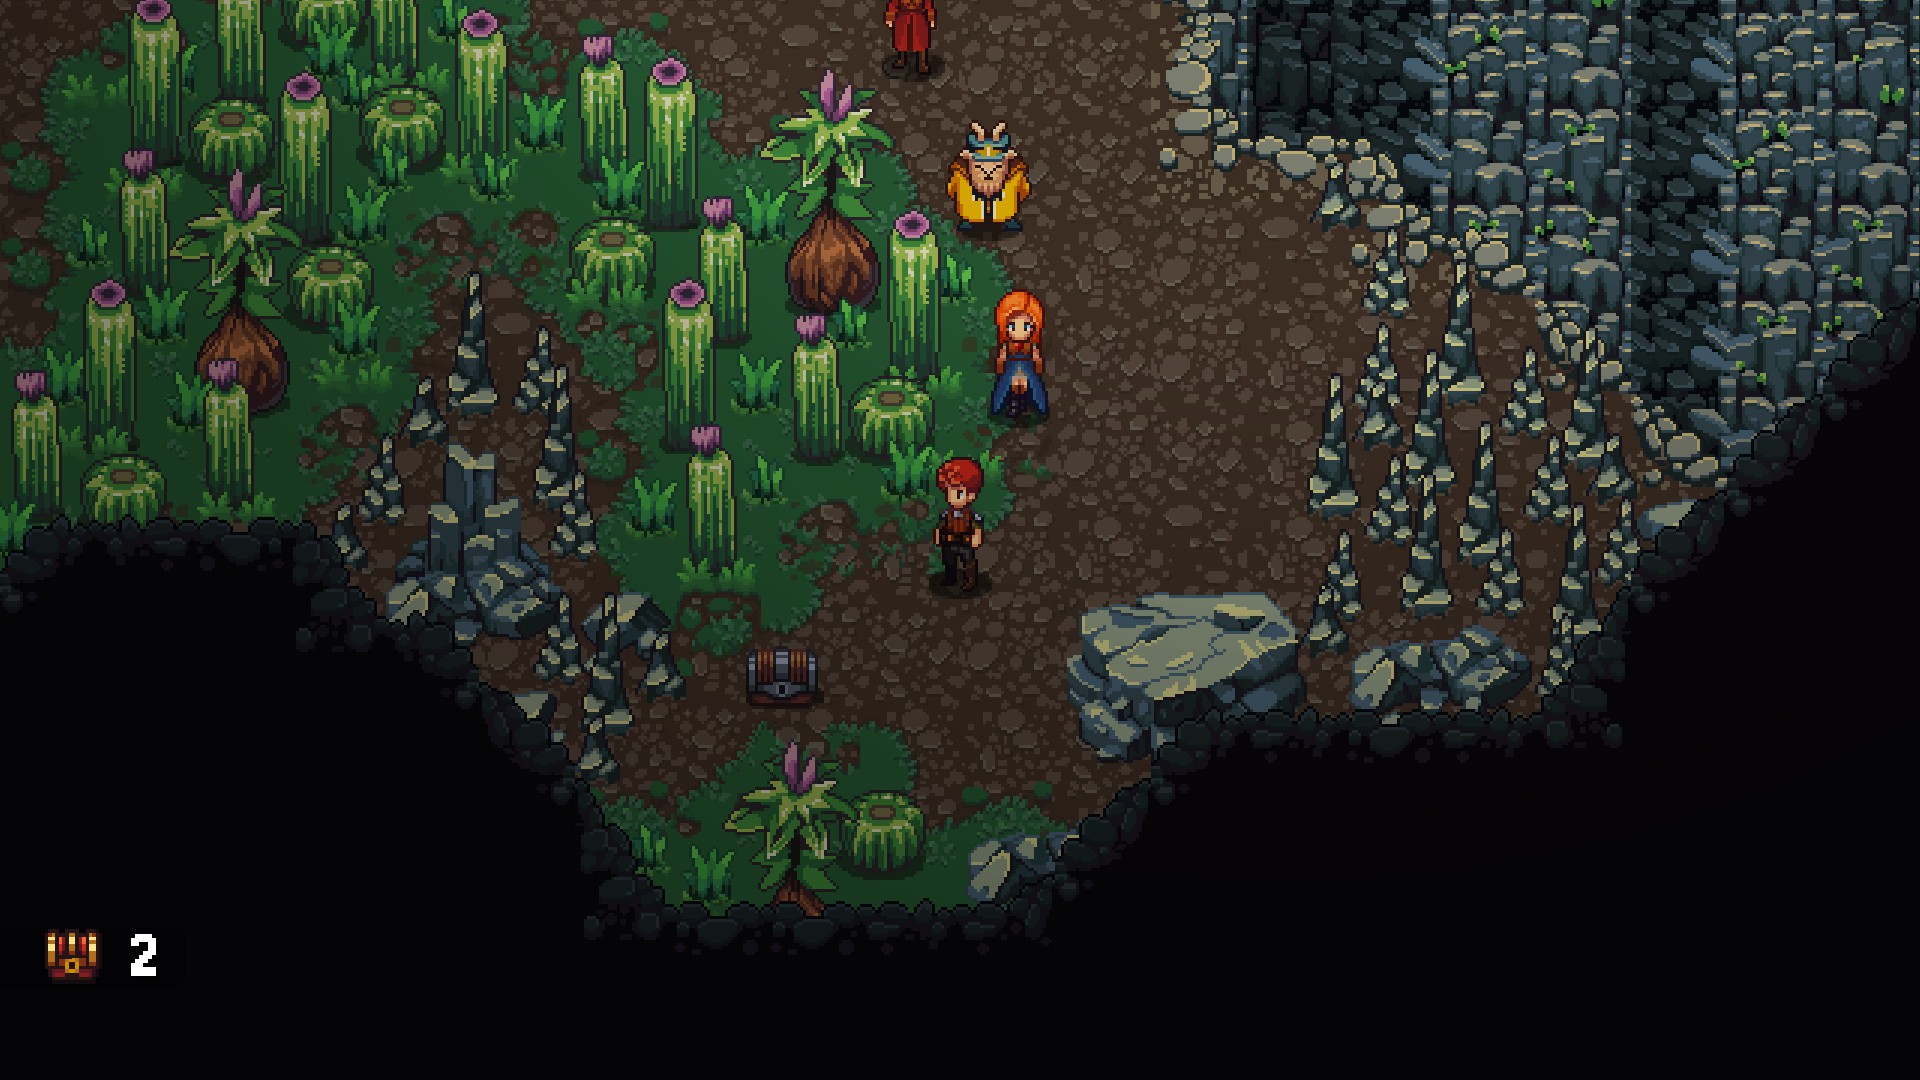
The first entrance to the Ograne Grottos that you'll likely find is on the side of a deep scar in the earth, north of the entrance to Farnsport in the Rohlan Fields. You can enter the area quite early in the game, though there's not a ton to see if you come in this way:

  • Partway through the grottos you'll find a small shrine with a lever inside it. The lever is connected to something elsewhere in the grottos, not accessible on this side of things.
  • If you head all the way west through this section of the grottos you'll hit a dead end on the southwestern screen. Along the path to this dead end is a pile of rubble that you can bash open. Behind it is a chest containing a Chemistry Crystal.

Yep, that's all.


Ograne Grottos Southwest - Rohlan Fields Entrance (2)

Monsters

  • Goblin Knight - Strong to Water, weak to Earth - Drops Rainbow Ore
  • Goblin Wizard - Strong to Water, weak to Earth

The second entrance to the Ograne Grottos (though perhaps not the second you'll enter) is located in the north of the big lake in the middle of the Rohlan Fields. The entrance is located behind a cluster of waterfalls, and you'll need Sky Armor to fly down and land on the small tip of land jutting out of one of the waterfalls.

Proceed into the cave until you see two jumps over water ahead. Take the jump on the right, then the next to the north, until you're beside a cluster of cacti. Check the smallest cacti to find a buried cache of 3,100a, then keep going north. Jump your way west until you get ambushed by two Goblin Knights. They're pretty basic enemies, and nothing to worry about.

Southwest of where you battled the Goblin Knights is a drop leading south. It'll take you to a chest containing Platinum Ore. Hop back north, then veer west. The next northbound path will take you to a chamber with an Amber Crystal if you go far enough north. 

If you turn east before reaching the north end of the passage you'll find another northbound route, though if you walk up against the wall you'll find a hidden tunnel leading to two Goblin Knights and a Goblin Wizard. Follow the passage they were guarding and you'll find a red chest at its end, within which you'll find a Falchion for Glenn.

If you continue along the main path to the east you'll run into a Goblin Knight and a Goblin Wizard, and beyond them you'll find an entrance to the southern section of the Ograne Grottos, albeit a passage far removed from the area connected to the fields outside Farnsport. There's a red chest containing a Gemstone Jerkin to the south, and you'll find an Amber Crystal by heading east and looping around the water. Also to the east, just before you leave the area, is a heap of rubble hiding some Dragon Mail.


To the north you'll find the central section of the Ograne Grottos, and a Fast Travel Crystal will grant you quick return access to this place. To the right of the crystal you'll find a chest containing 2,500a. North of here you'll find the area blocked by a huge beast called a Tadeye, and unless you're coming here very late in the game you can't fight fair against this beast. You'll need to begin the quest The Gates to Nhysa to stand a chance against the Tadeye.

Once the Tadeye is gone the path will branch in multiple directions:
  • To the northwest you'll find a path leading, ultimately, to a dead end. Along the way you can plunder no less than five Amber Crystals, making this a good place to farm Crystals, thanks to the close proximity of the Fast Travel Crystal. There's also an Adventurer's Guild guy here who will teach you the habits of the Ograne Grottos' Unique Monsters.
  • To the northeast you'll find a path to a small village of goblins. You'll come here as part of the side quest A Goblin Dilemma. Until you've triggered the side quest you can't enter the village. There are two Amber Crystals along the way.
  • To the north you'll find the entrance to a set of ruins, leading, ultimately, to Nhysa, the subject of the side quest that got you past the Tadeye. You can't do anything about them until you complete the side quest. As you head north towards the ruins you'll see a cluster of cacti on your right. Check the rocks down and to the right of the cactus patch to find a buried Crit Damage Up Crystal.
  • Once you gain access to the ruins you'll find an elevator to Nhysa, an area that deserves its own guide. East of the elevator you'll hit a dead end with a locked door that needs to be opened from the other side. West of the elevator you'll find a path to the northwestern area, where you'll find a metal box containing Strike First RAM.

There are three more items you can get in this area, though they're all kept out of your way by water. If you take the southwestern path from the center of the area you'll find a spot where you can hop into the water, though it doesn't seem to lead anywhere. You can get around this problem by approaching the small, bubbling patches that appear throughout the area. Interacting with these patches will ferry you to nearby bodies of water, allowing you to pick up items.

  • The first bubble patch you see as you swim east will take you to a pond with another bubble patch. This, in turn, will shoot you over to a small embankment with a red chest. Inside the chest is an Earth Belt.
  • East of the first bubble patch is a second. This will place you near the center of the map. Head south from here to find bubbles that will bring you close to an island. On the island is a chest containing an Elastic Wing.
  • If you head north from the previous bubble patch near the middle of the area you'll find another one. Head south of where you come out and you'll find a series of bubble patches that will, eventually, ferry you over to an island near the Fast Travel Crystal. The red chest on this island contains a Phantom Cloak.


In addition to everything listed above, you can also reach the southwestern area of the Ograne Grottos from this central location. Normally when you go there will be more Tadeyes blocking your progress through the area, and all you can get at is an Amber Crystal. If you leave and reenter a few times the Tadeyes will disappear. This is because a Unique Monster will appear in the area, driving the Tadeyes away. You still need to keep an eye out for it, but now you can explore the rest of the area:
  • In the south is a chest containing 3,584a, near a big cluster of cacti.
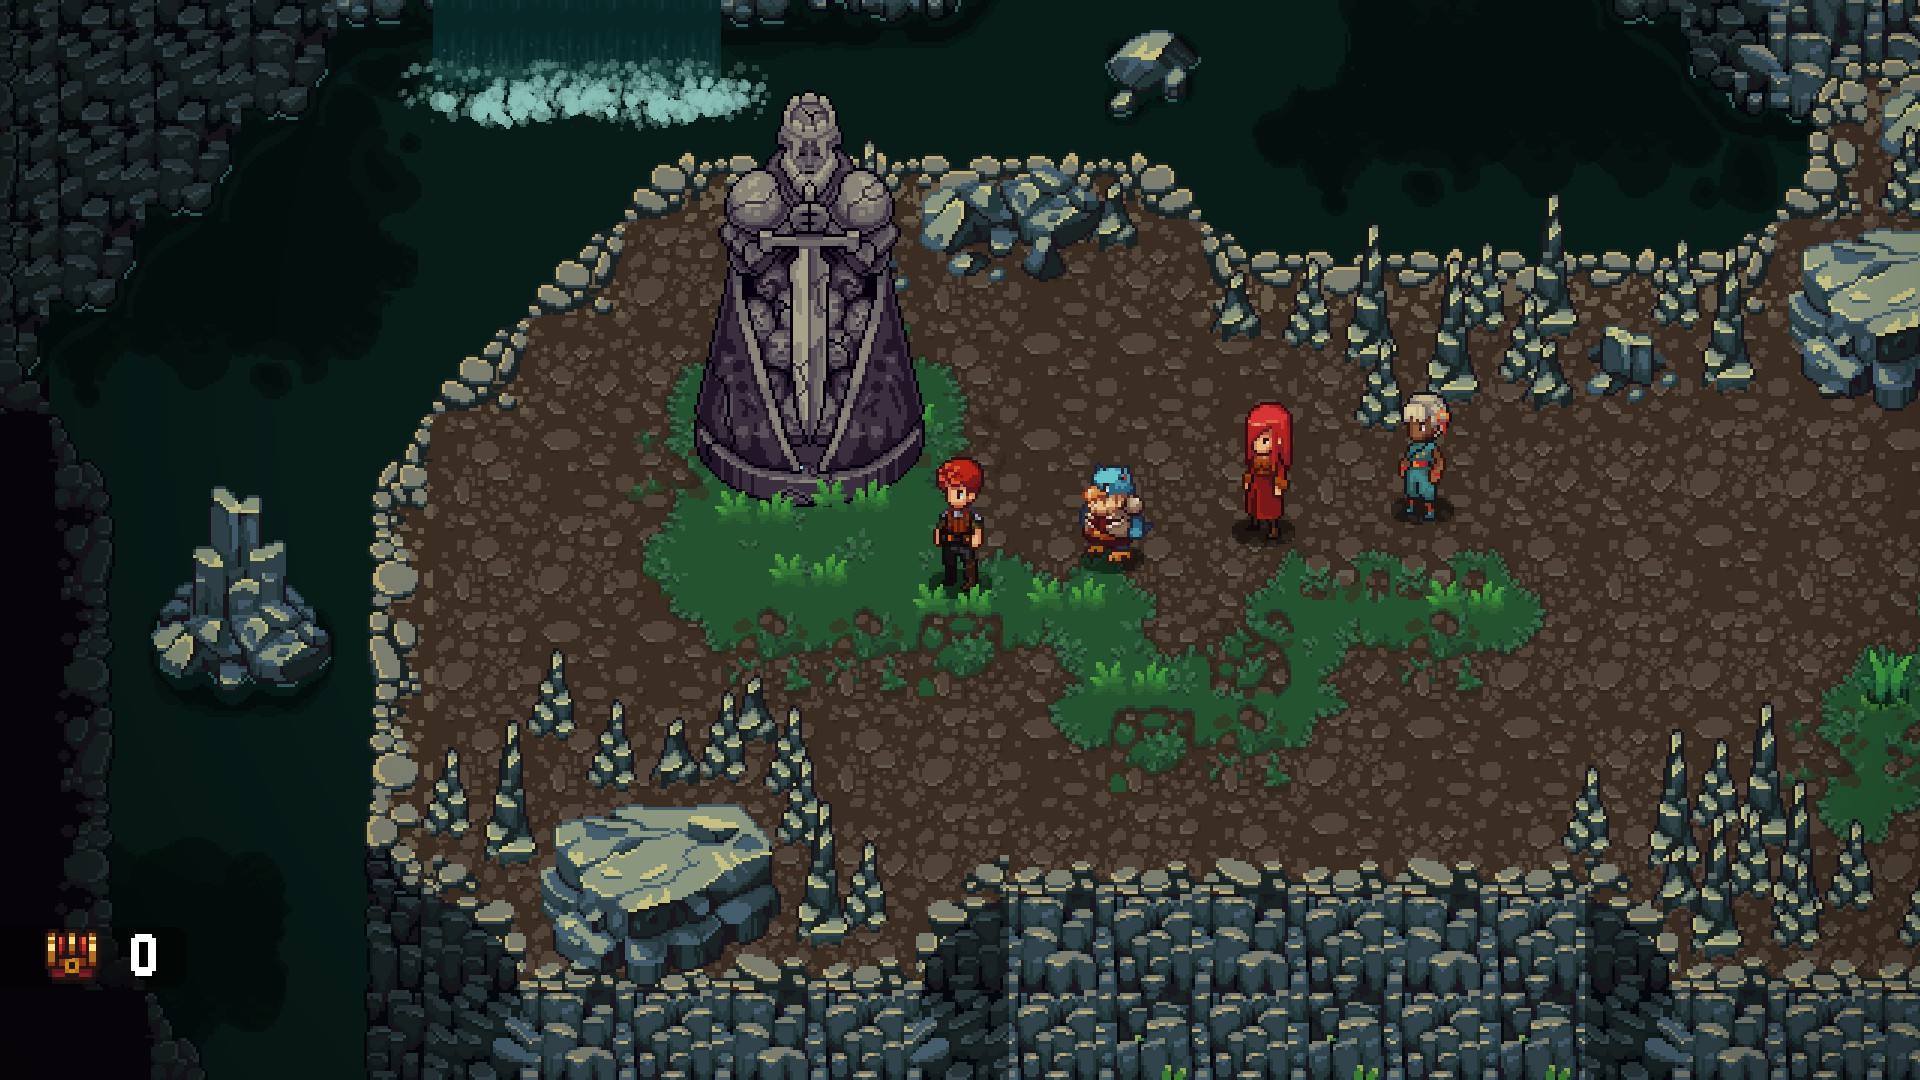
  • Also in the south is an Amber Crystal. If you continue west of here you'll run into the Senior Tadeye, the beast that drove the lesser Tadeye away. It's even stronger than the other Tadeye, and you'll get annihilated if you try to fight this thing early in the game. It's guarding a statue of the Heroes of Leonar. 
  • If you head north of the path leading to the Senior Tadeye you'll find a chest containing a Sacred Water.
  • Head north and west and you'll find a path to this area's Fast Travel Crystal. North of the crystal you'll find six altars that apparently have slots for placing items. This spot will ultimately pit you against Chained Echoes' superboss, though you need to find Tablets that will fit into these slots. (Three of which you'll find in and around the Ograne Grottos. Handy!)
Once you've gained access to the Goblin Village during A Goblin's Dilemma you'll be able to purchase Incocybin Berries from the village's merchant. You can use these to drastically weaken both the Tadeyes and the Senior Tadeye. 


Whether you defeat the normal Tadeyes or the Senior Tadeye, you can now gain access to the statue of the Heroes of Leonar. You'll need to beat four Tadeyes if you offer up Sacred Water to this statue, though if you defeat them (with a hearty dose of Incocybin Berries) you'll receive the Mage Warrior Emblem, sigil of Franforth the Mage Warrior.


Ograne Grottos East - Raminas Tower Entrance

Monsters
  • Hana Doll - Drops Butterfly Ribbon
  • Vampire - Strong to Dark, weak to Light
You won't gain access to the remaining sections of Ograne Grottos until you've reached the end of Chained Echoes. Just before you fight the final boss in Magic Academy Nhysa you'll find a small, side room of the Academy with an Elevator Key. You can use the Elevator Key to access the lower levels of Raminas Tower, which in turn will lead you to the northeast of Ograne Grottos.


On the left side of this entrance area you may run into a Unique Monster called Bog the Real Gob. Bog despises other goblins, so the only way to make him show up is to complete the quest A Goblin's Dilemma. This will clear out the Goblin Village elsewhere in the Ograne Grottos.

Head west of the Raminas Tower entrance and into the northern section of Ograne Grottos, mining the Crystal Source along the way. This path will take you to a room with a locked door that you couldn't bypass earlier. This will make a shortcut to the elevator down to Nhysa, as well as the central area of Ograne Grottos.

South of the locked door you'll find a small storage room. Living here is a special, rodent merchant who, among other things, will sell you four very important items:
  • Golden Voucher. Buy this and a merchant on The Hooge will agree to sell you some very powerful Sky Armor components when you speak to him.
  • A Diving Bell. Buy this and you can enter a whirlpool on the Arkant Archipelago to find the Phioran Village. (Though you can also fully upgrade Hermit's Isle to get in, as well, and skip the Diving Bell altogether.)
  • A Rusty Greatsword. This can be converted into Raphael's ultimate weapon when combined with a Soul of Farnese.
  • Dayajir's Soul. If you collected the Dayajir Sky Armor from the Empyrean Ruins you can purchase this item to greatly upgrade its stats, making the Dayajir one of the best pieces of Sky Armor in the game. You'll need to travel to The Hooge to upgrade the Sky Armor once you have both pieces.
Even if you don't buy these items now, coming back for them later isn't a terrible idea.


If you head east of the Raminas Tower entrance you'll find a boat. Approach it and you'll see that there's a slot for a coin. In order to use the boat you need to find Charon's Coin, which is located in an abandoned mansion in the middle of Rohlan Field's lake. 

Using the coin will shepherd you south one screen, where you'll find a Fast Travel Crystal. The path splits to the north and south. Both send you towards important destinations. We'll start by heading south, as going north will take you out of the Ograne Grottos, in more ways than one.

South of the Fast Travel Crystal you'll run into five Vampires. They're annoying little creatures that can heal themselves, but don't do a ton of damage with their attacks. To the south of the Vampires you'll find a Crystal Source and a heap of rubble that's hiding three Blood Stones, as well as an exit to the final section of the Ograne Grottos.


Southeastern Ograne Caves

When you enter this area you'll see a ledge on your right and a path to your left. There are a number of little shortcuts, similar to the ledge, that will get you through this place more quickly, though this guide will just make note of them and skip them so we don't miss anything.

Take the left and you'll run into a Hana Doll. These creatures have 'accumulated' damage, and every time you hit one that amount goes down. When it's the Hana Doll's turn the remaining accumulated damage will be inflicted on your party, and the doll will then disappear. Just deal out as much pain as you can before the doll gets a turn and you should be fine.

Follow the path west and south, past a ladder shortcut, and you'll eventually run into seven Vampires. Take them out, then head east. Before you hit another larger clearing you'll find a chest containing an Emperor's Hide. North of the clearing and on your left you'll find a bridge, across which is a chest containing eight Rainbow Ores.


Return to the outer path and continue north. Directly north is some rubble you can clear away to find 13,000a. As the main path veers west you'll see some handholds built into the nearby wall, and if you climb them you'll be at the foot of the ledge near the entrance. Check to your right for a chest containing five Ancient Carcasses, then go back down the handholds and continue west. Eventually you'll be forced down a ladder, near the one you skipped earlier.

To the north you'll run into two Hana Dolls and five Vampires. You have to focus on the Hana Dolls first, so try and enter this battle with an Ultra Move ready and buff everyone's Agility to maximize your number of turns. The Vampires can wait. These enemies are surrounded by four Crystal Sources, and there's a chest containing four Divine Wool off to the right.

And then, to the south, through a portal...


Randomage

Strength: Dark
Weakness: Light
Steal: Nothing

This fight is just mean-spirited. The Randomage lives up to his name, battering you with a maddening assortment of random spells, attacks, and status effects. The sheer random nature of the Randomage will almost ensure that you'll have to fight him a few times, just to bypass any bad luck. You can expect the following actions from the Randomage:
  • Dual Cast (basically Act Twice)
  • Randomizer, which inflicts a random buff / debuff / status ailment on every character, including Randomage
  • Earth, an AOE Earth spell
  • Water, an AOE Water spell
  • Fire, an AOE Fire spell
  • Wind, an AOE Wind spell
  • Enchanted Combo, a multi-hitting melee attack on one character
  • Open Rift, which summons in several dolls, including Hana Dolls
  • Twisting Wind, which changes the composition of the Overdrive Bar
  • ???, which makes the Overdrive Bar invisible
For the majority of the fight the Randomage will use a combination of his AOE elemental spells and Enchanted Combo to do damage, tossing in Randomizer occasionally to mess with you. He'll use Open Rift once you do enough damage, then after that he'll retreat... and you'll need to fight him again. Twisting Wind comes next, and then he'll obscure the Overdrive Bar completely, forcing you to rely on the Overheat sign to determine whether or not you're in the clear. (On the plus side, when the Randomage hides the Overdrive Bar it means that the fight is almost over.)

The key to winning this fight, aside from some good luck, is preventing the Randomage from taking turns. This is always useful against bosses, of course, but it's especially important here. Buff everyone's Agility, debuff Randomage's Agility, and use status ailments to trip up his spells. Then debuff Randomage's attack and defence stats and go to town demolishing his HP. Buff your own attack and defences last. Keeping your team within the green on the Overdrive is critical for winning this fight, given how much damage the Randomage's spells do when he casts twice-in-a-row, so don't be afraid to use a less-optimal attack if it means lowering your Overdrive.

You'll earn a Grimoire Shard for defeating the Randomage. Leave his weird little pocket dimension the way you came in and you can retrieve what he was guarding: The Earth Tablet. Nice find. Back to the Fast Travel Crystal!


Baalrut Tunnel

If you head north of the Fast Travel Crystal you'll find a Crystal Source, and past that a cliff ledge. If you drop off of the cliff, and then again further below, you'll fall waaaaaaay down into a darkened, sandy cavern. This is Baalrut Tunnel, a spooky, quiet place, and you'll need to stumble around in the shadows for a little while. On the plus side, there are rewards to find:
  • If you head south from the entrance tunnel you'll eventually find a chamber with a thin passage on its east side. This passage leads to five chests containing three Blood Stones, four Rainbow Ores, six Emperor's Hides, six Ancient Carcasses, and four Divine Wools.
  • Check in the south of the aforementioned southern chamber. You'll find an exit into the Narslene Sewers that requires enough explanation to warrant its own guide. This area contains two important items for accessing post-game content, so you'll have to go through here eventually.
  • On the path towards the southern chamber you'll find a tunnel off to your right. It leads to a series of handholds. Climb them and you'll emerge on the Rohlan Fields, beside a golden box containing a Soul of Farnese.
  • Head north from the entrance until you find a Crystal Source, then veer northwest. At the end of a tunnel you'll find a red chest containing a Scholar's Habit.
Head generally north and you'll enter a larger chamber. To the west you'll find a Crystal Source, and if you look directly north of the Crystal Source you'll find a red chest containing a Flamberge. To the east of here is a larger light source, and illuminated in it... huh.


Chel and Twi'Tone

Strength: Light (Chel) / Dark (Twi'Tone)
Weakness: Dark (Chel) / Light (Twi'Tone)
Steal: Nothing

How unexpected. Chel and Twi'Tone are an odd couple that specialize in status ailments, and though they're not exactly brutal opponents they can still take you down if you aren't careful. Expect the following attacks:
  • Act Twice (both enemies)
  • Dart Shot, which inflicts a random status ailment on one character (Chel)
  • Pandemic Shadow, which inflicts random status ailments on the whole party (Twi'Tone)
  • Shadow Masks, an AOE Dark damage spell (Twi'Tone)
  • Twi'Tone will absorb 5,000 HP from Chel whenever it runs out of health
It ultimately doesn't matter that much which enemy you attack, as they basically share a health bar, though given its stronger attacks Twi'Tone is the foe to focus on. Debuff Twi'Tone's stats, particularly its Agility, then beat it down. Once Twi'Tone runs out of health it will absorb some from Chel, and you'll need to start over. Once Twi'Tone can no longer absorb health from Chel, hit them once to end the fight. For the most part you can ignore the status ailments the pair inflicts, though if you're finding the battle difficult you can equip Passive Skills and Crystals that at least protect against Sleep and Paralysis.


You'll earn a Grimoire Shard for defeating Chel and Twi'Tone. Behind them you'll find an exit from the Baalrut Tunnel, and will emerge near a small oasis. There are three Crystal Sources surrounding the oasis, and sitting by the water is a merchant with a selection of powerful Bracelets on sale. South of the merchant, set upon an altar, is the Fire Tablet. Grab it and you'll be done with both the Ograne Grottos and the Baalrut Tunnel.

... sorta. There's still the matter of the other Tablets...