Part 31: A Call From the Past - Sova Village, Flying Continent Shambala
Main Walkthrough
Need some quality headphones to connect to your PC? Try the JBL Tune 720BT, now available on Amazon! As an Amazon Associate I earn from qualifying purchases, at no additional cost to you.
Empyrean Ruins
Monsters
- Fallen Dragon - Strong to Earth, weak to Water - Drops Colossus Hide, Single Horn - Can steal Wyrm Carapace
- Golem - Strong to Wind, weak to Water - Drops Rayo Fiber, Rusty Gear - Can steal Rayon Fiber
- Gorilla - Weak to Water - Drops Fine Wool, Huge Tooth, Monster Fangs
- Blue Clock Spider - Strong to Wind, weak to Water - Drops Mechanical Eye, Mythril Ore
- Red Clock Spider - Strong to Wind, weak to Water - Drops Mechanical Eye, Mythril Ore
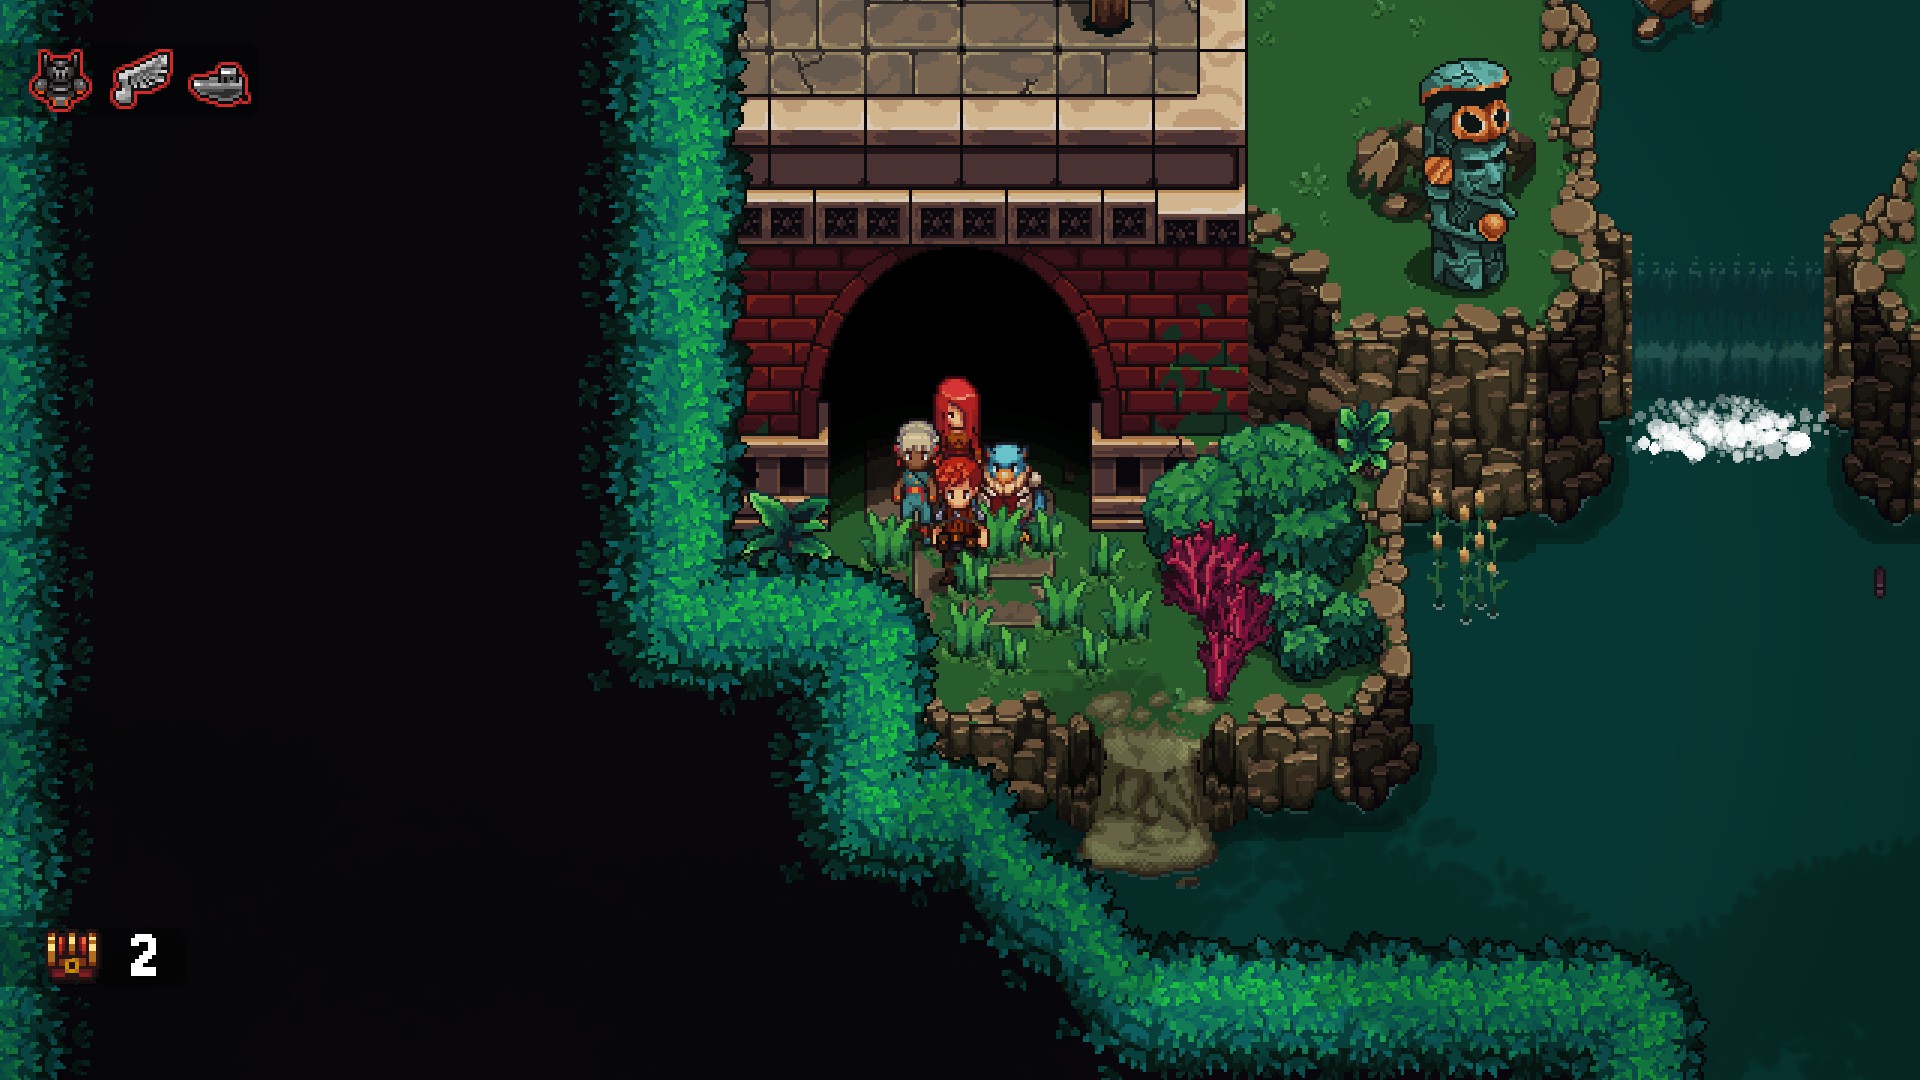
Several tragedies later, the team find themselves one enemy shorter and one party member heavier. It's finally time to enter the Empyrean Ruins of Shambala, where, hopefully, everyone will receive some answers to Lenne's odd visions. Head to the ether cannon emplacement in the north of Shambala to get underway.
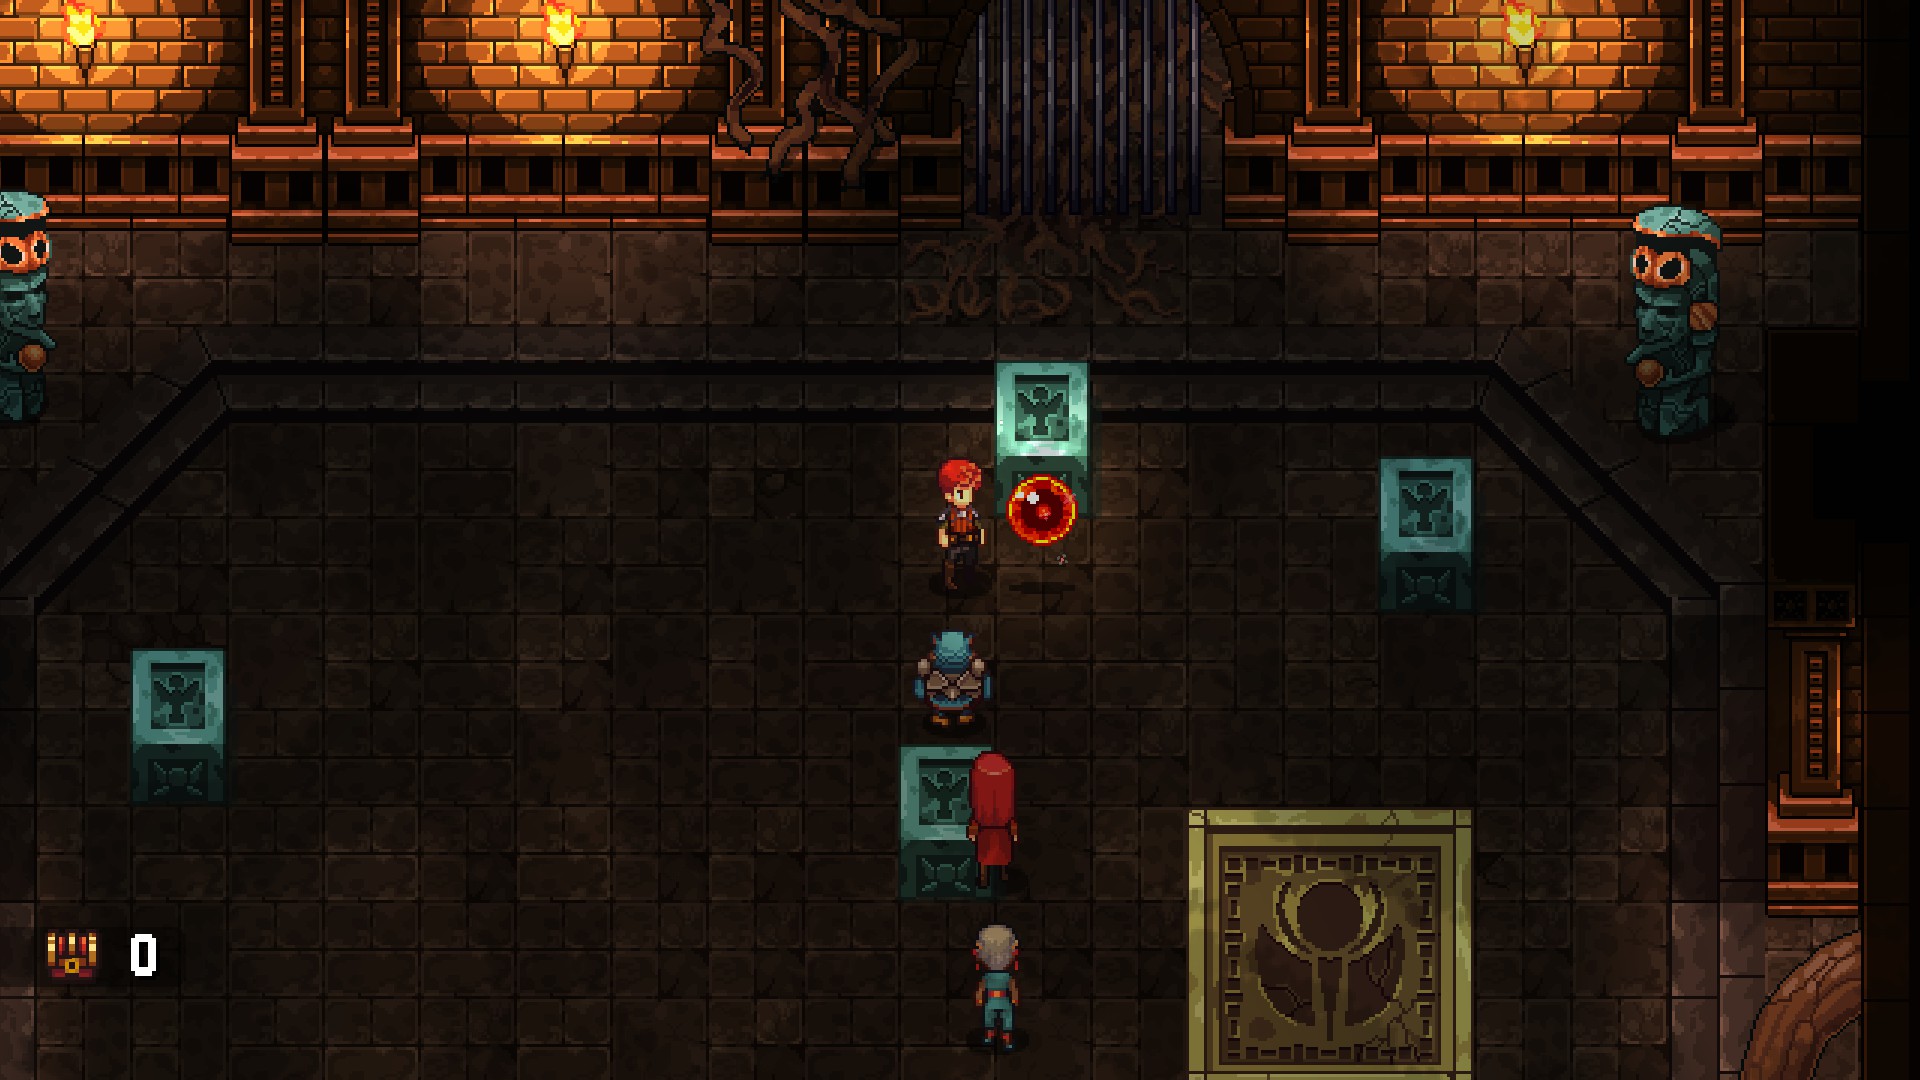
After a quick parlay with Gwayn, who is ever on your heels, you can proceed into the ruins. Head north and into the first building you find. There's a familiar-looking puzzle here that involves pushing orbs onto a yellow panel on the floor. Some instructions:
- Push the orb on the left east, north, and east. That will get into to its destination.
- Destroying the grey block with the first orb will allow you to push the orb on the right north. Then you just need to nudge it east and south.
Doing all this will open the door in the north. Head through and you'll be back outside. Further north you'll find two plates on the ground in front of a gate, and you need to use switches nearby to activate the plates, thereby opening the gate. The switches are to the east and west of the gate. You'll start running into enemies here, and since all of them use physical attacks Egyl makes a great stone wall for your party.
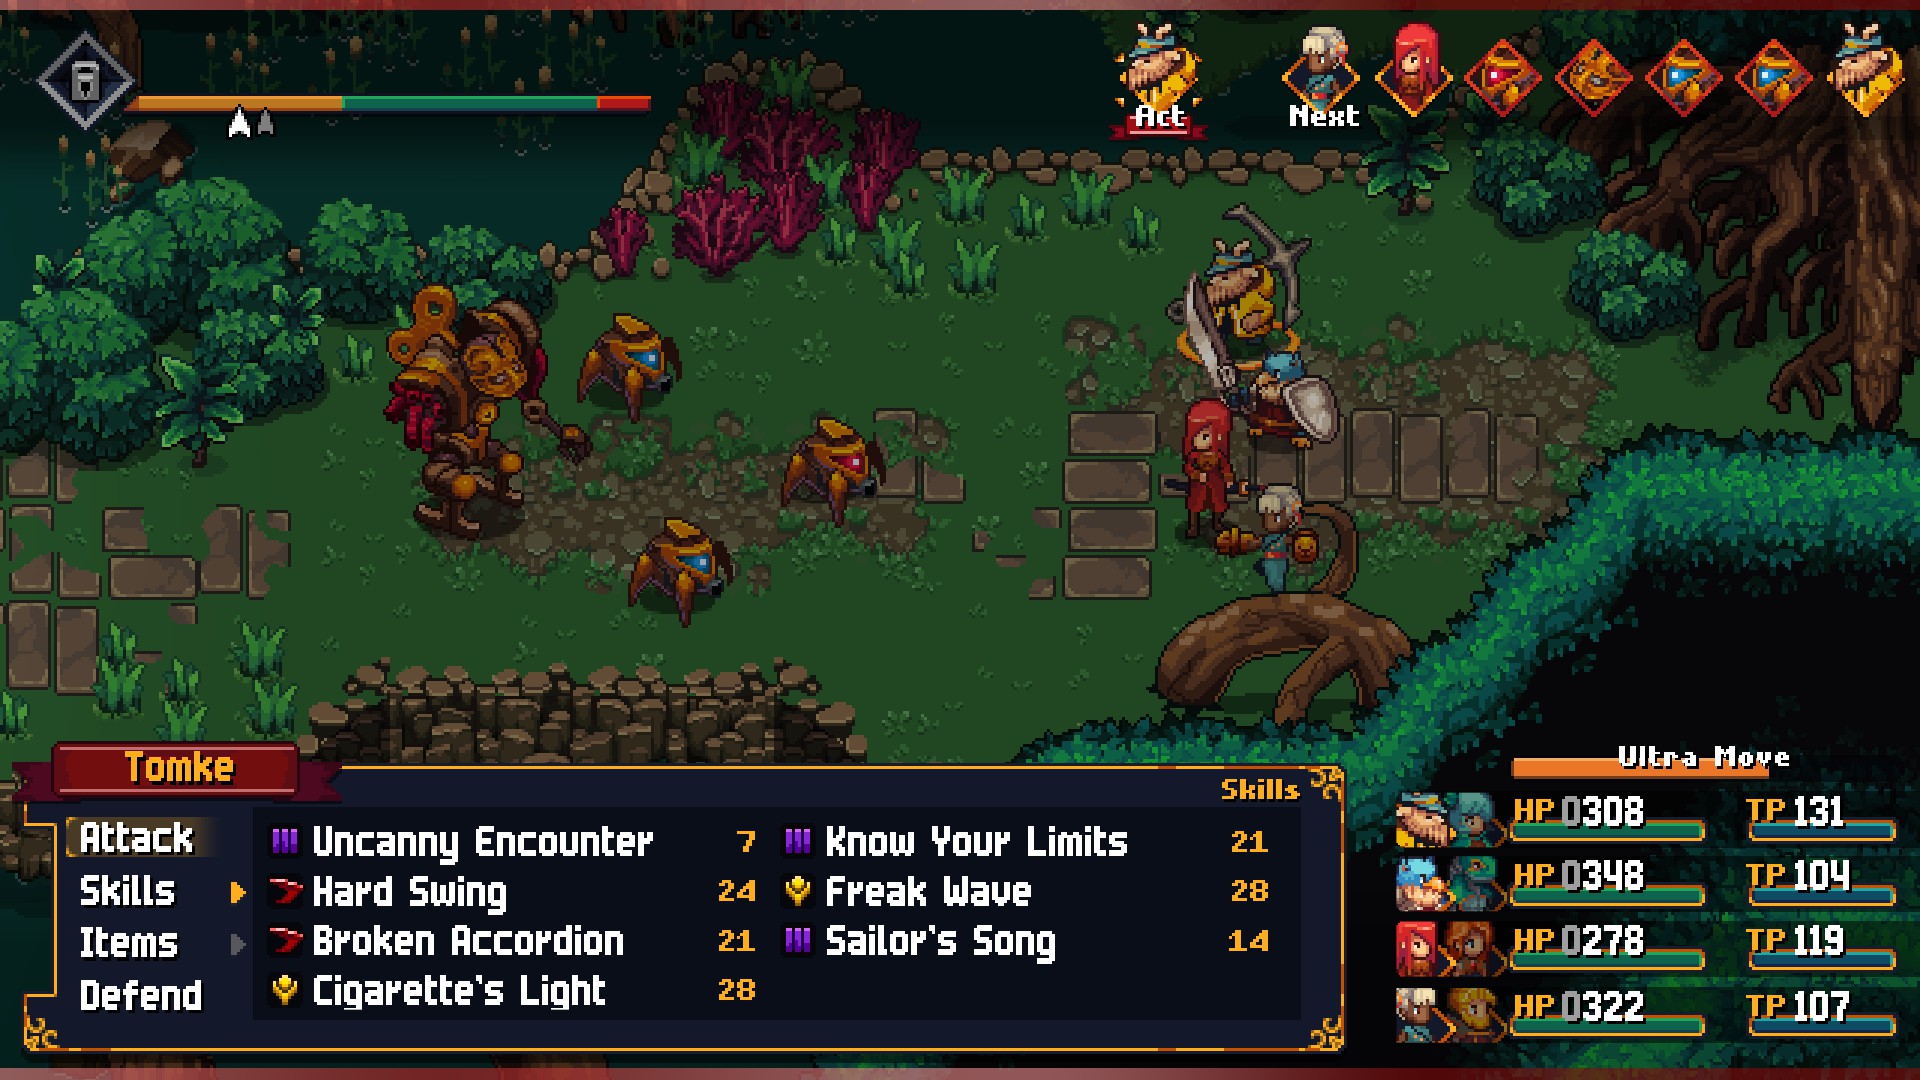
To the east you'll be forced into the water, and you'll hit a crossroads as you head further east. Go south and you'll find a red chest containing a Decorated Vest. To the east you'll run into four Clock Spiders, two Red and two Blue. The Red Clock Spiders are more vulnerable to physical attacks, while the Blue are more vulnerable to magical attacks. Make sure to have a good balance of party members or you might be chipping away at these things for a while.
Continue north for a ways. Once the path starts to push you west you'll run into a Red Clock Spider, two Blue Clock Spiders, and a Golem. The Golem's a melee fighter with lots of health that can hit one or more party members at once, but is otherwise nothing special. West of the fight you'll dip back into the water. Before going south, look north, then east. You can cross beneath a bridge over here to find an isolated stretch of land with a red chest. In the chest is Parade Armor.
To the south, down a waterfall, you'll find a building on your left. Inside is a floor panel that you need to touch. This will activate one of the panels in front of the gate leading deeper into the area. Once you've set off the panel, head back outside and go south, down more waterfalls, to return to the gate.
To the west of the gate you'll find an angry, red statue, as well as a line of spikes blocking your path. Pop open the chest on your left to find three Monster Fangs, then interact with the statue. This will lower the spikes in front of you, then raise more in front of the chest. Simple enough.
Head north of the statue and you'll run into two Golems, guarding an intersection. Head south of the Golems and you'll find a chest containing three Meals. To the west you'll find two statues, one red and one yellow, and some accompanying spikes. Trigger the yellow statue to lower the red spikes in front of the red statue, then trigger the red statue to open a path north.
Two more Golems await to the north of the statues, and the path splits again at their little clearing. To the west you'll find a building with a metal box inside. The box contains a Kerberos FK300. To the east is another statue puzzle. Trigger the red statue to the south, then the yellow statue to the north, then the red statue again. This will open the path to the second floor panel, and heading south of the panel will take you back outside - and more or less back to the gate, which is now open.
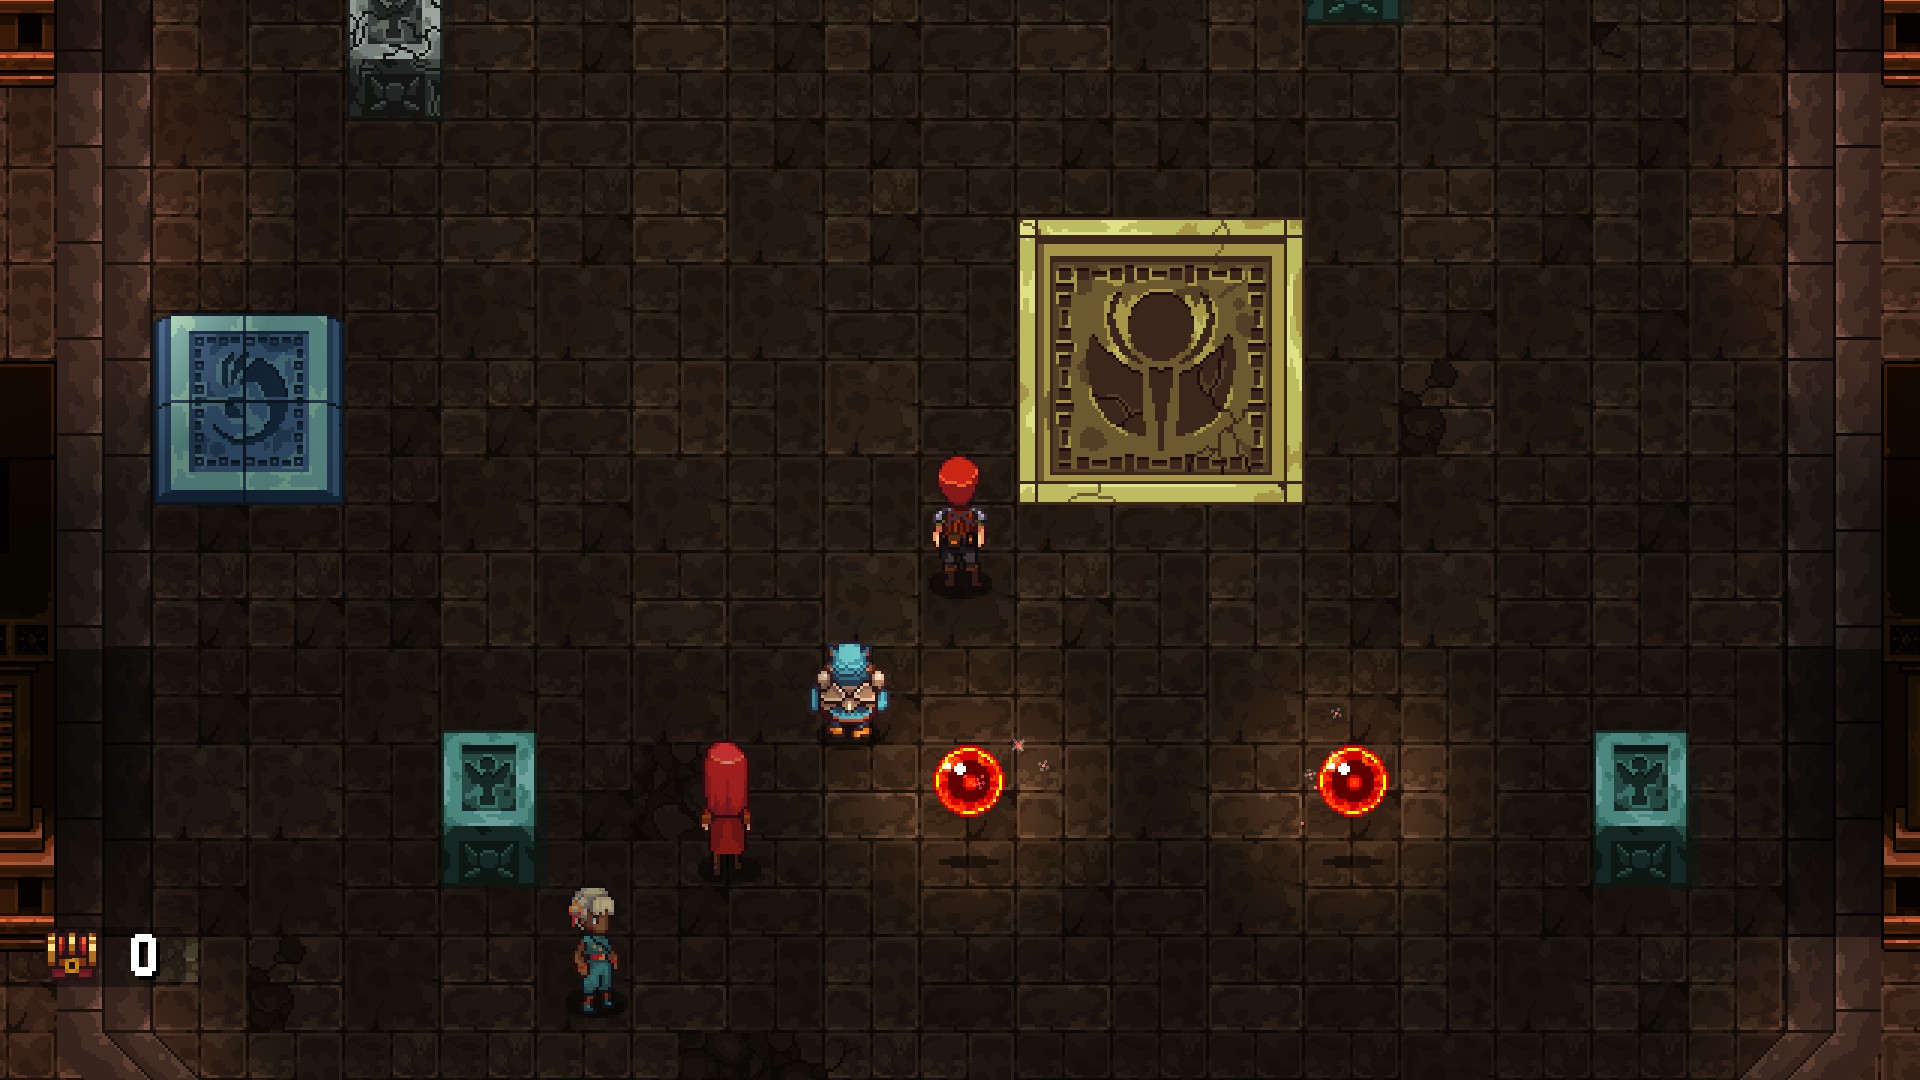
And inside that gate? Another puzzle! These folks really enjoyed their puzzles, and this one is pretty tricky. Here's the solution:
- Push the left orb west, then push the right orb west, so they're side-by-side.
- Push the left orb north, then push the right orb (the one still in the south) west.
- Push the lower orb north so it collides with the upper orb, then push that same orb east, so it hits the blue block that's closest to the golden panel.
- Push that same orb north so it strikes the crumbling block. Then push the orb in the west to the east, so the two orbs are again side-by-side.
- If done correctly the two orbs will now be north of the golden panel, and you can push them down and onto the panel to solve the puzzle.
Phew! Getting tougher. Head north out of the chamber and you'll get a break from the violent, puzzly stuff as you discover a little garden, tended by Golems. They're all happy to talk. Check to the west of the garden to find a metal box containing an
Agamemnon FA300, and look along the rock walls in the northwest to find a small cave containing two
Crystal Sources.
You can now hop in your Sky Armor, which is probably a sign that you should. Head north through the next gate and you'll find an overgrown area that you can't navigate without flying. There are several areas and items of note here:
- East of the entrance is a metal box containing a Glaive V300.
- On the east side of the area is a large clearing atop a building. Here you'll find a metal box containing an Ovelia F0300.
- In the southwest you'll find two Gorillas guarding a metal box. These things aren't a big deal unless they decide to use their AOE attack, which can potentially paralyze the whole party. Work hard to whittle down one of them so you'll only be fighting one if paralysis suddenly breaks out. The box contains a Sword & Shield S300.
- In the northwest you'll find a Fallen Dragon, also guarding a metal box. The dragon can use normal attacks and Fire Breath to hit the whole party, and isn't a big deal. (Resist the urge to try and steal from it on foot. You'll never win the battle, and it's only carrying a Wyrm Carapace.) The box contains an Ether Cannon E300.
Also in the northwest is the exit to the next area.
You'll emerge in tall grass. Head north and through a building to find a chest containing five Fine Wools, then hop in your Sky Armor in the clearing and fly west. Atop a building you'll find a red chest containing a Ley Line Coat. South of here you can land your Sky Armor and battle three Gorillas that are blocking your way north.
Hop out of your Sky Armor once the Gorillas are gone and make your way north, through the next building. You'll wind up in another open area that you can fly through, though your movements are restricted by tall grass that prevents your Sky Armor from landing. Before you do anything else, check to the southwest to find an island on its own. The metal box on the island contains a Hammer & Shield H300.
Touch down by the Golem who is standing in the southwest, then head east. You'll find two Fallen Dragons over here. Take them out, then head north. On your left in the next clearing is a Crystal Source. There's a building near the Crystal Source, and you can shimmy behind it and head west to find a metal box. Inside the box is a Merlin FM300.
Follow the path to the east of the Crystal Source and you'll run into three Gorillas. To the east of the Gorillas you'll find a metal box containing a Paris FP300. Also over here is a ledge that you can't use unless you're on foot. Hop out of your Sky Armor and you can hop off of the ledge to fall faaaaar to the south. You'll land on an island with two metal boxes, one containing a Dayajir and the other a Bowgun B300.
Fly back north and land where you fought the Gorillas. The remaining path will take you northwest, and in a final clearing you'll find a Fallen Dragon and two Gorillas. Take them out, then proceed into the last building to find... yes, you guessed it...
... a puzzle. The true final boss of Chained Echoes. (Not really.)
- Start by pushing the left orb south. This will take out a crumbling block for later.
- Push the left orb back north, then fire it east and onto the golden panel. That's one down.
- Next, push the remaining orb east, south, west, and north. This will line it up with the golden panel, assuming you got rid of the crumbling block earlier. Kick it into the goal to end the puzzle.
Head through the gate and you'll be back outside. Fly north and you'll discover another of the many pig heads that decorate the Empyrean Ruins, though this one seems more conspicuous than the others. Justly so, too, because it attacks you when you get close.
Shaved Head
Strength: Dark
Weakness: Light
Steal: Nothing
Interesting name. Blessed with Act Twice right off the bat, Shaved Head is a hard-hitting swine that will constantly push you into Overheat with its small, annoying repertoire of moves. You can expect the following attacks from this statuesque piggy:
- A normal physical attack
- Stone Coat, which protects Shaved Head from all attacks
- Stomping Hand, which physically strikes five random characters
- Preparing Ancient Magic, which will trigger Ancient Magic in three rounds and kill your whole party
Shaved Head will start off with Stone Coat, which protects it from any damage until you've hit the boss five times to crack the defensive coating. In the meantime Shaved Head will jump back and forth between its normal attack and Stomping Hand, and the combination of the two makes it difficult to stay out of Overheat. Do enough damage and Shaved Head will stop attacking and use Preparing Ancient Magic, and if the three turns run out your team is toast.
For the most part this is a battle most easily fought in Gear 1, despite being pushed into Overheat. This will allow you to counteract the effects of Shaved Head's physical strikes without using up too much TP, which will be useless against Stone Coat anyway. Blind is a great status ailment in this fight since Shaved Head's attacks are physical, though it only works about 50% of the time. Otherwise, debuff Shaved Head's attacks and heal as necessary. Once Preparing Ancient Magic comes out you can push everyone into Gear 2 and unload all of your best attacks on the pig. Don't bother with healing at this point, as there are no more attacks coming your way.

You'll earn a Grimoire Shard for defeating Shaved Head. A great deal of storytelling will follow as you head north, and when you truly regain control of your party, you'll find yourself faced with... another huge section of dungeon! Eesh. There are three more panels to activate and a gate to open. Your merchant buddy is also here, in case you need to gear up.
Head east. You'll find a yellow statue and a red statue. Trigger the red statue to continue east, then swing north when you hit an intersection. You'll hit a series of jumping points over to a yellow statue. Activate it and head back west. This will have raised yellow spikes in your path, but you can use a ledge to the right of the spikes to drop back down to ground level.
Head south, then east. Ignore everything until you see stairs. Go up them and swing left to find a building. Inside it is a chest containing two Rayon Fibers. Head back out and down the stairs, then go through the archways on your left. You'll wind up fighting a Golem, two Blue Clock Spiders, and one Red Clock Spider.
Head east, then north. Inside a small building Lenne will witness an apocalyptic vision. Ominous. Trigger the panel inside, then head back out and south. You'll be forced along a meandering path to the west, until you're stopped by three lines of colored spikes. South of here is a yellow statue to activate. Do so, then backtrack east until you see a blue statue that you can now reach. Activate it as well.
Follow the path as far east as you can go, until you run into a red statue. Trigger it. This will remove the last of the three lines of colored spikes in the west, though there are still several items to get before you leave this section of the area. Make a return trip back to the jumps in the north that lead to a yellow statue. Activate the statue again, then make your way back to the east end of the maze. With the yellow spikes out of your way you'll find chests containing Ambrosia, a Rune Blade, a Paralyze Hit Crystal, and a Beleet's Bow.

Head west until you see a blue statue sandwiched between red and yellow spikes. Access it from the north side and trigger it, then make your way west again, to the three lines of spikes. Activate the yellow statue in the south, then head back to the blue statue you just triggered and do it again. This will remove the three lines of spikes once more. Follow the path beyond the spikes and you'll wind up heading north, back at the gate and the merchant, and the way further west will now be clear.
Follow the pathways west until you wind up between two sets of stairs. Go southwest from here and you'll run into four Blue Clock Spiders and one Red Clock Spider. They're guarding two Crystal Sources, as well as a chest containing two Sweets. If you check the wall to the north of the Spiders, beneath some archways, you'll find a crack that will allow you to slip under the archways and fetch a... bird. Surely this will be useful for something.
Head back to the double stairs and go up the stairs on the left. Here you'll find a Golem, who wants to know if his birds are alright. You already have one, so there are two more to go. Head south of the Golem until you see another Golem on your left. To your right is a building that you can pass through from the back. Beyond the archway in the south you'll find another
bird.
Head west, past a big pig head statue. You'll find a clearing with another Golem, and this one's on the lookout for one of its clanky buddies. Before heading off to search, check the trees lining the area to the south. There's a hidden path here that will bring you to the third bird.
Near the hidden path is an archway leading north. Check the walls on your left as you head north and you'll find a hidden path leading to two enemy Golems and two Blue Clock Spiders, as well as a chest containing six Ancient Skulls. The enemies are guarding a friendly Golem that desperately needs to report in to the west for inspection.
Follow the path to the north before going west and you'll come to a forgetful Golem. Tell it about the inspection another Golem mentioned and it will leave. Check the chest to the northwest for a Defend TP Gain Crystal, then follow the Golem south. It isn't the Golem that was needed, but the moment you catch between the two automatons here is nice. The Golem that was meant to show up for inspection will get the supervisor out of the way, and you'll find a vision - and a panel - through the door it was guarding.
Return to the double stairs. The Golem looking for its birds will move out of your way, allowing you to head north. At the end of the path waits another vision, as well as the final panel to activate. Do so, then head back east, to the gate. With all three panels active it's now open. Head north, into the next building, and... aw, jeez.
The puzzles never end. Care for an answer?
- Push the orb on the left east, crumbling the grey block between the two orbs. Then push the orb on the right west so the orbs are bumped up against one another.
- Push the right orb north and west, crushing the grey block in the northwest.
- Push the lower orb west and north. The two orbs will now be floating beside one another.
- Push the lower orb east, then north one square. It should now be in the path of the other orb.
- Push the left orb east so the two orbs wind up beside each other. You can now push the orb on the left north and onto the golden panel.
- Push the remaining orb east, north, and west, also onto the golden panel.
Last puzzle, promise. Head north and you'll find a courtyard. Continue north and you'll discover a treasure room filled with goodies, including a Javelin, a Plot Armor, seven Wyrm Carapaces, ten Mythril Ores, 5,000a, a Great Sword GS300, a Support Drones D300, and a Church Key. Snag everything and head back outside, where someone you probably forgot about is waiting.
Dark Sky Armor
Strength: Dark
Weakness: Water
Steal: Nothing
Oh hey, this thing again. The Dark Sky Armor isn't too bad as far as bosses go, though at least one of its moves requires immediate attention if you don't want to lose a party member. You can expect the following moves from this foe:
- Pure Terror, which cuts one character's HP in half and inflicts Terrified status
- Full Terror, which cuts everyone's HP in half and inflicts Terrified status
- A normal melee attack, which hits a random number of times against random targets
- Paralyzing Thunder, which can potentially paralyze everyone in your party
The Dark Sky Armor will start off using Pure Terror, which will half a character's HP and start a countdown. If you fail to heal the character back to full health in two turns they will collapse. Do so to keep them in the fight, then debuff the Dark Sky Armor and wallop it for a while, dealing with Pure Terror whenever it gets used again. Things aren't too bad until the Dark Sky Armor uses Full Terror, which inflicts Terrified on everyone. Ouch. You can try to mash your way through the remainder of the fight, but it's safer (and not that difficult) to use Skills or items to simply bring everyone back to full. Then you can finish the Dark Sky Armor off.
You'll earn a Grimoire Shard for defeating the Dark Sky Armor. You'll also watch a lengthy chain of cut scenes, all pointing you towards the endgame. Not much left to go now...
Main Walkthrough