Need some quality headphones to connect to your PC? Try the JBL Tune 720BT, now available on Amazon! As an Amazon Associate I earn from qualifying purchases, at no additional cost to you.
After paying a visit to New Wyrnshire, the group - now formally known by their clan name, the Crimson Wings - have more or less become the official resistance against Taryn rule. Now they need some allies, and their first major candidate is Amalia, the princess of Farnsport. She has disappeared into the underbelly of Farnsport to lead a resistance of her own, and the group needs to track her down.
Your first step is to head to Basil, the small rural town on the west side of the Rohlan Fields. Basil has seen better days, as Tarynean troops recently made an example of the farmlands by burning most of them to the ground. Here you'll run into Heinlein, Victor's guide from earlier in the game, and he'll offer to help you find Amalia.
Head to Farnsport. The city has been conquered by the troops of Taryn, and things look more and more grim as you explore Farnsport's various districts. (Particularly the Port. Eesh.) You can poke into all the buildings to see how the townsfolk are coping - not well - but the only person of interest is Deimsch, the blacksmith who lives in the northwest of the Bazaar. He will join your crew with his wife and move out of Farnsport if you speak to him.
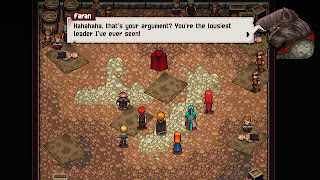
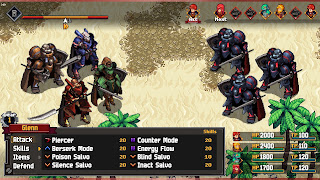
If you head towards southern exit of the Bazaar, to the Port, you'll see crates on your left. Weave between them and you'll find a doorway. Inside is a network of hallways leading to Faran, one of the city's commanders, and his beat-down resistance group. During the meeting two Guardian Soldiers and a Guardian Mage will barge in, and you'll need to take them down. Not a big deal.
Faran will decide to believe in the group in the aftermath of the battle, admitting that Amalia is being held at a Taryn base at 'Arkant'. He speaks of the Phyon Oasis, a fortress to the southwest of the Arkant Archipelago, and east of Farnsport. Hop in your airship and head over.
Phyon Oasis - West
Monsters
- Guardian Mage - Strong to Light, weak to Dark - Drops Stolen Diamond
- Guardian Soldier - Strong to Wind, weak to Earth - Drops Solder Crest, Stolen Diamond
- Support Drone Wielder - Strong to Earth, weak to Wind
- Sword Wielder - Strong to Earth, weak to Wind - Drops Scrap of Iron, many different pieces of equipment for Sky Armor
- Terror Terrier - Strong to Water, weak to Earth - Drops Ball of Hair
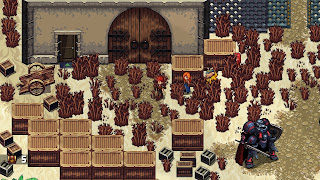
Faran's men will attack the base upon your arrival, and you'll need to use the distraction as an opportunity to sneak into the oasis and free Amalia. There are cannons here that will shoot down your Sky Armor if you try to fly, so simply zipping into the the base is out of the question, but you can still hover around in your armor if you want some added protection.
There is an optional task for this mission, and that's skipping all of the battles. To do this you'll need to be especially careful, as there are a few battles that you can blunder into if you're moving too quickly. If you decide to attempt this you should proceed on foot, and give any foes you see a wide berth. The Phyon Oasis is an open enough area that it's not too difficult to find your way around battles:
- The first squad of soldiers is right near the western entrance to the base. You can either go north and find a path past them through the water, or go south and over the sea in the south in your Sky Armor.
- The second squad of soldiers is around the middle of the base, just east of a bridge. To get past them you'll need to head south to the seaside, hop in your Sky Armor, and hover south along the periphery walls. In the far south there's a gap in the walls that you can over through to reach the east side of the base.
Regardless of your approach, there are a number of items to pick up around the camp:
- Head north from the starting point and you'll find your merchant buddy, as well as an Amber Crystal. Just south of the Amber Crystal, partially obscured by some trees, is a chest containing an Angel Wing.
- In the southwest of the area, south of your starting point, you'll find a metal box containing a Sword & Shield S200.
- North of the first squad of enemies, near the entrance to the base, is a chest containing two Heal Overdrives.
- In the southwest, on the inside of the defensive walls, is a chest beside a campfire. Inside the chest you'll find three Demon Leathers.
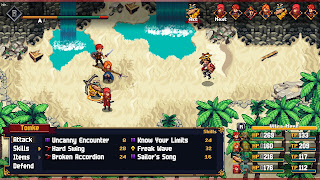
- Near the bridge that connects the two sides of the base is a pathway that you can follow north, along the edge of the water. Up here you'll find a chest containing two Elastic Wings. Also here is a house that connects to a cave. Halfway through the cave you'll find stairs leading outside, where you can battle a Guardian Soldier and two Terror Terriers. Getting them out of the way will allow you to hover east, where you'll find red chests containing a Danforth and a Defense Gorget. The remaining cave will take you to a battle with two Guardian Soldiers and two Guardian Mages, as well as a red chest containing a Phantom Cloak.
- In the south of the base's western section is a long dock, stretching out into the water. On the end of the dock is a metal box containing a Bowgun B200.
- As you come up into the base from the beach on the east side you'll find an Amber Crystal.
To the east you'll find a large storage room. Check to the south and you'll find a lever. Pulling it will partially open a gate somewhere nearby. There's a door to the west of the lever that will take you outside, to the second half of the base.
Phyon Oasis - East
You'll run into a group of Sword Wielders immediately after entering this area. Near them is the gate that's halfway open, as well as a door into another warehouse. Check east of the entrance to the warehouse to find a chest containing two Ancient Skulls, and to the northeast of the entrance to find a red chest containing a Cool Scarf. In the north is a lever that will fully open the gate.
Head into the east wing of the warehouse before leaving. Guarding this area is a Guardian Soldier, along with two Terror Terriers. Hit the lever in the northeast to open another gate somewhere in the base.
Head back outside and go through the gate. To the north and on your left is a chest containing a Crit Damage Up Crystal. To the east is a group of Sky Armor that you can't avoid, so suit up and take them down. Further east you'll hit an intersection, and if you check to the north you'll find a chest containing a Gain TP After Kill Crystal.
Head south. You'll reach a gate you opened earlier, though the gap is only large enough to let your team through on foot. There's enemy Sky Armor down here, and you will die if you fight them on foot, so sneak through by hugging the crates and taking a left. You'll be back in a warehouse, and there's a chest to the east containing two Alarm Clocks, as well as a lever. The lever will fully open the gate, allowing you to slip back north, suit up in your Sky Armor, and take out the pilots blocking your way further east.
Check along the trees to the southwest of this last group of Sky Armor to find an Amber Crystal and a chest containing two Platinum Ores, then head east. The path will force you north, though before you head that direction, check through the trees on your right. You'll find a red chest containing a Yahnagi Bow for Robb and a metal box containing an Ether Cannon E200. Follow the main path north, then, when you reach stone walls, take a left to find another Amber Crystal, as well as a red chest containing a Gemstone Jerkin.
Almost done. Enter the building in the north and you'll find more injured rebels, followed closely by two more Guardian Soldiers and Mages. Take them down, watch the cut scene that follows, then check in the southeast of the warehouse. There's a red chest down here containing a Tsurugi for Sienna.
Head back outside and backtrack through the base. There's an exit in the north with a merchant waiting by an Amber Crystal. Check across the water and through the trees to the northwest of the merchant to find a metal box containing a Sword & Shield S200. Proceed any further east along the main path and you'll learn of a betrayal - and have the chance to finally put a nuisance down.
Strength: Earth
Weakness: Wind
Steal: Nothing
- A normal attack
- Cannon Storm, which hits everyone for normal damage
- Dark Ether, which hits everyone for Dark damage
- A super attack, which will wipe out your party in four rounds
- Act Twice, allowing him to use two moves in a single turn
- A normal physical strike
- Fists of Nova, hitting everyone with physical strikes


