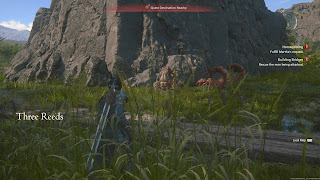
Upon arrival at Martha's Rest Clive and Jill meet up with Martha herself, and she's willing to help them reach Rosaria - if they repair a ruined bridge. This leads to a pair of quick quests that you'll need to complete before you can move deeper into imperial territory.
Building Bridges
Reward: 1,000 gil, Meteorite
Your first task is to find Martha's carpenter friend, who is off on an errand and has yet to return. Head back to the bridge into Martha's Rest and you'll see a ladder on your right, not far from the Fast Travel Obelisk. Go down the ladder and you'll be in a watery area beneath the bridge. You'll hear a scream...
... and if you look at the enormous rock holding up the bridge, you'll spot the carpenter. He has been stranded by a group of Cray Claws, and you'll need to kill the beasts to free him from his narrow roost. You've likely slain a large number of Cray Claws while exploring Three Reeds, so this fight should be a piece of cake.
You'll receive Valley Madder and Sharp Fangs for defeating the Cray Claws. Bernard, the carpenter, will thank the pair for their help, then head up to inspect the broken bridge. Report back to Martha after the conversation is done to complete the quest. It will lead directly into the next quest.
A Bearer's Lot
Reward: 5 Steelsilks, 5 Bloody Hides, 2 Gil Bugs
Once you turn in Building Bridges Martha will give you a new task: Head to an abbey in Sorrowise, the area adjacent to Three Reeds. You can reach Sorrowise by using the wooden elevator on the west side of Martha's Rest. Pull the lever on the left side of the elevator to send it to ground level.
Sorrowise
Enemies
- Adamantoise
- Arachne
- Bighorn
- Bluebird
- Death Blossom
- Gloom Widow
- Hornet
- Megalocrab
- Wild Chocobo
Sorrowise is geographically similar to Three Reeds, though you'll run into different monsters if you explore the area. You can head straight to Glaidemond Abbey in the southwest, if you like, though we'll have a quick look around the area first.
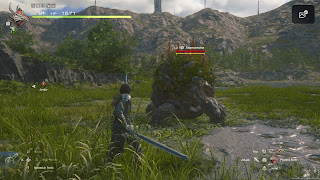
- Take a right after stepping off the elevator and you'll find a path populated by Megalocrabs. They're a new foe, but nothing special. You'll find six Briar Clam Shells on your left as you head north. Ahead is a clearing, and it is guarded by an Adamantoise, a surprisingly swift enemy that withdraws into its shell and zips around at high speeds. Dodge carefully. The Adamantoise is guarding three chunks of Wyrrite.
- Adjacent to the Adamantoise's clearing is another, large field patrolled by Killer Bees. Along the dirt path you'll find a Sharp Fang. Check by the water's edge in the west to find three Briar's Clam Shells, not far from a second Adamantoise.
- Just north of Glaidemond Abbey is an outcropping of land jutting to the west. You'll find Megalocrabs out here, guarding a Sharp Fang. To the right of the battle zone, beside the dirt path, is a chest containing a Goblin Coin, 15 chunks of Wyrrite, and 15 Sharp Fangs.
- Head to the land east of the abbey and you'll start running into Hornets, Wild Chocobos, and the occasional Buebird. Stick to the path and you'll find three Sharp Fangs, or go off the beaten path to find three Bloody Hides, along with Death Blossoms.
- In the southeast you'll find a bridge to some place called Riddock's Jump that is currently raised. Beside the bridge is a Sharp Fang. There's also a Bighorn to the east of the bridge that you can fight, if you wish. There's 10 gil sitting near the Bighorn, as well as a chest beside a fallen wagon. The chest contains 10 Bloody Hides.
- A short ways east of the abbey you'll find the remains of a building, populated by a variety of spiders. You'll find three Briar Clam Shells in the grass near the foundations of the building, and if you check inside what is left of its walls you'll find a chest. The chest contains a Meteorite.


