

Need some quality headphones to connect to your PC? Try the JBL Tune 720BT, now available on Amazon! As an Amazon Associate I earn from qualifying purchases, at no additional cost to you.


Although the invasion of Taryn didn't go totally according to plan, the team has managed to steal the Grand Grimoire away from Frederik. Sounds good... only there are now greater forces at play, meddling in the affairs of Valandis. Lenne in particular seems to be the focal point of some crazy stuff.
After the invasion you'll jump back to Hermit's Isle. Check the room in the northeast of the ground floor, east of the dining hall, and you'll find Victor in his usual spot. The lengthy cut scene that follows will explain some of Glenn and Lenne's issues with visions, and the party will resolve to head somewhere new: The floating island of Shambala. It will appear on the world map once you depart Hermit's Isle on your airship.
Should you head right there? Perhaps, but there are two things you can do before departing for Shambala:
- Recruit new members to the Crimson Wings. Falora has more information... or you can just check this guide on gaining new recruits. Anybody who shows up after Storming Tormund, the previous main quest, is now fair game. Note that there are two recruits on Shambala that we'll get to shortly.
- Once you've upgraded Hermit's Isle to its third form - essentially a small, fortified town - you can also trigger a side quest, For the Love of Food. To do this you first need to have Tomke in your party, which requires completing another side quest, The Food, the Chap, and the Hungry. Both quests will get you a new party member.
Head to the northwest in your airship once you're done exploring the world. Shambala is floating a short way off the shores of Valandis.

Flying Continent Shambala
Monsters
- Sky Monkey - Strong to Water, weak to Dark - Drops Ancient Skull, Fake Monkey's Paw
- Toucibri - Strong to Earth, weak to Wind - Drops Colorful Beak, Elastic Wing
Loot and Materials
- asd2
- Coffee Bean
- Death's Apple
- Feather
- Flying Pig
- Gem Gum
- King Beetle
- Olden Book
- Rose
- Shell
Flying Continent Shambala - South
Ahhh, bliss. Shambala is another large area to explore, so you'd best get started. Climb to the Fast Travel Crystal in the north, then head west. You'll find a chest containing two Mythril Ores. Head back east, then check along the edges of the cliffs for a drop down to another island. Here you'll run into two Toucibri, the first monsters in this area. They're pretty straightforward melee fighters.
North of the Toucibri is a free-floating island that moves in a rough circle. Hop onto it, then back off to the path on the left once the island (briefly) moves into place. You'll catch a quick look at one of Shambala's less-violent residents. Before climbing north to pursue them, check all the way west to find an Amber Crystal.

To the north you'll enter a clearing populated by two Sky Monkeys. These creatures can hit you with debuffs, alongside plain melee attacks. Not a big deal. North of the monkeys is an Amber Crystal. West of the monkeys is a huge, metal chain hooked into the side of the island, and if you check the rocks just north of the chain you'll find some buried treasure in the form of a Fauchard.
Walk past the group of wading flamingoes and head north. Swing west and you'll find a small island on its own with a red chest on it. The chest contains a Viking Sword. Return to the larger island and travel east, until you find a small building and spot the flustered avian from early again. Head south of the building and you'll find Golden Borb Bob, a Unique Monster that will hatch out of an egg. Bob will only appear if you have less than 100,000a on you, which is... likely. West of Bob you'll find a chest containing a Dragon Killer Crystal.
To the east you'll enter the next area of Shambala.

Flying Continent Shambala - Southeast
This section of Shambala consists of a large, central island orbited by two smaller, fast-moving islands. You need to jump onto the island with ramps on its right and left sides to get started. These take a little while to reach you, so be ready.
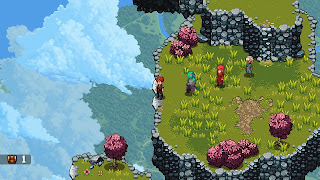
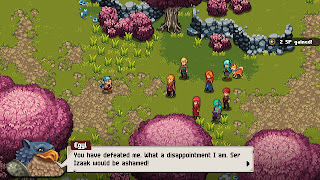
Once you're on the first orbiting island, stand on its right side and wait for it to slide up against a larger island in the northeast. On this island you'll find a red chest containing an Épée. Wait for the flying island to sweep back to the landing point and hop back on, this time standing on its left side. When you debark onto the central island you'll come into conflict with Egyl, the guy from earlier, and it turns out he wants to scrap.
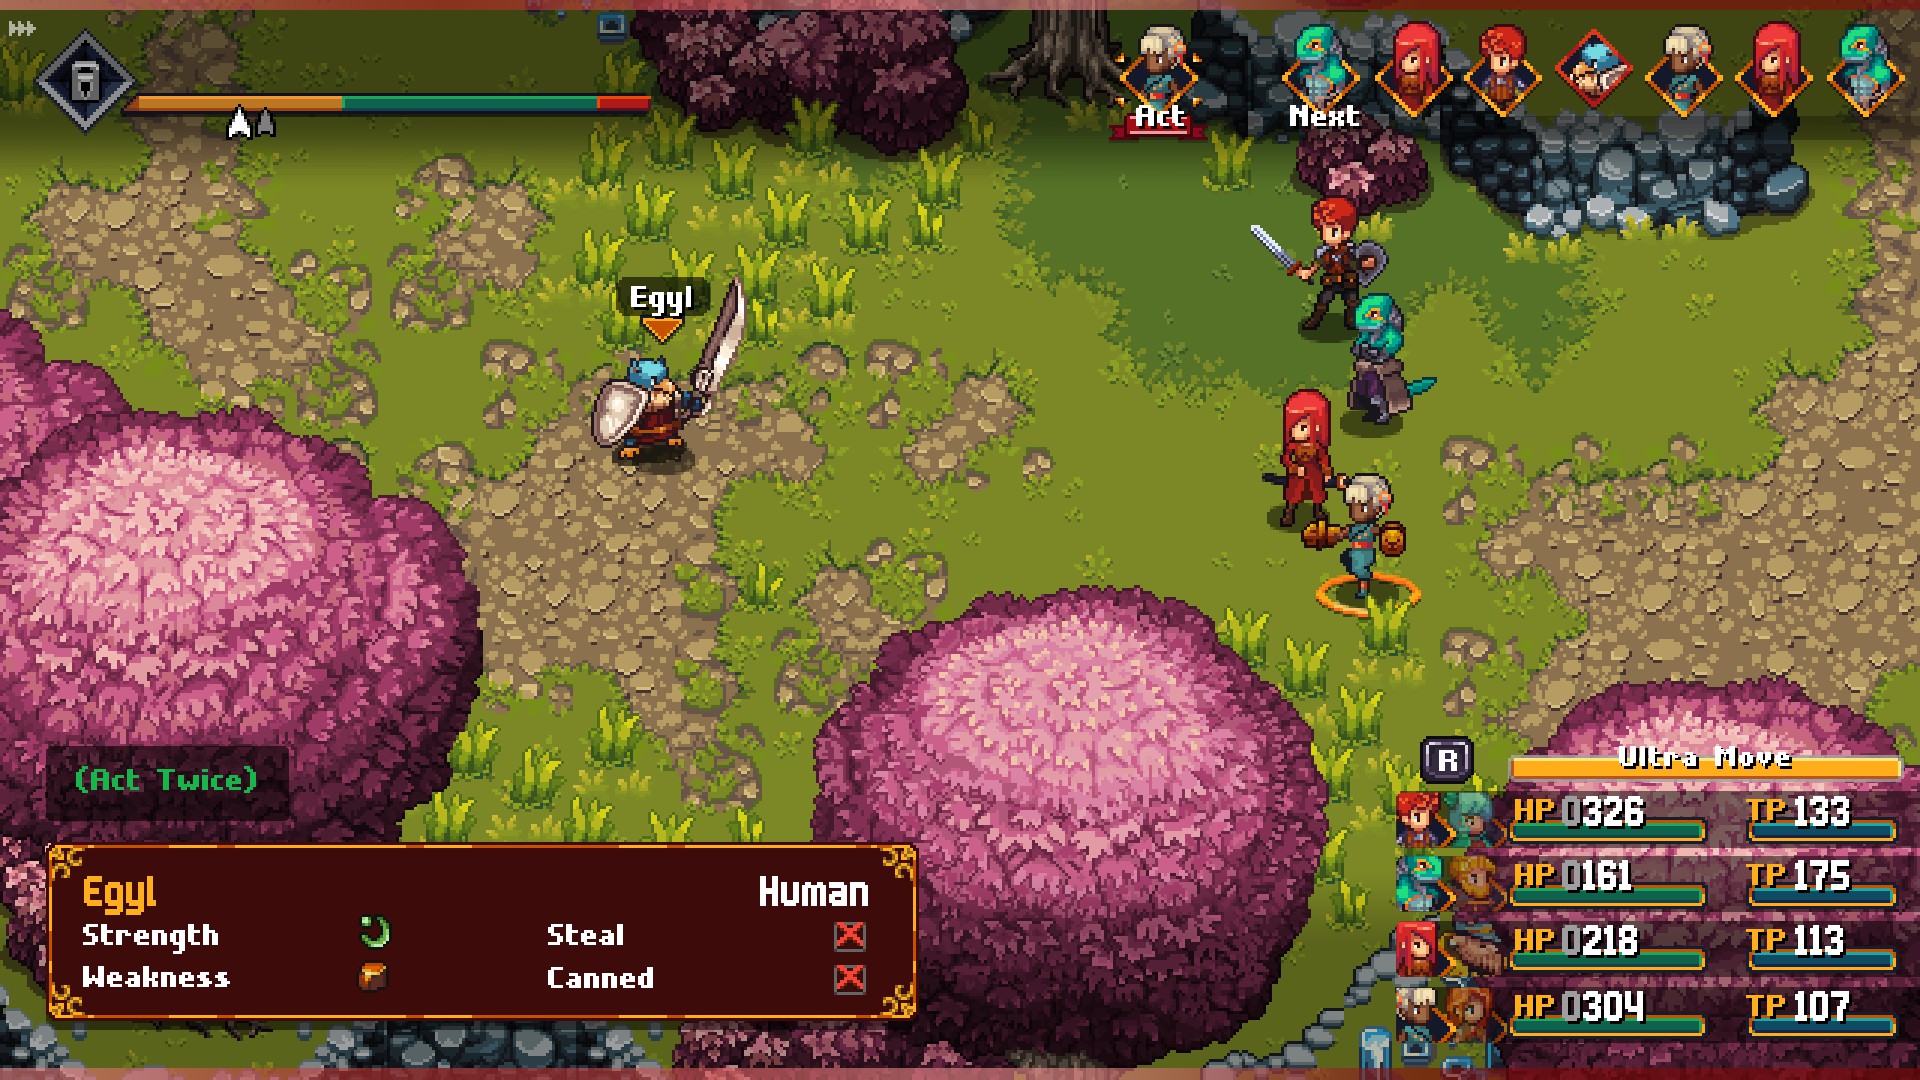
Egyl
Strength: Wind
Weakness: Earth
Steal: Nothing
C'mon, Egyl, ease up. Beginning the fight with Act Twice active, Egyl is potentially much deadlier than he looks. Each turn he'll use one of two attacks, both of which combined can easily knock out at least one of your party members. If you haven't been keeping up with your equipment Egyl can be a nasty wakeup call.
Egyl can use the following attacks:
- Giant Sting, which hits one character for heavy damage
- Whirlwind Spear, which hits everyone for moderate damage
- First Aid, which restores a bit of health
If Egyl is going to take advantage of Act Twice he'll typically use Whirlwind Spear followed by Giant Sting, though he can use other variations of this combo as well. If you haven't debuffed Egyl, buffed yourselves, and / or put the Overdrive Bar firmly in the green, Egyl could very well kill one of your party members. Ouch. Spend the first few turns of the match boosting Overdrive and buffing / debuffing so Egyl's attacks don't hit too hard, then do what you can to keep things that way, healing as necessary. Once Egyl's physical Skills are debuffed he's not too bad.

Egyl will be convinced of the group's intentions once they decide not to kill him, and will agree to escort the party to his leader. Check up the nearest ramp once Egyl is done talking to find an Amber Crystal sitting beside a building, then head northwest. A Toucibri and a Sky Monkey wait in the north, near a debarking point for the orbiting islands.
Hop onto the orbiting island with ramps on its north and south sides. The path forward is a short ride to the east, but ignore it for a moment and stand on the south side of the island. You can hop off the island in the southeast to find an area with an Amber Crystal and a red chest containing a Golden Breastplate. There's a rep from the Adventurer's Guild nearby, as well, but you can't reach him without your Sky Armor. Alas.
That's all for this area, so hop back onto the north-south island and ride it to the far north. You'll find the entrance to your next destination, Sova Village, in the northwest.