Need some quality headphones to connect to your PC? Try the JBL Tune 720BT, now available on Amazon! As an Amazon Associate I earn from qualifying purchases, at no additional cost to you.
Monsters
- King Owl - Strong to Light, weak to Dark - Drops Giant's Hide, Long Feather, Old Bark - Can steal Long Feather
- Scorpion - Drops Stinger, Tough Rips - Can steal Gold Ore
- Sporeman - Drops Carrot Nose, Jute Fiber
Loot and Materials
- Blue Plate
- Creepy Mask
- Cricket
- Lost Badge
- Mushbroom
- Perpetuan Lemon
- Stinky Powder
- Thin Wire
- Tulip
- Water
Western Flower Fields of Perpetua
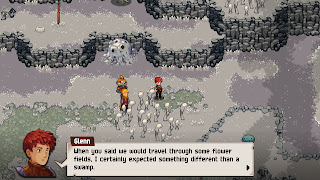
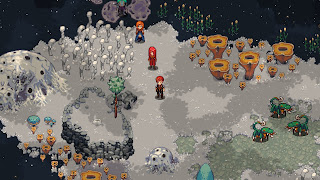
The group is partway to their destination, the Kindreld Monastery. First, though, they need to cross the Flower Fields of Perpetua, a warped, swampy region that stands as a testament to the aftereffects of the Grand Grimoire's terrible power. Gear up and start making your way east through the bog.
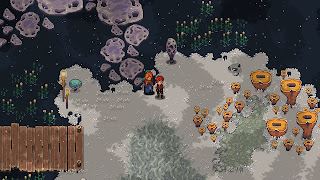
After a short walk you'll wind up on a wooden boardwalk. Walk north and you can step on the purplish, fungi-like platforms beside the boardwalk. This path will lead you to a chest containing two Yak Grass Fibers. Take these and head back south.
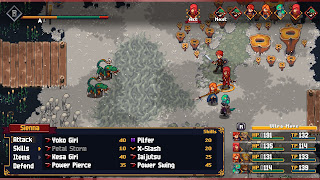
The path will split again at a hole-pocked, domed structure protruding out of the ground. If you go south of here you'll wind up on a stretch of land guarded by two Sporemen. These creepy creatures can hit your characters with Blind and Oil, and hit fairly hard to boot. Northwest of the Sporemen is another fungal pathway leading to an Amber Crystal, as well as a chest containing an HP Up Crystal.
Trek back to the domed structure and go east, jumping from one island to another. Here you'll run into a pair of King Owls. These things have strong elemental attacks, and should be treated with caution. Check the left side of the two red trees here to find a bit of buried treasure in the form of a Brigandine. Southeast of here you'll find a chest containing a Gold Ore.
Head north. Across another boardwalk you'll run into a magical wall known as a Leopalt Barrier. You'll need to find the caster of the spell before the barrier will disappear. South of the barrier you'll find paths to the next screen to the east, where you'll find chests containing three Thick hides and 750a, though they're both dead ends.
Head north. You'll find a clearing where the area's Fast Travel Crystal waits, as well as a Sporeman and a King Owl. Further north you'll find a smaller clearing with two side paths, both leading east. The lower path leads to a chest containing two Meals, while the upper path leads to two Amber Crystals and a hidden cave containing 2,399a. North of this clearing is a boardwalk leading out of the area.
Northwestern Flower Fields of Perpetua
On the next screen you'll run into a pair of Scorpions. These things, unsurprisingly, can poison your party members, and like everything else in the swamp they just plain hit hard. The sections east of the Scorpions are ultimately a dead end from this side, so you'll need to trek west.
Travel all the way west along boardwalks until you find a red chest containing an Herbal Collar, then return to the boardwalks and go north. You'll come across an abandoned research camp that must have been attacked by something nasty. There's an anvil here, and if your characters have been taking lots of damage from the enemies in the swamps you may want to spend some time upgrading their armor.
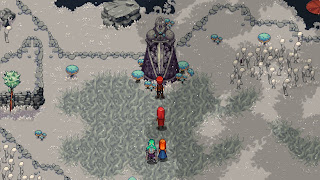
North of the camp you'll come to a network of twisting paths. Continue north through the little forest of lit trees to find a chest containing two Giant's Hides, then backtrack south and go west. You'll run into a pair of King Owls. Follow the path past the Owls to the north and, after some trekking, you'll come to a conspicuous clearing. A vision will interrupt the party, yet despite the threat of danger you'll come out unscathed - and the barrier, apparently, will be weakened.
Check the northeast of the clearing before you move on, then the bulb to the south, to create a path of fungus. With this you can fast track back to the camp and begin the return journey to the south. Along the way, though, make sure you inspect the fungus bulb just north of the southern exit. This will create a path to the north, where you'll find a chest containing two Meals, as well as an Amber Crystal.
Almost done. As you recall there was a dead end to the east of the entrance. If you go there you'll find another fungus bulb to activate. At first there is no apparent effect, but if you head back the way you came you'll find a fungal path spreading out to the north of the boardwalk you're crossing. On the other side you'll find a Sporeman and an Owl King. Beyond them you'll find quite a bounty: three Angel Wings (southeast), a Gold Ore (east, behind some trees), three Amber Crystals (north and northeast), and Glasses (west).
Western Flower Fields of Perpetua
As you head back towards the barrier you'll notice new fungal growths on the west side of this area, growing near one of the bridges leading south. Follow them to find an Amber Crystal in the north and a clearing in the south and west, where you'll find another Amber Crystal. On the far west edge of the screen you'll find a ledge you can jump to. This leads to a pair of Scorpions...
... and if you carry on north, to the next screen, you'll find a statue to the Heroes of Leonar waiting. Ever a welcome sight. Offer up some Sacred Water and you'll face a battle with two Scorpions and two King Owls. Defeating this group of enemes will earn you the Shaman Emblem, sigil of Renia the Shaman. Magic users like Lenne, Victor, and Ba'Thraz will find this Emblem useful.
Head back to the barrier. It's gone! Excellent. Head east into new territory.
Central Flower Fields of Perpetua
You'll come out near another fungal bulb. Activate it to create a path to the south. On the other end you'll run into three Scorpions, and past them an eastbound path. Ignore the northbound walkway for a second and activate the fungus bulb to the north of the eastern walkway. This will create a fungus path off of the northbound walkway.
Activate the fungus at the end of the new path to create yet another path off of the wooden walkway. Use it to travel east, where you'll run into a Scorpion, a Sporeman, and a King Owl. Past the trio the path meanders southeast, where, surprise, you'll find a fungus bulb. Activate it to create a path to the south where you'll find a chest containing a Yak Grass Fiber.
Backtrack to the two docks. Your fungus manipulation will have created a path to the nearby shore, where there's another fungus to activate. It'll create another path to a small island to the west where there's another fungus. Activating it will create a path from the south end of the island with the two wooden walkways to another off-shore island. Here you'll find two red chests containing a Silver Sword for Glenn and an Estoc for Victor.
Head back north to the northbound wooden walkway and you'll find a new fungus path. It leads to the area's Fast Travel Crystal, as well as a merchant and an anvil. These are well-placed, as you'll run into the area's monster when you try to go any further northwest. Fight!
Puppet and Puppeteer
Type: Undead
Strength: Dark
Weak: Light
Steal: Shaman's Robe (Puppet), Gold Nugget (Puppeteer)
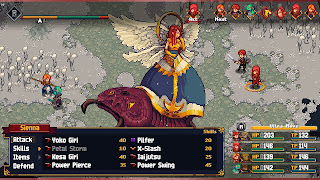
Huh. Okay then. Though it's one creature controlling both segments, this fight consists of two independent combatants going at your party, and you need to destroy both to finish things. Each enemy has its own moveset, and they can cause a fair amount of trouble when working together.
The Puppet uses the following attacks:
- Blinding Light, an AOE attack that hits everyone with Light damage
- Paralyze, which can Paralyze a single character
- Twisting Wind, which changes the layout of the Overdrive Bar
The Puppeteer, meanwhile, uses some different attacks:
- Dark, which hits one character with Dark damage
- Doom, which begins a countdown that will kill the character when time runs out
- Poison Wind, which can poison everyone on your team
Dark and Blinding Light are straightforward. Paralyze you'll either need to heal or wait out, while Doom can only be stalled by switching out your character, which will reset the three-turn timer. Even Poison Wind, while annoying, isn't a huge deal in the long run. The problem is Twisting Wind, which will alter the Overdrive Bar. Rather than yellow, green, and red, it will become green, red, green, and red, forcing you to bop back and forth between Overdrive and Overheat with little chance of reprieve.
The answer to this battle is simple enough: Get rid of one of the bosses. The Puppet is the better choice, as its moves are arguably more annoying than those of the Puppeteer. If you do enough damage you won't need to battle for long under the effects of Twisting Wind, and only having to contend with one enemy will make staying out of Overheat much easier. Ba'Thraz is a good offensive choice for quickly chewing through the Puppet's HP, thanks to his Light-based Skills, though anybody that hits hard will work nicely.
You'll earn a Grimoire Shard for defeating the Puppet and the Puppeteer. You'll also clear out your final obstacle to getting through the swamp. There are still a few things to check before you leave, however.
- In the far west you'll find a chest containing two Angel Wings.
- In the far east you'll find a chest containing some Tough Rips.
- In the northeast and the northwest you'll find Amber Crystals.
- In the east you'll see two sigils indicating buried treasure. Between them is a small pool of water. Check the right side of the pool to find a hidden Counter Attack Crystal.
There's more to see in the Flower Fields of Perpetua, but you can't reach any of it yet. For now, all you can do is head to the exit in the north, which will take you to another - albeit short - section of the area.
Northeast Flower Fields of Perpetua
You're now in a forest of red trees. Almost done:
- Head to the far-west end of the forest path. If you go south here you'll find an exit to the previous area. Check to the south to find an Amber Crystal. Heading west one more screen will bring you to a red chest containing Chain Mail.
- Though Loot / Material pickups aren't normally noted in these guides, it's worth mentioning that the northbound path on the west end of this area has four such items waiting at the end, and there's another one along the way. If you go back and forth between this pickup spot and the exit to the south you can grab a ton of useful items in a short period of time, over and over.
- In the north your team will set up a campfire and talk for a while. Once they're done, continue north, then check to your left. You'll find one final Amber Crystal before leaving the area.
Return Trip
Once you've progressed far enough into Chained Echoes to have Sky Armor you can check out the southern sections of the Flower Fields of Perpetua. The monsters down here are much stronger than those to the north, and there are sections you likely won't be able to fully complete until you've reached the end of the game.

