Alena, the princess of Zamoksva, speaks to her father, the king. Alena is the main protagonist of the second chapter of Dragon Quest IV.

The second chapter of Dragon Quest IV begins in the seemingly-Slavic kingdom of Zamoksva. You're given control of Alena, the Tsarevna, who yearns to test her strength in the outside world - yet is forbidden by her overbearing father, who won't even let Alena leave Zamoksva Castle. We'll see about that.

Getting out of the castle isn't that difficult. You might as well have a look around before you leave, however. You'll find areas to explore both above and below the throne room.

  • Go up the stairs in the southwest of the throne room and you'll find the royal bedchambers. The king's room is locked, but Alena's is accessible. Check the cupboards in the bottom-right corner of the room to receive a Feathered Cap and a Medicinal Herb. Equip the cap.
  • In the northeast of the main floor of the castle is a bedroom, adjoining a small prayer area. Check the cupboards on the left side of the bedroom for Holy Water.
  • Also in the northeast of the main floor is a treasury, behind a thick, red door. You'll get to open this some day, so keep its location in your brain.
  • In the northwest of the main floor is a kitchen. Bust open the pots and barrels along the right wall to find a Medicinal Herb.
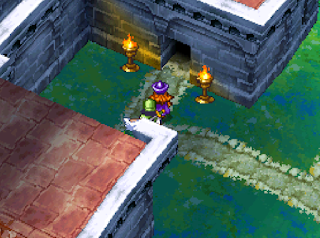
Alena finds a way out of Zamoksva Castle, her home in Dragon Quest IV.

That's all for Zamoksva. If you check Alena's bedroom you'll find a man repairing the right wall. Head to the entrance of the castle and speak to the guards, who won't let you through, then return to Alena's bedroom. The man will be gone, and you can kick through the wall and escape. 

Head south along the outer walls, then take a left and follow the path until you see a yellow glint on the ground. Check it for 50 gold. That done, return to the east side of the walls and turn the camera. You'll see a gap in the railing, and Alena can hop down to ground level and escape... though two of Alena's retainers, Borya and Kiryl, will intercept her on the way out. Fortunately, all they do is join the party. You'll need their help.

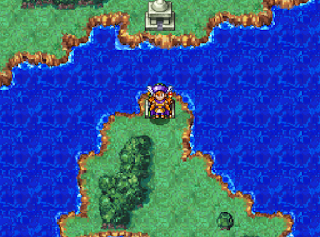
One final note: When you leave the grounds you'll be on the world map, in front of Zamoksva Castle. If you reenter the castle the guards will force Alena back inside, and you'll need to use the window escape trick again.

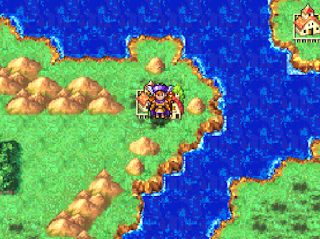
Alena sets out from Zamoksva, her home kingdom in Dragon Quest IV.

World Map - Zamoksva Region - Enemies

  • Bagworm - 16 HP
  • Foo Dog - 23 HP
  • Lickspittle - 13 HP
  • Mischievous Mole - 10 HP
  • She-Slime - 10 HP
  • Walking Stick - 8 HP
  • Wiggly - 11 HP

Ah, freedom. Unlike Ragnar's chapter, where you're running around with only a single controllable character, you can issue commands to Alena, Borya, and Kiryl. Each of them has their own specialty:

  • Alena is a fighter, like Ragnar. She knows no magic, but is the sturdiest character of the three party members and hits like a truck. She'll do most of the single-hit damage in this chapter. (Though she needs a weapon first. At the moment Alena is a bit lacking in equipment.)
  • Borya is a spellcaster. Level him up and you'll receive a series of offensive spells that are great for wiping out enemies. Borya is arguably the most fragile party member of the game, however, so keep an eye on his HP.
  • Kiryl is a healer. He's not as brittle as Borya, but you should still keep an eye on his HP. Kiryl makes a reasonable fighter alongside Alena, though he'll never hit as hard.

All three Zamoksvans will, ultimately, remain in your party for the entire game. Feel free to invest in them equally. It is important to note that, should any of these characters fall in battle, you'll need to visit a church and pay to get them resurrected. It will be a long time before you can bring anyone back to life without requiring the services of a priest.

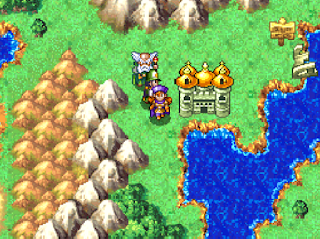
Your next destination is to the north and northeast of Zamoksva. You may notice, however, that there is a town right next to the castle. Before you go too far you should pay this place a visit.

Alena, Borya, and Kiryl approach Zalenagrad, a town in Dragon Quest IV.

Zalenagrad

Your base camp for the first portion of this chapter, Zalendagrad is a small settlement with all the essentials. Use this village to build up some cash and grind out a few levels. You should also have a quick look around, as there are items to be found and / or purchased.

  • Right near the town's entrance is the Armor Shop. Once you've earned some cash from fighting you can come here to outfit your party members. You should save your money during your first visit, however, as Alena needs a weapon.
  • In the north of Zalenagrad is a large building. Go through the central door and you'll find the church. Head upstairs one floor and check the balcony to find a bard named Josef Starling. He'll be important a bit later in the game, so keep his location in mind.
  • On the west side of the northern building is the Weapon Shop. At a minimum you should buy Alena an Oaken Club, which will allow her to one-shot most of the local monsters. Before you leave this area you should upgrade her to the Divine Dagger, and Kiryl to a Copper Sword. (If you picked up extra gold on the way here you can buy the Copper Sword for Kiryl now, then give his Oaken Club to Alena for free.)
  • There are two barrels inside the Weapon Shop. Bust them open to receive a Seed of Agility.
  • On the east side of the northern building is a room with a locked, red door. Some day you'll be able to open this door. For now, just try to remember that it is here.
That's all for Zalenagrad. Your party is too weak to head north just yet, so stick around the village and fight monsters in the nearby forest until you've raised everyone to level 3 or 4, and purchased one or two pieces of armor for each. At that point you'll be ready to trek to the next town, to the north and northeast. The monsters get stronger once you enter the hills, so make sure your party is thoroughly prepared before you walk too far.

Alena's party approaches Taborov, a town in Dragon Quest IV.

Taborov

A 'cursed' village in the mountains, Taborov has some problems that the party can solve. First, though, let's look around.
  • Near the entrance is a small graveyard. Check behind the central grave marker to find a hidden Seed of Life.
  • On the east side of Taborov is a large house, belonging to the mayor. Bust up the barrels inside to receive an Antidotal Herb, and check the cupboards in the upper-right corner for a Leather Hat.
  • In the northwest of the village is a small house. Inside you'll find a girl named Anastasia, who speaks of 'sacrifices'. She'll be important shortly. Check the barrel in the house, next to the door, for a Seed of Agility.
  • Climb into the well in the center of Taborov. At the bottom you'll find a sparkling Mini Medal. Mini Medals are a form of currency that can be exchanged for items much later in Dragon Quest IV. You'll find Mini Medals all over the place, so leave no well, barrel, pot, or chest unturned.
In the north of Taborov you'll find a church and an Item Shop, but you can't save in the church and the Item Shop is empty. Odd. Speak to the mayor, in the large house on the east side of town, and he'll wail over the impending abduction of Anatasia. The group can offer to deal with the monster that's coming for Anatasia, and he'll tell you to speak to the priest in the church. Do so and you'll set up an ambush - and a small boss battle.

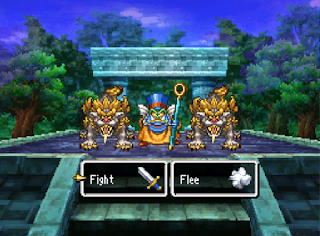
The party battles Master Kung and his two Foo Dogs, bosses in Dragon Quest IV.

Master Kung and Foo Dogs

HP:
  • 40 (Master Kung)
  • 23 (Foo Dogs)
This fight is a piece of cake. None of your enemies have much health, and two of the three are just normal monsters. Master Kung can Heal himself and the Foo Dogs, though for the most part he just attacks. All three of them fighting together can dish out a decent amount of pain, though the Food Dogs likely won't last long.

If you've boosted your party to level 5 Kiryl will know the Buff spell, and using it on the party (starting with Borya) will prevent Master Kung from doing too much damage with his staff. Wipe out the Foo Dogs, then everyone can gang up on Master Kung and beat him into submission. Borya's Sap spell will make this process even faster, though Master Kung has so little health that you might as well just blast him with Crack instead.

You'll receive a Seed of Life for defeating Master Kung and company. This will free Taborov from the threat of abduction, allowing you to continue your journey. Defeating Master Kung will also bring the Item Shop back online, and you can buy a new weapon: The Hunter's Bow. Everyone can use these, though you may want to prioritize sticking one on Borya so his normal attack isn't useless. 

Head north through the church - where you can now save - and out the other side to leave Taborov.

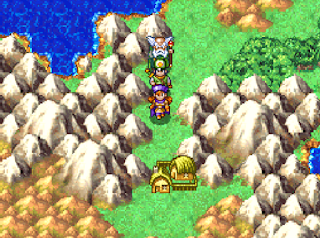
The party leaves Taborov for Vrenor, another town in Dragon Quest IV.

World Map - Vrenor Region - Enemies

  • Bullfinch - 20 HP
  • Carnivine - 17 HP
  • Firespirit - 12 HP
  • Funghoul - 19 HP
  • Healslime - 16 HP
  • Lickspittle - 13 HP
  • Mischievous Mole - 10 HP
  • Wiggly - 11 HP
Once you leave Taborov you'll wind up on a northeastern path to the next town, Vrenor. This walk is a bit more difficult, though you should be fine. Note that you'll start running into enemies who can Poison your characters, which will require either an Antidotal Herb or a visit to a priest.

It is standard procedure in Dragon Quest games to linger near a new town and build up levels a bit before moving on. That said, the Inn in the next town won't function when you first enter, so we'll head straight there before doing any grinding.

Alena's party enters Vrenor, a town in Dragon Quest IV.

Vrenor

Another countryside village - there are lots of them in this chapter - Vrenor is currently playing host to the Tsarevna of Zamoksva... and was doing so before Alena even showed up. That's suspicious. Better have a look around town before getting to the bottom of this mystery.
  • West of the entrance to Vrenor is a little shack, next to a cemetery. Check the pots inside for 10 gold.
  • There are two houses on the main path into Vrenor. The house on the left contains an Antidotal Herb, inside a pot.
  • In the east of Vrenor is an empty Weapon Shop. You'll need to deal with a few things before its owner appears.
  • In the south of Vrenor is the Item Shop, which also serves as the Armor Shop. You'll likely want to buy Chain Mail and Hardwood Headwear, if you can afford them.
  • In the southwest of Vrenor is the church, and when you enter the priest will come rushing in from his garden. There's an item in the garden, though you can't get it until you resolve the problems in Vrenor.
Your primary destination here is the Inn. Pop inside and check the second floor to discover an abduction-in-progress, as several seedy-looking men take off with the Tsarevna. (Again, not Alena.) Check the cabinet in the upper bedroom for some Plain Clothes, then follow the kidnappers out the door in the left wall to find an exit from the town. 

Before you follow the kidnappers out of Vrenor, however, you need to figure out what they want. Check the east side of Vrenor and you'll see a boy running squares with a dog. Speak to the boy and he'll reveal that he has a random letter, demanding the Armlet of Transmutation in exchange for the captive. It is located in a dungeon to the south of town, and since you can now use the Inn you may want to have a snooze. There are monsters waiting.

Alena's party prepares to enter the Vault of Vrenor, a dungeon in Dragon Quest IV.

Vault of Vrenor - Enemies
  • Bedbug - 23 HP
  • Crested Viper - 31 HP
  • Funghoul - 19 HP
  • Pickayune - 33 HP
  • Thorny Devil - 25 HP
The first dungeon of the second chapter, the Vault of Vrenor is small. You'll be in and out again within a few minutes, assuming you don't have trouble with the enemies. Having a few Antidotal Herbs on hand is recommended. This path will see you through:
  • Start by checking south of the entry stairs. A side passage will take you to a chest containing a Chimaera Wing.
  • Head west and you'll see a chest on a raised platform. It contains a Seed of Agility. North of the platform is another chest, containing 360 gold.
  • Walk around the north side of the raised platform and you'll find steps. These lead around the west side of the chamber, and up to stairs to the next floor.
  • South of the entry stairs on the lower floor you'll find a split in the path. Go right at the split, then south until you see a clearing surrounded by pillars. Take a left at this clearing and you'll find a chest containing Magic Water.
  • Return to the clearing with the pillars and head south. You'll soon come to a raised platform with steps leading west. Take the lower set of steps and you'll make your way to a chest, which contains the Armlet of Transmutation
With the Armlet in hand you can leave the Vault of Vrenor. If Borya is at level 7 you can use Evac to teleport out; otherwise, you'll have to walk back the way you came.

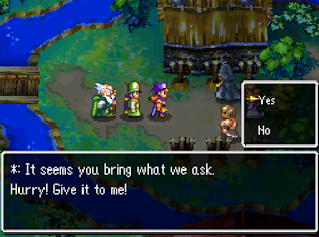
Alena's party negotiates with a group of kidnappers in Dragon Quest IV.

Return to Vrenor, heal your party, then idle around the world map until day turns to night. Enter the town and check the graveyard in the northwest of Vrenor, behind the shack near the northeastern entrance. Assuming you spoke to the boy with the letter (east side of Vrenor, with the dog) you'll find the kidnappers in the graveyard. Give them the Armlet of Transmutation and they'll leave the 'Tsarevna' behind, who, of course, is a fake. She'll give you the Thief's Key.

Saving the fake Tsarevna will put things to rights in Vrenor, and as an added bonus you can now visit the Weapon Shop and make purchases. Check out the church at night and the priest will leave his garden alone, allowing you to grab the Seed of Life sitting in the plants.

Leave Vrenor and head southwest. After some traveling you'll wind up at a new location: A tent in the middle of a desert.

Alena's party approaches the Desert Bazaar, a temporary location in Dragon Quest IV.

Desert Bazaar

A little marketplace in the middle of nowhere, the Desert Bazaar is your second-to-last town in this chapter. There are things to see while you're in the area:
  • The Weapon Shop, Armor Shop, and Inn are all right near the entrance of the Desert Bazaar. (You need to twist the camera to see the entrance to the Inn.) You can get a few upgrades at the Armor Shop, if you wish, though the Weapon Shop has more exciting items on sale. Borya can buy the Poison Moth Knife, which can Paralyze targets, while Kiryl can get the Holy Lance, putting him more or less on par with Alena for hitting power.
  • On the west side of the bazaar are six pots. Bust them open to find a Seed of Strength, a Medicinal Herb, and... Horse Manure.
  • In the northwest of the bazaar is a large tent, next to the Item Shop. Bust open the pots inside the tent to find a Seed of Agility.
While you're exploring the Desert Bazaar you'll spot a soldier from Zamoksva. He's standing just south of the tent where you found the Seed of Agility. Speak to him and he'll tell you that something is wrong with the Tsar, Alena's father. Head back to Zamoksva (Chimaera Wing, most likely) and you'll discover that the Tsar has lost his voice. 

Alena's party enters the rear of Zamoksva Castle, Alena's home in Dragon Quest IV.

Speak to the Tsar's advisor (the guy in purple who's roaming the throne room) and he'll tell you to speak to Old Starek. Head upstairs from the throne room, then check the Tsar's bedroom, which you can now enter thanks to the Thief's Key. Check the cupboards for 30 gold. Next, hop out the hole in Alena's room, jump down to the rear of the castle, and rotate the camera so you can see that there's a blue door. Head through.

Inside the castle you'll find Old Starek. Speak to him and he'll tell you to seek out the poet known as Josef Starling, who you may have met earlier in the game. Check the cupboard in Starek's room for a Chimaera Wing, and destroy the pots for a Magic Seed.

Leave Zamoksva Castle and head to Zalenagrad. Enter the large building in the north and climb to the second floor balcony. Josef is up here, and he'll reveal that his voice came from taking Birdsong Nectar, which he got from... the Desert Bazaar's Item Shop. Teleport back to the Desert Bazaar and speak to the owner of the Item Shop, on the west side of the bazaar, to learn that Birdsong Nectar can be procured from a tower in the west.

Leave the Desert Bazaar and trek southwest. It won't be long before you find the tower.

The party prepares to enter Birdsong Tower, a dungeon in Dragon Quest IV.

Birdsong Tower - Enemies
  • Crested Viper - 31 HP
  • Cyclown - 41 HP
  • Erazor Blade - 29 HP
  • Flyguy - 34 HP
  • Flying Doctor - 47 HP
  • Killer Gila - 34 HP
  • Peeper - 35 HP
  • Pickayune - 33 HP
  • Pteranodon - 41 HP
A bit longer than the Vault of Vrenor, Birdsong Tower is still not a terribly large dungeon - though it is appreciably more dangerous. The enemies have quite a bit more HP, and tend to use a greater variety of troublesome attacks. Fortunately for you, however, there's an Inn built into the tower, and you can find it through the door to the north of the dungeon's entrance. If you need to do some leveling (7 or 8 will do nicely) this tower is a great spot.

This path will get you through Birdsong Tower:
  • Take a left at the tower entrance. You'll see a thug standing outside a blue door. Go through the door to find stairs to the second floor.
  • Walk west of the entry stairs on the second floor, then south. You'll find a path to stairs up to the third floor. This path is a dead end, though you'll find chests containing a Seed of Strength and 1,200 gold. (If you didn't have enough money to buy new weapons in the Desert Bazaar before, you will now.)
  • Head back to the second floor. To the right of the stairs back to the first floor is a doorway. Go through, then head south as far as you can. You'll hit a path to stairs.
  • You're back on the third floor again. North of the stairs and on your left is a chest containing a Chimaera Wing.
  • Return to the stairs, then head west. Once you hit the far wall you'll see a lengthy pit to the north, running alongside the path forward. You need to carefully walk along the path and avoid the pit. If you mess up you'll drop back to the second floor. At the end of the path you'll find stairs.
  • Take a left on the fourth floor, then head south. You're done!
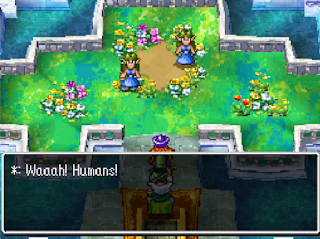
The party encounters a group of faeries in Birdsong Tower, a dungeon in Dragon Quest IV.

On the fifth floor of Birdsong Tower you'll find a small garden, as well as a pair of fairies. In their haste to leave they'll drop something. Check the blue sparkle on the ground to retrieve the Birdsong Nectar. Success! (Note that if you don't find the fairies up here you must have missed out on an NPC somewhere along the way. You have to speak to everyone listed above to receive the nectar.)

You can teleport from the top of the tower, so use a Chimaera Wing (or the Zoom spell, if Borya has reached level 9) to return to Zamoksva. Stand in front of the Tsar and use the Birdsong Nectar as an item from your inventory to restore his voice. Overjoyed, the Tsar will grant Alena permission to travel the world - and warn her of a growing evil.

Travel back to the Desert Bazaar and walk east. There's a small shrine here - one you may have visited already - and now that Alena has her father's blessing, the party can use the teleportal inside the shrine. This will shoot you across the channel near the shrine to another shrine, where you'll find an Inn - and an exit to another part of the world map.

The party enters the region surrounding Endor, an important city in Dragon Quest IV.

World Map - Endor Region - Enemies
  • Armoured Scorpion - 40 HP
  • Cyclown - 41 HP
  • Healslime - 16 HP
  • Metal Slime - 4 HP
  • Pteranodon - 41 HP
  • Restless Armour - 54 HP
  • Skeleton Swordsman - 52 HP
The second chapter of Dragon Quest IV is almost complete, and all that remains is the kingdom of Endor. You'll find the kingdom of Endor to the southeast of the shrine, and it is your only available stop in the region... at least for the moment. You'll be back here in the next chapter.

For the most part the monsters in the Endor Region aren't that notable. The one exception is the Metal Slime. Appearing in every instalment of Dragon Quest, Metal Slimes are evasive creatures with a few peculiar attributes:
  • Each one only has 4 HP
  • They're immune to magic attacks
  • Melee attacks usually miss
  • Metal Slimes will run from battle most of the time
All this makes Metal Slimes sound like a waste of time. Running into one is a blessing, however, as successfully killing a Metal Slime will earn the party a whopping 1,000 experience. At this stage in Dragon Quest IV your party members will virtually always earn a level if they kill a Metal Slime. It can take a while to run into one, however, and success is not assured, so it is up to you whether hunting Metal Slimes is worth the effort.

The party approaches Endor, a castle town in Dragon Quest IV.

Endor

A bustling city that has nothing to do with Ewoks, Endor is currently the home of a combat tournament. Before your party inevitably gets involved in said tournament, however, you should scour the streets for goodies. There's a lot to see.
  • The Armor and Weapon Shops are on the main roads of Endor, the former near the entrance of the city and the latter further north. If you are pressed for cash you should only spend money on equipment for Alena, as she's going to be fighting solo in the near future.
  • Across the road from the Armor Shop is a combination Inn / Tavern / Casino. Bust up the barrels on both sides of the bar on the ground floor to receive 16 gold and a Seed of Resilience. The Casino can earn you some excellent equipment, but you'll need to drop a ridiculous amount of gold. We'll revisit this place later in the game, when it is more... worth it.
  • In the southwest of Endor is a small, out-of-business shop. This building will play a major role in the next chapter. For now, check the cupboard on the second floor for a Silk Robe.
  • There are three jars between the Weapon Shop and the church, in the northwest of Endor. One of them contains an Antidotal Herb.
  • In the northeast of Endor, next to the Item Shop, is a two-storey mansion. Check the barrels on the ground floor for 40 gold.
The party approaches the front gates of Endor Castle, the end of their chapter in Dragon Quest IV.

Your primary destination in Endor is the castle, in the north of the city. There are a few additional things to collect inside before you get on with the story:
  • Enter the western door at the castle entrance. Head north down the hallway and you'll find a doorway on your left that leads to a tiny strip of land outside the castle. There's a hidden set of stairs here that leads to a chest containing a Seed of Life.
  • Enter the main area of the castle and go down the stairs in the north. You'll find a kitchen / eatery area. The barrels in the northwest contain 3 gold.
And that's all. Proceed to the throne room, up the stairs near the castle's main entrance, and you'll find the King and the Princess waiting. They'll explain that the Princess is set to marry whomever wins the kingdom's tournament... and the King wants that to be Alena, which would nullify the whole deal. Sounds like a plan.

Use either of the side doors on the front of the castle to find your way to the Endor Tourney grounds. Go through the door on your left and you'll be in the waiting room for battles, where you can rest at an Inn or purchase items from an Item Shop. There's also a church down here, though you can't use it to save.

The Endor Tourney is your final challenge in the second chapter. Go through the door in the north of this area and Alena alone will have to fight five opponents in a row. It's not that difficult a feat, though there are a few things you should do before you send Alena into the tournament:
  • Level Alena to 8 or more. You can get through the tourney at lower levels, but it isn't advisable for beginners. Get Alena over level 10 and you should be fine.
  • Buy the Iron Claw from the Item Shop. This is by far the best weapon for Alena in the second chapter. If you can't afford it, then go fight in the field until you can. You should also buy the best armor available to Alena, back in the city section of Endor.
  • Fill Alena's inventory with Medicinal Herbs. They're her only option for healing. You can use Medicinal Herbs between fights to avoid wasting turns.
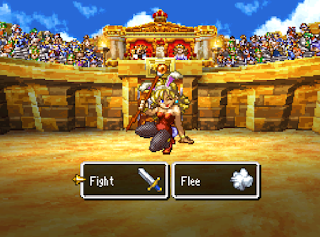
Alena battles Prima Donna, a minor boss in Dragon Quest IV.

Head up the stairs in the middle of the room when Alena is fully prepped. The opponents Alena faces in the Endor Tourney are as follows:
  • Attila the Hunk - 70 HP. A basic melee fighter.
  • Quick Draw McGore - 90 HP. Another basic fighter, though slightly evasive. Drops a Medicinal Herb.
  • Prima Donna - 90 HP. A spellcaster who can heal herself. Drops a Medicinal Herb.
  • Samson Knight - 90 HP. A basic melee fighter who can heal himself. Hits harder than any of the other opponents, so watch Alena's HP. Drops a Medicinal Herb
  • Abominable Showman - 55 HP. A melee fighter who can split himself into four copies. In order to damage the Showman Alena must target and hit the real one. There's no way to tell which one will be the real one, so this fight is down to dumb luck. Choose one of the Showmen and just keeping attacking that one until you hit paydirt, healing as necessary. An annoying battle, but not as difficult as it seems.
Alena wins the Endor Tourney, bringing an end to her chapter in Dragon Quest IV.

You're given the option to heal Alena after beating the Abominable Showman, but there's no point, as the final combatant never appears. This ends the tourney, with Alena as the victor. Huzzah! In the aftermath the King will suggest Alena return to Zamoksva with news of her success...

... though when you enter Zamoksva Castle you'll find it... empty. Search the upper floors for a bit of dialogue, then leave the castle to end the chapter. Ominous.