The third chapter of Dragon Quest IV puts you in the shoes of Torneko, a small-town merchant with big-town aspirations. This chapter plays out quite differently from the rest - your primary goal is to make money and move up in the world, not stop evil people - and is a great opportunity to build up a massive amount of gold, if you want to cheat a little.
The chapter begins in Lakanaba, Torneko's hometown, and his wife, Tessie, will give him a Packed Lunch to start the day. She'll give you another Packed Lunch each day, though only if you used up the previous one. You're now meant to head to the Weapon Shop and work as the man behind the desk, though you might as well have a quick look around town first.
- There's a Leather Hat in the cupboard in Torneko's house, next to Tessie.
- Outside Torneko's house are three pots. One contains a Medicinal Herb.
- Just north of Torneko's house is an Item Shop. There are two pots on the carpet, and one of them contains an Antidotal Herb.
- North of Torneko's house is another home, and out front is a fellow named Old Man Finn. He'll ask for a favor, and if you push him over to the church he'll give you a small, random handful of gold. You can repeat this process each day. (Though, uh, it is not worth the effort.)
- In the northwest of Lakanaba is the Armor Shop. Check the back of the shop and you'll find a rear door leading behind the front desk. Check the dresser upstairs to find a Leather Shield.
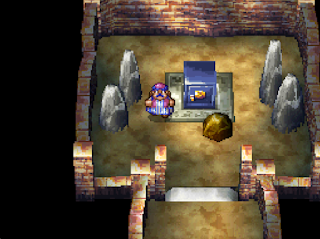
All that leaves is the Weapon Shop, in the southwest of Lakanaba. This is your first major money-making opportunity in the third chapter.
Running the Weapon Shop
Approach the Weapon Shop and the owner, Torneko's boss, will kick him behind the front desk. Your job now is to wait for customers, then sell weapons to the people who come inside. Torneko receives a small commission for each weapon he sells. Occasionally people will discover they can't buy a weapon and will just waste your time, and you can refuse to sell them something and haggle a bit, but for the most part this process is just tapping buttons. You can stop by moving away from the counter when no one is around.
Torneko begins with three items for sale:
- Oaken Club (30 gold)
- Copper Sword (100 gold)
- Divine Dagger (200 gold)
You can sell unlimited amounts of these three items. Every now and then, however, someone will come in and try to sell something to Torneko. These extra weapons will then go into the store's inventory, though only a single copy of the weapon. The store has unlimited gold, so you can buy whatever you like. The following weapons can be purchased this way:
- Hunter's Bow (350 gold)
- Chain Sickle (550 gold)
- Cautery Sword (3,500 gold)
Customers will occasionally pop in and try to buy these weapons, and if they do you'll lose them from the store's inventory. This is not to your benefit, as Torneko can buy as many copies of these three weapons as he likes from the store's owner, once the working day is over. You can use this method to purchase up to 99 Cautery Swords, then sell them later in the chapter at an inflated price. We'll get to that in a bit. Suffice it to say, once all three weapons are available in the shop (or at least a Cautery Sword) you should stop working here.
Speak to the owner in the basement to stop working for the day. He'll give you Torneko's share of the profits - it is quite piddly, regardless of how much you sold - and send you home. You can then speak to Tessie to sleep, which resets the store and repeats the whole process. After the first day you can speak to the Weapon Shop owner and purchase items rather than work.
Earning money via the Weapon Shop is all well and good, but it'll take a long time before Torneko is rolling in gold - and he'll still be at level 1, to boot. Eventually you'll need to leave Lakanaba and do some more traditional dungeon-diving, and if you speak to the innkeeper you'll receive a hint for where you need to go next.
World Map - Lakanaba Region - Enemies
- Healslime - 16 HP - Night only
- Mischievous Mole - 10 HP
- Scissor Beatle - 9 HP
- Slime - 8 HP
- Stump Chump - 16 HP - Night only
- Wiggly - 11 HP
The monsters around Lakanaba are as weak as they come. This is very much to your advantage, as Torneko is arguably the worst fighter in Dragon Quest IV. He's reasonable at melee combat, and... that's about it. Your primary advantage here is that you can get high-quality weapons early in this chapter, and outfitting Torneko with a Hunter's Bow, Chain Sickle, or Cautery Sword as quickly as you can will smooth things out.
Torneko's scenario grants him a few more advantages over the other chapters, as well:
- Torneko can rest at his house for free, and, assuming you used the Packed Lunch from the previous day, Torneko's wife will always give him a new one. Packed Lunches restore 30 HP.
- Occasionally while roaming the world map you'll run into encounters with friendly merchants. This comes in handy if Torneko is out of Medicinal Herbs.
- The monsters in this chapter drop much more useful - and valuable - items than anywhere else in the game. You'll collect a ton of equipment by killing monsters, and you can sell it to make a tidy profit. Of particular note are Steel Broadswords and Iron Armour, both of which serve a purpose later on if you collect six of each. Hold on to your Steel Broadswords and Iron Armour!
Stick around Lakanaba for a bit, until you've raised Torneko to level 3 or 4 and earned enough coin to buy new equipment. This should be plenty to get Torneko through the first dungeon of the chapter. Head northeast of Lakanaba and you'll find it.
Cave of Safekeeping - Enemies
- Bubble Slime - 12 HP
- Mischievous Mole - 10 HP
- Scissor Beatle - 9 HP
- Stump Chump - 16 HP
- Wiggly - 11 HP
This little area is pretty straightforward, and serves more as a puzzle than a proper dungeon. You won't find any significant side paths, and just need to solve a few brainteasers to claim the final prize. Follow these steps:
- Proceed through the dungeon until you see a door with a button on the front. If you hit the button the water behind the door will wash out and send Torneko south, to a pair of stairs. (You don't have to do this, but it's a little faster than walking.)
- Continue through the dungeon until you find a second door / button combo. Pop open the chest to the left of the door for a Chain Sickle. Press the button on the door to get washed down a level.
- North of your landing spot you'll find a split in the path. To the right you'll find stairs to the previous level, and to the left you'll find stairs going deeper into the dungeon. Go left.
- Follow the passage on the next floor until you see a huge boulder. If you walk south it will start to roll towards Torneko, and though it won't squash the merchant it will prevent you from backtracking. Run south, take the first right, go south again, take the left, then go north. This will send the boulder rolling into a gap in the south, allowing you to cross and find some stairs.
- You'll find the Steel Strongbox on the final floor. Alas, when you pick it up a security door will leap up, preventing Torneko from leaving. Push one of the two rocks sitting in the corridor to the Strongbox's room, pick up the Steel Strongbox, and then nudge the rock onto the button where the Strongbox was sitting. This will keep the door open and allow Torneko to leave.
Success! Make your way back through the dungeon and leave. Although it is optional, the Steel Strongbox will prevent Torneko from losing half of his gold if you fall in battle. Given the importance of gold in this chapter, having the Steel Strongbox isn't a terrible idea.
With (or without) the Steel Strongbox, Torneko's next task is setting up shop in a major city. There's no city more major in this region than Endor, to the south, though the bridge leading to Endor is currently out. You'll have to do something about that, and if you look southeast of Lakanaba you'll find a village where you can get started.
Shinnock
Southeast of Lakanaba you'll find a little village in the woods. This is Shinnock, a peculiar hamlet with some friendly - but quirky - inhabitants. You don't have to enter Shinnock just yet, but you might as well have a quick look around before pushing the story forward, as it begins important in a bit.
- On the east side of Shinnock is a small house. Inside you'll find a man, Archie O'Tect, who has fallen head over heels for a rather growly woman. Archie will need to be removed from Shinnock before you can reach Endor, but you can't do it just yet.
- Shinnock's Item Shop, in the middle of the village, only sells two items: Medicinal Herbs and Steel Broadswords. The price for the Steel Broadsword seems like a steal, and... it is. If you buy these items you'll instead receive either Horse Manure or a Cypress Stick.
- If you bust the pots behind the Item Shop you'll receive Horse Manure and a Medicinal Herb.
In the north of Shinnock is the home of the mayor. Check his cabinet for Boxer Shorts, then speak to the man. Any attempt to leave Shinnock at this point will fail, and only by spending the night at the mayor's home can Torneko return to the world map. Very strange indeed.
Whether you enter or skip Shinnock, your next destination is in the mountains to the southwest of the village.
Ballymoral
A surprisingly tiny castle town - compared to Endor, anyway - Ballymoral is experiencing some tough times. Losing your chief architect will do that. Torneko needs to perform a jail break, but you should have a quick look around first.
- The Armor Shop is near the entrance to Ballymoral, though the owner is currently out of stock. If you check the north side of the shop you'll find a side entrance, which will allow you to get at three barrels. One of them contains a Seed of Life.
- The Weapon Shop is on the east side of Ballymoral. The Iron Lance on sale is a good upgrade for Torneko, if you haven't taken the time to purchase a Cautery Sword. Bust up the pots inside the shop to receive 70 gold.
And... actually, that's all for side content. Speak to everyone in the castle and you'll learn that the king plans to invade Endor, though the lack of a proper bridge leading south has halted his plans. He needs Archie O'Tect back.
Torneko has other business, however. Buy a Chimaera Wing, if you don't have one already, and head to the northeast of Ballymoral Castle. Here you'll find stairs down to the dungeon, where a pair of guards are on constant patrol. Wait for them to start moving, then move into the little gap in the wall to the right of the stairs, across from one of the prisoners. If you're noticed Torneko will get booted out of the dungeon and you'll have to try again.
Speak to the prisoner across the hall once the coast is clear and he'll reveal himself as Finnegan, the son of the old man Torneko was pushing around Lakanaba. He wants out of his cell, and asks for a Chimaera Wing to make his escape. Hand one over and Finnegan will teleport out of the dungeon. You'll likely get caught at this point, but you're done here anyway.
Hoof it back to Lakanaba and you'll find Finnegan north of his home, in the northeast of the town. Speak to him and, in gratitude, the ex-convict will agree to lend Torneko his dog Fido. Lead Fido to Shinnock and he'll charge into the mayor's house, revealing the scam behind the village. The 'mayor' will beg forgiveness, and if you agree he'll give you Full Plate Armor.
This will release Archie O'Tect from Shinnock, and he'll head to Ballymoral Castle. His return will see the bridge south of Ballymoral fixed, and you can use it to travel to Endor. Success!
(At this point you can return Fido to Finnegan. Alternately, you can keep Fido, and he'll follow Torneko for the remainder of the chapter. Fido doesn't do anything, and will prevent a temporary NPC from entering the party, but, hey, if you like dogs...)
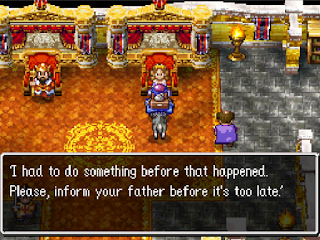
There's one last thing you should do before you head to Endor. Visit Ballymoral and check in with the realm's prince, Regan. He's on the west side of Ballymoral Castle, and he'll tell you to meet him behind the Weapon Shop. Waste time until nightfall, then check behind the shop, in the northeast of Ballymoral. Regan will give you the Prince's Letter, and tell you to give it to the princess of Endor.
World Map - Endor Region - Enemies
- Bodkin Archer - 16 HP
- Firespirit - 12 HP
- Mad Mole - 16 HP
- Splatypunk - 22 HP
- Stump Chump - 16 HP
The Endor Region is changed from your visit in the second chapter. The monsters are much weaker, and the bridges are fixed. This includes the bridge to the east of Endor, which leads to an optional dungeon that will earn Torneko a bunch of cash. Torneko can't use the shrine to visit Alena's former stomping grounds, alas, but there's plenty to explore here anyway.
Also across the bridge is the beginning of a tunnel. Inside is an old man who's trying to carve a path to a port town, and he needs 60,000 gold to complete the project. It is highly unlikely that you have this much money right now, and even if you do you'll still need to complete a few things in Endor. Getting 60,000 gold for this elderly gent is your ultimate goal in Torneko's chapter.
Endor
Seem familiar? Of course, you were just here with Alena. Endor hasn't changed much, aside from the NPC dialogue and the lack of a tournament. If you wandered around picking up items as Alena you won't find any new ones as Torneko. You should nevertheless poke around a bit, as there are a few new things to see:
- If you check the Casino you'll find that it has been temporarily shut down. The one plus side is that you'll find Ragnar down here, and he's still searching for the Hero. Torneko isn't invested in the main quest yet, so the two mustachioed men won't join forces. Still, it's nice to see the party is moving around the world.
- The Weapon and Armor Shops sell the same items as before. Notably, though, you can purchase an Astraea's Abacus for Torneko to wield. It isn't as good as a Cautery Sword, so if you already went through the trouble to get one this won't be of interest.
- There are two NPCs whom Torneko can hire to join him on his adventure. We'll talk about them below, as there's no point in hiring them just yet.
Down to business. If you enter the building in the southwest of Endor you'll meet an old man who wants to sell the place, though he needs a merchant who is willing - and licensed - to take it off his hands. Speak to the king, however, and he'll only consider giving Torneko a merchanting license. You'll need to do something to get the king's attention.
Walk up to Princess Veronica - she's in the throne room of the castle, near the king - and use the Prince's Letter as an item on her. The king will overhear the discussion and give Torneko a Royal Scroll. Head back to Ballymoral and similarly use this item on its king. You'll resolve the matter of impending war, and when you speak to the king of Endor he'll grant Torneko permission to open a shop in Endor.
Success? Not quite. The old man won't give his shop away for free, and wants 35,000 gold before he'll hand it to Torneko. It's possible to get this money just by wandering around and killing monsters, but there's a quicker way to get the job done. Torneko may need some help to achieve his goal, however.
Recruiting Help
As noted above, there are two NPCs in Endor whom you can temporarily hire to join Torneko's party. Each costs a different amount of gold, and brings a different set of skills to the party. The NPCs you can hire are as follows:
- Laurel - 600 gold for five days. You'll find Laurel on the second floor of the Inn. Laurel uses magic in combat.
- Hardie - 400 gold for five days. You'll find Hardie out front of the church. He won't join Torneko if Fido is still following you around. Hardie is a melee fighter.
If you take the time to outfit Torneko with the best equipment (hint hint, Cautery Sword) you don't really need to recruit these guys, though they will save Torneko a bit of time. Note that you can't manually control either NPC, which in Laurel's case sometimes makes for... questionable combat decisions.
Whether you grab Laurel and Hardie or not, your next destination is the swamp-side dungeon that's across the bridge near Endor.
Cistern Chapel - Enemies
- Bantamweight - 31 HP
- Elepus - 28 HP
- Flyguy - 34 HP
- Killer Gila - 34 HP
- Lugworm - 30 HP
- Metal Slime - 4 HP
- Splatypunk - 22 HP
- Vampire Bat - 25 HP
A watery dungeon, the Cistern Chapel is technically optional, but... you'd be crazy not to go inside. You get money much faster doing the dungeon than randomly killing monsters in the field and hoping for item drops. You can use the following route to get to the prize at the end of the Cistern Chapel:
- Head north of the entrance, then take a right, ignoring the stairs you find. There's a raft here that you can use to sail south, to a waterfall. It will drop you down two levels.
- Sail north, debark, and follow the path until you reach a larger chamber. There's a chest nearby that's out of reach, as well as another on Torneko's level. The accessible chest contains a Chimaera Wing. Head east through this chamber, then south, to find some exit stairs.
- Take the westbound path on the next floor. It will lead you to a floor button. Press it to lower the water in this area.
- Head back the way you came and you'll discover that the wooden platform leading to the stairs has been lowered, forcing you to the lower level. You'll find a chest containing an Iron Lance on your right.
- Return to the upper level and head west again. On the other side of a small, curved bridge you'll see stairs leading back to the lower level, with a skeleton near the bottom. Go beneath the bridge and you'll find a chest containing a Medicinal Herb. North of the bridge is a chest containing 760 gold, and further north of the bridge are four pots containing an Antidotal Herb and a Chimaera Wing.
- Head west of the skeleton. On the other side of another curved bridge and to the north is a chest containing a Holy Lance. There are two sets of stairs over here, one leading back to the entrance and the other leading deeper into the dungeon. Take the down stairs.
- You'll now be in the chamber with the out-of-reach chest, only now it has been flooded - and you conveniently have a raft to sail around. To the east you can get at four chests, on tiny islands, and they contain Iron Armour, a Steel Broadsword, and... well, someone beat you to the other two chests.
The flooded room also has a larger island with stairs built into the floor. Descend to the final level and you'll find a chest containing a Silver Goddess Statue. This is what you came here for, and with the statue in hand you can leave. The stairs two floors up will make this a short trip.
Return to Endor and pay a visit to the large, two-storey house in the northeast. There's a main on the second floor who will freak out when he sees the Silver Goddess Statue, and offer Torneko 25,000 gold. That will put you much closer to your goal of 35,000 gold, and you should take the man up on his offer.
You'll need to collect the remaining 10,000 gold yourself, though given the number of enemies you fought in the Cistern Chapel you likely have a fair amount of gold already - not to mention a bunch of equipment you can sell. (Remember, you want to hang on to Iron Armour and Steel Broadswords if possible.)You can also return to the Cistern Chapel and just kill monsters until you have enough money.
Once you fork over 35,000 gold to the old man in Endor he'll give Torneko his shop. At this point the scenario changes a bit.
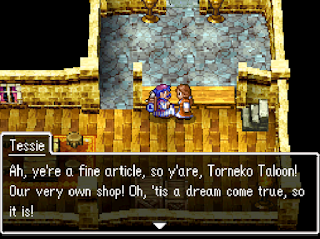
Moving to Endor and Paying for the Tunnel
Once Torneko buys the shop in Endor he'll move his family in, and you'll officially have your own store. You can speak to Tessie behind the counter to sleep each night, and she'll give you a fresh Packed Lunch in the morning. All is well... though the chapter isn't over yet.
Remember that old man who wanted to dig the tunnel? He's still waiting for 60,000 gold in funding, and now that Torneko has a shop he'll be willing to accept the money. You just... need 60,000 gold. Funding the tunnel excavation takes up the remainder of the chapter. There are a few ways to accomplish this titanic feat.
Your first option, suggested by Tessie, is to speak to the king of Endor. He'll put in a request for six Iron Armours and six Steel Broadswords. You can turn these items in to the king's commander, who is behind a desk in the northeast of Endor Castle's ground floor. There are three ways to collect these items:
- Iron Armour is sold at Endor's Armor Shop for 1,200 gold
- Steel Broadswords are sold at the Ballymoral Weapon Shop for 2,000 gold
- Both Iron Armour and Steel Broadswords are occasionally dropped by monsters
Successfully bring six of each item to the commander and he will give you 60,000 gold, which is just what you need to complete the construction of the tunnel. Well done! Of course, this isn't the only path to wealth...
Now that Torneko has his own shop you can leave items with Tessie to sell. Speak to her over the counter and you can drop off anything you like. Tessie will sell things at an extreme premium - almost double the normal value! - and when you visit her after wandering around for a while she'll hand over the money once you try to give her new stock. Considering how much equipment you can collect by killing monsters in this chapter, you'll earn a ton of cash in no time.
There's an easier way to make money than killing monsters and hoping for equipment drops, however. Simply go to a store, pick an item, and buy a bunch of it. Then hand everything you bought over to Tessie. It may take a bit, but she'll sell out her stock, and you'll earn double the money on your investment. This is where the Cautery Sword from earlier in the scenario comes in, as you can purchase as many of these as you like, then give them to Tessie to sell. Rinse and repeat until you're filthy rich. (Astraea's Abacus is also a decent purchase, if you didn't bother with the Cautery Sword.)
Is this enough to break the game? Almost! There's one problem with this strategy: Gold doesn't carry over between chapters. By the time Torneko rejoins the party he'll have lost every coin you' earned. That said, he will bring any equipment on himself, or in his bag, along for the ride. Pay for the tunnel, then invest all of your remaining gold in expensive items. You can then sell them when you reach the 'main' chapter of the game, and never have to worry about money again.
Regardless of how you earn your cash - and what you do with it - you need to give 60,000 coins to the old man in the tunnel, east of Endor. Once you do this you can no longer earn money from Torneko's shop, so make absolutely sure that you're done farming gold.
Head home, as the old man suggests,
and Tessie will inform Torneko that the Casino is up and running again. At this point you can, if you wish, turn your remaining gold into Tokens. This is
not a great idea, however, as Tokens cost 200 gold apiece in this chapter. You're better off investing your gold in items, then coming back here later when the exchange rate is more reasonable.
Speak to Tessie again after visiting the Casino and she'll have word that the tunnel is finished. That was fast. Say your goodbyes, then head to the tunnel. Once you pass through and climb the stairs at the end the chapter will draw to a close.


