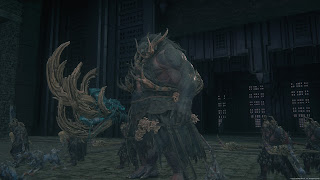
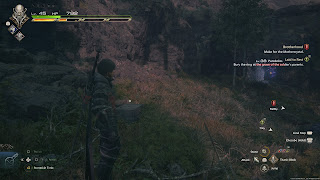
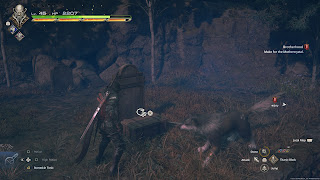
With Barnabas gone there's only one Mothercrystal left, and that's Drake's Spine. Clive gets teamed up with Joshua for this one, and you'll be heading north of Eistla to see the job done. Don't forget to return to the Hideaway to replenish your potions after the previous battle.
As a result of defeating Barnabas Clive now has the power of Odin. All of Odin's attacks are geared towards swift melee combat, though you may be surprised at how little damage each slice does. The trick here is that your Eikonic Abilities build up to an additional move, Zantetsuken, which inflicts heavy damage on one or more opponents. Build Zantetsuken up to level five and it is generally game over for your adversaries.
The Great Southern Gate / Kritten Hollow / Vidargraes - Enemies
- Akashic Courser
- Akashic Folkstaf
- Akashic Lindwurm
- Akashic Mastiff
- Akashic Miner
- Akashic Osfreyr
- Akashic Serf
- Akashic Sigfreyr
- Akashic Sprinter
- Akashic Tarantula
- Akashic Tognvaldr
- Belzecue
- Bomb
- Hyena
- Lich
- Lindwurm
- Ogre
- Orcish Fodder
- Orcish Mesmerizer
- Orcish Warlord
- Purobolos
- Pyrolisk
- Royal Courser
- Specter
- Sprinter
- Wild Chocobo
- Wraith
The Great Southern Gate / Kritten Hollow / Vidargraes - Random Items
- Black Blood
- Bloody Hide
- Clutchmine
- Gil
- High Potion
- Potion
- Revenant
- Magicked Ash
Your next stop, the Mothers' Mines, is located north of Eistla. Before you set off it is worth mentioning that there two Notorious Marks you can fight in areas you've already visited, near Eistla:
- Gobermouch is in Eistla itself, up a wooden framework to the west of the Obelisk
- Agni is located in a clearing in Halfcombe, where you fought a Plague
- Just west of where you come in is an Item, near some Chocobos.
- In the south is the ruined remains of a camp. There's an Item here, though if you approach a Wraith and some Specters will appear and attack. Check the supply tent in the camp for a chest containing Amber.
- Also in the south, just west of the camp, is a rock with an Item on it, as well as a gang of Pyrolisks.
- In the southwest is a large cluster of carriages, watched over by a Lindwurm. Check the south end of the road running through here to find a broken bridge with a chest on the end. You'll be attacked by Wraiths if you get close, but fighting off will allow you to open the chest, which contains a Meteorite. On the left side of the road, behind one of the carriages, you'll find another chest, this one containing twenty pinches of Magicked Ash.
- In the west of the area, just north of the carriages, you'll find a slumped body next to a ruined heap of wood. Beside the body is a Treasure Map. This hints at a treasure you can find somewhere near Kretov... wherever that is.
- First up are a bunch of melee-oriented mooks. The only one worth targeting first is the Folkstaf, who will use Warcry to make his teammates stronger.
- Second are Akashic Mastiffs backed by some Orcish Mesmerizers. Unsurprisingly, you want to take out the magic-wielding orcs first.
- Third are some Akashic Coursers and Osfreyrs. Nothing special here.
- Fourth is an Akashic Tognvaldr and several Orcish Mesmerizers. The field is wide, so stay clear of the Tognvaldr at first and focus on taking out the Mesmerizers. Once they're flattened you'll have room to fight the Mesmerizers.
- Last is an Orcish Warlord, and... a lot of other enemies. This battle isn't as crazy as it seems at first. Lure the Orcish Warlord away and let Joshua and Torgal handle everything else, which they're surprisingly good at doing. So long as you pull the Warlord a fair distance away from its soldiers it is more or less a one-on-one fight.
- Descend to the lower level of the fortress surrounding the gate and head northwest. You'll find a number of enemies out this way, not the least of which is a Lich. This fight is normal so long as you avoid getting the nearby Bomb and Purobolos involved. They can complicate things while you're trying to avoid the Lich. There's an Item among some supplies, near the Lich's starting point, and if you check the building the Bombs were guarding you'll discover it is a colosseum called Balmung Dark. You'll come back here for optional content, and for now it is locked.
- If you check the southeast end of the fortress' lower level you'll run into a pair of Osfreyr and an Orcish Mesmerizer. They're guarding an Item, as well as several big heaps of supplies. Among the supplies is a chest containing Amber.
- On ground level and between the two huge sets of stairs leading down from the fortress walls are several groups of enemies. They're guarding... an Item. Exciting.
- If you stick to the left side of the huge field at the bottom of the stairs you'll see a beast that resembles a Coeurl wandering around. This is Bygul, a Notorious Mark.
- Follow the western edge of the map to the north and you'll find a hill guarded by two Purobolos, just west of the entrance to Neverturn. There are two Items you can collect over here.
- Speaking of Neverturn, while this area is primarily important for providing a conclusion to the Laid to Rest side quest, you can also find a chest here. It's in the northwest of Neverturn, near a Purobolos, and contains an Empty Shard, a Goblin Coin, and thirty pinches of Magicked Ash.
- On the left side of the main path leading northeast is a rock with an Item on it. Also sitting on it are three Purobolos, so be careful if you go for the Item.
- If you look to your right as you head down the central path you'll see an Item way off to the southeast, against the eastern cliff wall. Bother to go out this way and you'll also find an Ogre that you can battle. It is nigh-identical to the Minotaurs you've fought elsewhere in the game, and not really worth your time, but... if you wanted to fight everything...
- If you stick to the east side of the field as you exit Kritten Hollow you'll run into a pack of Hyenas, near the edge of a cliff overlooking Vidargraes. There's a chest at the top of the cliff containing twenty pinches of Magicked Ash. Look east of the chest to see an Item against the periphery of the region.
- On the west side of Garnick is a little wooden pen with an Item inside.
- Check in the east of Garnick, near a well, for another Item. It's in some bushes.
- In the north and up some stairs is a house that will likely be important later, but which you can't enter just yet. Check the west side of the house for a chest containing a High Potion and twenty spools of Steelsilk.
- Look behind the conservatory building to find an Item, in front of a grave.
- In the southwest of the grounds is a cemetery. Check the upper section of the cemetery to find a chest containing twenty spools of Steelsilk. There's also an Item in the cemetery, on the lower level.
- Head east past the house on the grounds and you'll see an Item. Approach the Item and you'll be attacked by an Akashic Lindwurm. The Lindwurm is guarding the Hand of Enceladus Chronograph, which challenges you to play with only Odin as your Eikon. Look to the left of the Chronograph to find a chest containing an Empty Shard, thirty chunks of Wyrrite, and thirty Sharp Fangs.


