Part 12: Bean Valley and The Vinery
Main Walkthrough
Nimbus Land
When you reach the top of The Vinery you'll meet a pair of familiar, fluffy-looking folks. Hop onto the springboard near them and you'll be sent up to another cloud with two more springboards, as well as some holes in the ground. The hole to the left leads back to The Vinery, the lower springboard takes you back to the world map, and the upper springboard leads to your next destination, Nimbus Land.
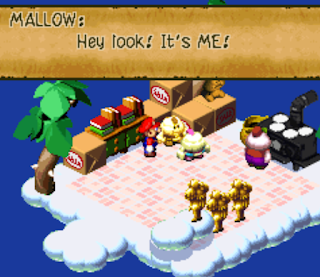
As soon as you appear in Nimbus Land you'll be treated to a confusing cut scene, as well as a party member who is clearly running a little slow in the head. Your next major destination is Nimbus Castle - assuming you can find a way in - but you might as well look around the kingdom a bit first.
- Right near the entrance to Nimbus Land is an item shop. It offers the usual upgrade to the majority of your party's equipment. Everyone in the party - except for Bowser, who for some reason is excluded completely - can benefit from a shopping spree at this store. If you climb onto the boxes in the rear of the store and leap towards the front desk you'll reveal a hidden chest containing a Frog Coin.
- The Inn is on the west side of Nimbus Land. Lodgings cost 30 coins a night, and you can pitch in an extra 30 coins to use the Inn's 'Dream Cushion', which will grant you an extra cut scene. If you dream of Toad you'll receive a Red Essence once Mario wakes up.
There's more to Nimbus Land, but you can't access the rest until you've cleaned up the whole missing prince situation. You can get started on this by visiting the northwestern home in Nimbus Land. Check the statue inside that looks suspiciously like Mallow and you'll watch a cut scene with Garro, the home's owner. Speak to Garro again and he'll cook up a scheme to get you inside Nimbus Castle, though by the time you regain control and have a chance to save...
Dodo Pecking
Your first trial inside Nimbus Castle is avoiding the incessant pecks of Dodo, the put-upon assistant of Valentina. Dodo is in a bad mood, and he'll move throughout the room, smacking the Valentina statues with his beak. This includes Mario, disguised as a statue, and you'll need to perform some careful jumps to avoid Dodo's pecks. Here are some tips for avoiding Dodo:
- Wait until Dodo cranes his neck back before you jump. Move too early and Dodo will run away, counting that moment as a fail. You can only screw up twice!
- Don't let your guard down for an instant. This sequence is short but tricky. Watch Dodo the whole time.
- Avoid jumping when Dodo isn't in front of you. Mario can mess around while Dodo is prowling the room and not get caught, but there are times when Dodo abruptly rushes over and surprises you. You'll be noticed if you're hopping about willy-nilly.
Successfully avoid Dodo's pecks - he'll try to hit Mario five or six times before giving up - and you'll find a Feather in the room with the save block. Get caught twice, however, and...
Dodo
HP: 800
Weakness: Fire
Burly though he looks, Dodo is a bit of a basic pushover. You shouldn't be in any danger if you're forced to fight him. Dodo uses the following attacks:
- A normal melee peck
- Multistrike, a single-target attack for moderate damage
- Flutter Hush, a single-target attack that Mutes a character
Yep, that's all. Dodo can do about 30 points of damage at the worst, and he doesn't have much health. Use normal attacks or Mario's Fire Special Moves to roast the bird.
Whether you got caught by Dodo or not, you're now free to explore Nimbus Castle, the game's next major dungeon.
Nimbus Castle
Enemies
- Birdy - 150 HP - Weak to Ice
- Bluebird - 200 HP - Weak to Fire
- Heavy Troopa - 250 HP - Weak to Jump
- Jawful - 278 HP
- Muckle - 320 HP - Weak to Fire
- Orbison - 30 HP - Weak to Jump
- Pinwheel - 99 HP
- Sling Shy - 120 HP
- Shaman - 150 HP
Welcome to Mallow's home, such as it is. If Mario is still disguised as a statue when you enter the first hallway you'll get an extra cut scene. Otherwise, now you can explore. The castle seems a touch maze-like, but it's not that bad.
Start by taking the first left from the room with the save block. This will bring you to the hallway filled with Valentina statues. If you walk all the way to the southwest you'll find the entrance to Nimbus Castle, and you can come and go as you please now that the guards are out of the way. Check the doorway on the left west side of the main corridor and you'll find two side rooms that will lead you to a chest containing a Flower. This is a dead-end from the lower level, so you'll need to backtrack.
Return to the hallway next to the save block chamber. There are two more doors you can take here, both of which ultimately lead to the same place. Take the northeastern door, however, and you'll find a chest containing a full heal. In the chamber where the two paths connect - there's a Heavy Troopa guarding a door here - you'll find a Flower in a chest, up in the northwestern corner of the room. Each door leads somewhere different:
- The western door will, after a few chambers of enemies, take you to a room filled with Nimbusians, as well as a save block. The guard in the western corner will give you Castle Key 1, and the fellow in blue will give you a Flower Jar. Just outside the save room are two hidden blocks - one right by the door exit, the other down an invisible pathway on the left side of the hall near the door - and they both contain Frog Coins.
- The eastern door will lead you to a dead end with a chest. The chest contains a Flower.
- The central door is locked, and you'll need Castle Key 1 to get inside. Make sure you heal and save before you enter, because something - someone? - wants to play.
Shelly / Birdo
HP:
- 500 (Shelly)
- 777 (Birdo)
- 10 (Eggbert)
Surprise! Agree to play with the, uh, giant egg, and after you crack the shell you'll discover a Birdo inside. Despite her cutesy looks Birdo can be rather dangerous if you're not careful. Shelly doesn't do anything, but Birdo has a few attacks:
- A single-target egg flurry that does moderate damage
- A single-target egg spit that does heavy damage
Birdo will start off with the egg flurries, then mix in the single-egg spits if you hit her enough times. If the single-egg spit hits a character who is defending it will ricochet off and become an Eggbert, which you can destroy with one attack. The resulting explosion will do some damage to Birdo. On the whole this is not the most efficient way to beat Birdo - she doesn't have much health, and can be taken down with normal attacks - but if you brought along a healer like Toadstool who won't do much damage, by all means, have them defend and see if you can generate an Eggbert or two.
Birdo will toss Castle Key 2 at you once you win the battle. You can use this to open the door in the rear of the room.
The room behind Birdo is one you visited earlier, if you checked out the eastern room in the hallway with three doors. You're now on the upper half of the room, and if you're careful you can hop onto the chest that used to contain a Flower. Hidden on top of it is a chest containing a Frog Coin.
In the next hallway to the northeast you'll find a door with a note out front. Check it for a cut scene, then keep going northeast. Beyond a Heavy Troopa you'll run into a cut scene with Valentina and Dodo, and the pair will flee. Follow them through the next few narrow corridors until you see a chest floating well above your head. There's an invisible platform beneath it, and you can use it to open the chest, which contains a very-short-lived Power Star. Use it to blow intot he next chamber and you can take out a few enemies, including a dawdling Dodo. (Or, if you like, you can just fight him again normally.)
Run out the final door of Nimbus Castle and Mario will drop waaaaay down, landing near the first two Nimbusians you met. Use the springboards to return to Nimbus Land - make sure you heal and save outside this area, before returning to the city - and you'll immediately get into a battle.
Valentina and Dodo
HP:
- 2,000 (Valentina)
- 1,000 (Dodo)
Weakness: Fire (Dodo)
You've been chasing Valentina around for a while now. About time she get her commupence. A multi-part battle with a bit of a twist, the fight with Valentina and Dodo isn't too bad, though it can take a while. Dodo uses the same attacks as before, while Valentina throws in a bunch of familiar spells:
- A weak melee attack
- Crystal, a single-target Ice attack
- Diamond Saw, a single-target magic attack
- Drain Beam, a moderate magic attack against your whole party
- Blizzard, a moderate Ice attack against your whole party
- Water Blast, a heavy magic attack against your whole party
- Petal Blast, an attack against your whole party that can turn characters into Mushrooms
- Aurora Flash, an attack against your whole party that can put them to Sleep
- Light Beam, an attack against your whole party that can put them to Sleep
This battle begins with Dodo abducting the party member in the middle slot for a one-on-one brawl. Ideally you want to put one of your fighters - Bowser, Geno, perhaps Mallow - in this slot so they don't get overwhelmed. Get Dodo's health down by about half and he'll run off, leaving your remaining two characters to fight Valentina for a bit. Keep damaging her and Dodo - as well as your missing party member - will rejoin the larger. From this point on it's a standard slugfest.
Aside from the status ailment attacks, which can be a major nuisance, Valentina is similar to enemies you've fought before. She tends to target the entire party, making Toadstool a staple member for lower-level groups, and you've seen everything she can do. By the time Dodo shows up again he'll be low on health, so concentrate all fire on him, then go after Valentina to finish the fight once Dodo stops moving. Valentina has a fair bit of HP, but her defenses aren't that great and she won't last too long against your full party.
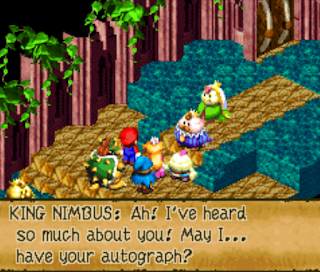
Valentina and Dodo will fly the coop once you take them both out, leaving behind a key. (If you want to see what happens to Valentina in the aftermath, check the top balcony of Booster Tower.) The team will meet up with the proper king and queen of Nimbus Land, and they'll point you towards Barrel Volcano, where the next Star Piece apparently crash-landed. Sounds good... though before you head to the volcano, you should give Nimbus Land and Nimbus Castle another quick once-over.
- Return to the passage where you found a Power Star in a chest in Nimbus Castle. The chest has regenerated, and if you jump up to it via the invisible platform beneath you'll now find a Flower inside.
- Check the room where the king and queen were previously locked away, one room southwest and on the left of where they are now. The guard standing against the wall in this room will give you a Flower Jar.
- Head back to the hallway in Nimbus Castle with three doorways, just before the room where you fought Birdo. There used to be a chest by the bird cage in the north, but now it is gone. Check the same spot and you'll find a new, hidden chest, this time containing a Frog Coin.
- Head out to the town and check the eastern-most home. Inside you'll find Croco, whom you haven't seen in ages. Surprise him and he'll drop a Signal Ring. If you walk around with the Signal Ring equipped on one of your characters and enter a room with a hidden chest it will chime, letting you know that you need to do some searching. (Though if you've been following this guide, there's, like... a small handful left, so...)
- If you walk along the edge of Nimbus Land's eastern boundaries you'll wander off of the clouds and find an invisible path. This leads to the recurring Shy Away who worked for Valentina. It will give you Fertiziler in exchange for letting it go. The Fertilizer is a necessary component for getting two of the best items in the game.
That's all for Nimbus Land. Drop down the hole that serves as the town's entrance, hop down, and then go down the hole on your right on the next cloud. You'll wind up by the two Nimbusians who guard the hot springs, and this time they will let you through. You can roast in the springs a bit, if you like, but ultimately you need to check to the right of them, where you'll find a drop down to your next destination: Barrel Volcano. It's, ah, not as pleasant as Nimbus Land.
Part 14: Barrel Volcano
Main Walkthrough


