The Gathering Storm begins with a message that Martha, an ally from earlier in Final Fantasy XVI, has gone missing. Speak to Otto in the Hideaway's Mess and he'll provide more details, though it ultimately boils down to checking Martha's Rest for clues. Once you speak to Otto you'll also trigger a new side quest, Caulk & Bawl.
Gear up at the Hideaway, then head to Martha's Rest. It has seen better days, and the only person still operating normally is the merchant on the west side of the area. Head into the Golden Stables, Martha's establishment, and one of Clive's men will tell him that Martha was marched off by the imperials. They've headed to Glaidemond Abbey, a place you've visited before.
Dark Clouds Gather
Reward: The Breath of Wind (Gouge), 60 Bloody Hides, 10 Renown
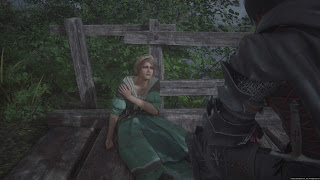
Glaidemond Abbey is in the southwest of Sorrowise, the western-most section of this larger area. Use the lift on the west side of Martha's Rest to descend to the bogs, then make your way southwest to the abbey. As you cross the eastern bridge (the western bridge is blocked) you'll find Martha, who will urge you onward to the abbey.
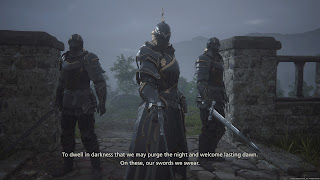
Complete the trek and enter the abbey. After witness what's inside Clive and Jill will be confronted by two Provincial Guards and three Black Shields. The Black Shields can put up a bit of a fight thanks to their defensive postures, but this small area leaves them terribly vulnerable to your AOE attacks. The fight shouldn't take long.
You'll earn Valley Madder and Wyrrite for defeating the soldiers, as well as the rewards listed above. This will end the sub-quest, but you'll still need to look for the abbot. Check the house to the left of the abbey for an answer to that question.
Release
Reward: Black Blood, 600 gil, 5 Renown
Clive will opt to handle the remains of the dead on his own. Follow the path through Sorrowise to the northeast, then south to a bridge named Riddock's Jump. Along the way you'll run into a bit of a surprise.
Reward: 10 Magicked Ash, 1 Meteorite, 5,000 gil, 10 Renown
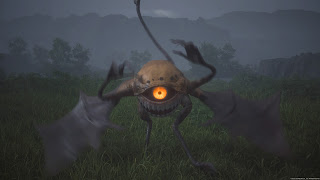
Ahriman is the first Notorious Mark you'll engage in Final Fantasy XVI. These monsters are mini-bosses, scattered throughout the lands, that test your combat mettle. Defeat them for rewards. Ahriman uses the following attacks:
- A bite attack
- An eye laser that travels in a straight line
- A pair of electric balls that travel slowly towards Clive
- A mine field that explodes after a few seconds
- Quaga, a mine field variant that erupts with earth spikes after a few seconds
- An AOE aura that builds up around Ahriman for a few seconds before exploding outward
- Doom, which after a four-second countdown creates a large AOE field around Clive that you'll need to escape before there's an explosion
This battle is a bit hectic. Ahriman specializes in hurling a multitude of projectiles and landmines in your way, and you'll need to dodge Ahriman's magic while still finding time to smack the beast around. You'll want to use your movement skills (primarily Phoenix Shift and Ignition) to stay in Ahriman's face as it teleports around, which in most cases will also take you past its attacks. Batter the eyeball mercilessly whenever you get in close, and save your Limit Break for the inevitable Staggers.
With the Ahriman removed you can proceed to Riddock's Jump. Check the waypoint on the left side of the bridge to set a few souls to rest. Return to Martha's Rest via the Obelisk, and check in with Martha at the Golden Stables. This will complete the sub-quest, and unlock a new side quest nearby: The White-Winged Wonder.
Return to the Hideaway. Gav is waiting for you in the Ale Hall, and speaking to him will begin a lengthy chat regarding Clive's next moves. Once that's done you'll have a new location to visit: Hawk's Cry Cliff. (You'll need to visit it once to unlock all of the other areas in the game. Don't worry, you can leave as soon as you've entered Hawk's Cry Cliff.) Reaching the end of this quest will also unlock a bunch of new side content:
- Visit the Mess and you'll find Gaute waiting with his Alliant Reports. Always handy.
- Next to Gaute is Desiree, who operates the Patron's Whisper. From this point on completing side content will usually earn you Renown, and you can turn it in for items via Desiree.
- The Moogle, Nektar, is running a Hunt Board in the Mess. Here you can learn of more Notorious Marks, and the general areas in which they're located. Defeating Notorious Marks is a great way to earn Renown, gil, and items.
- Last, and not included in the Alliant Reports, there's another new side quest available, and it's located in the Hideaway: The Fruits of Her Labors.


