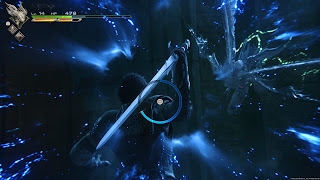
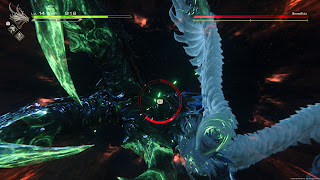
(Quick note: If you're playing the demo of Final Fantasy XVI, this section is the Eikonic Challenge, available after you've completed the rest of the demo. It's a bit different than the version in the main game, primarily because Clive has the Eikonic Abilities of a few more Eikons besides Phoenix.)
Enemies
- Royal Folkstaf
- Royal Gandfreyr
- Royal Mastiff
- Royal Osfreyr
- Royal Sigfreyr
- Royal Tognvaldr
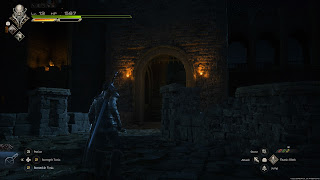
Welcome to Caer Norvent, currently under the stewardship of Benedikta. The first few rooms are twisting but straightforward, at least until you reach an empty dungeon. Beyond a gate that Clive and Cid will need to open together you'll run into a room of soldiers. These cramped quarters make for a bit of a hairy battle if you don't use your Eikonic Abilities, though you can sweep through foes in a hurry if you do employ your powers.
The exit door is on the right side of the room, though a peek outside will determine that there are many soldiers waiting. You'll need to find an alternate route, and your main option is to go out the window on the left side of the room. (Try to backtrack the way you came in for a bit of snark from Cid.) Here the path splits in two, and you can take either route. We'll have a look at both.
Lower Path
If you choose to stick to the ground and go through the archway on the other side of the window you'll find some Wyrrite on your right. Go up the stairs near the Wyrrite to find a Potion on the battlement. Head back to the lower level and follow the main path to find some Steelsilk, right near a wooden scaffold that you'll need to climb.
On the other side of the scaffold you'll run into another group of soldiers. Here you'll run into your first Gandfreyrs, which are royalist spellcasters who can annoy you at a range. They tend to skulk in the rear of the enemy lines and will use AOE attacks. Prioritize taking them out first, then go after the rest of the enemies. The exit is through the torchlit doorway on the left, where you'll also find a Bloody Hide.
Once you go through the exit door this path will link up with the upper path.
Upper Path
If you choose to climb you'll need to go up the stairs to your right when you come out of the window. At the top of the stairs is a gate, and it leads to a confrontation with a group of soldiers. At this point you'll start running into Gandfreyrs, and they can use their spellcasting abilities to bother you at a distance. They stick to the fringes, so rush them and take them out first.
On your left is another gate. Go through to find stairs leading to a bit of an alleyway, where more soldiers wait. Wipe them out to collect two Pinches of Magicked Ash from the ground. If you check across from the exit door at the bottom of the stairs you'll find a chest contianing 50 gil and five Spools of Steelsilk.
Through the door at the bottom of the stairs this route will join up with the lower path route.
Main Path
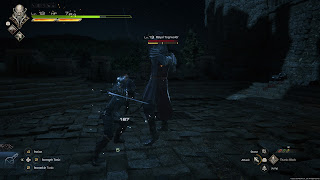
The two paths will converge on the same, small courtyard, and you'll get into a battle with a Royal Tognvaldr. These guys are more or less the same as the Midnight Raven that you fought in The Greatwood, though they can't use some of the more advanced, second-phase moves, such as Assassinate. Still, this one can kick your butt with the following attacks:
- A variety of acrobatic sword strikes
- A teleporting attack heralded by wisps of green magic
- Katon, a stream of fire
- Raiton, a lightning attack that strikes multiple marks on the ground
The Tognvaldr is slower than the average boss, but he can still hit quite hard, not to mention catch you off-balance if he uses his teleporting attack. Give the Tognvaldr some room, wait until he launches an attack, and either try for a Parry - sword strikes only - or just dodge out of the way. Then use an Eikonic Ability to chip through his Stagger Gauge.
Once the Tognvaldr is toast you can proceed through the next gate, on the right side of the courtyard. Beyond you'll find a chest containing The Flavor of Fire (Scarlet Cyclone), some stairs, and a Potion. When equipped any accessory bearing the name of an Eikonic Ability will make that Ability stronger, which is handy if you have any favorites. Go up the stairs to find two Sharp Fangs, as well as some retreating soldiers. Follow the soldiers...
... and you'll wind up on a long approach to your next major destination, to the right. There are a bunch of enemies here, notably the Royalist Folkstaf. These guys have strong guards, and will often defend and throw off your melee attacks, similar to a lot of bosses. Lock on and circle around them to strike from behind and ignore their defenses. You can also use your Eikonic Abilities to rip right through them.
Take out three waves of enemies and you can proceed through this area. On the other end is a chapel, and waiting inside are a pair of nasty bosses. Push your way inside and check on your left to find a chest containing ten Bloody Hides, then collect the Potion on the central path and open the gate ahead. Things are about to get hectic.
Chirada and Suparna
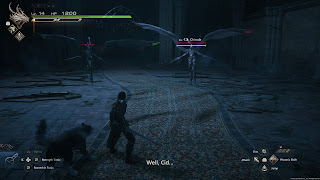
Chirada is back, and this time she brought a friend along. Cid is out for the count, so you only have Torgal to help against the winged sisters, and he doesn't do a ton to split their attention. Ah, well... Chirada and Suparna use the following attacks:
- A charging thrust (Chirada)
- A spinning slice (Chirada)
- An overhead kick (Chirada)
- A straight line magic attack (Suparna)
- A series of criss-crossing wind magic attacks (Suparna)
- A cluster of wind-based landmines (Suparna)
- Perfect Storm, a joint attack where Chirada charges at you repeatedly while Suparna lays down windy landmines to try and trip you up
- A cinematic double attack that will give you a chance to Stagger both enemies
- Inheritance, which grants the surviving enemy the powers of the defeated enemy, as well as beefs up some of the attacks
The first half of this battle is a two-on-two. Chirada will spend her time trying to get into Clive's face, chasing you around the battlefield with thrust attacks or spinning slices. Suparna, meanwhile, will stay off to the side and use her magic to try and catch you off-guard. Once you defeat one sister the remaining enemy will use Inheritance to snag their powers, pitting you against a single foe that uses melee attacks and magic.
You can target whichever enemy you like in the first phase, though the better choice is Chirada. It isn't that difficult to see Suparna's attacks incoming, thanks to the line effects that appear on the ground, and if you try to go after Suparna she'll constantly find ways to flee. Chirada, on the other hand, is always getting in your face, and you'll have many opportunities to avoid her attacks and get in counterattacks. Parrying is a viable strategy, though your timing needs to be perfect to avoid return damage.
The battle against a single opponent is a bit easier, though ultimately fiercer. Every attack is still coming at Clive, and they all tend to be just a touch more dangerous than before - particularly the combos. Never assume that your target is done swinging after a single strike. That said, your tactics won't change all that much, and it becomes quite a bit easier to use Eikonic Abilities in the second half of the battle. Rely on these and you'll Stagger away Chirada / Suparna's HP in no time.
Once the battle ends you'll be down one Cid, but the path forward will be clear: Climb. Go upstairs until you reach a hallway that branches in two directions. Take a left and you'll find a door to a bedroom, inside which is a chest containing a Meteorite. Down the right path you'll find a Potion, as well as the way forward.
Beyond the Potion the path will veer right. There's a door straight ahead, before you go right, and if you pop inside you'll find a storeroom. Check around it for a Bloody Hide, a High Potion, and a chest containing The Favor of Fire (Heatwave). Keep following the main hallway and it will bring you to another door, as well as a Potion.
On the other side of the door you'll run into a small contingent of soldiers. Included among them are several Royal Gandfreyrs, and these ones will use Cure to keep the other mooks healthy. Head to the edges of the room and take out these healers first, then unleash Eikonic Abilities on the enemies that likely followed you around. The exit is on your left once you wipe out the enemies.
There are stairs ahead, and they will take you to a break in the wall that leads outside. You can collect 2 gil along the way. Climb up to the battlements and you'll wind up in another quick battle. The enemies were guarding a door back inside, where you'll find stairs. Check on your left once inside the door and you'll find a Potion at the bottom of a set of stairs.
Head upstairs and you'll soon run into two more easy enemies. Keep following the hallway and you'll find a dead end with some Wyrrite. In this hallway is a door leading into a meeting room with a small legion of soldiers. They're more of the same, though the darkness of this area - not to mention their significant numbers - makes it easy to get blindsided. Make liberal use of dodging to avoid any lucky attacks, and, as ever, go after the healers on the edges of the room first.
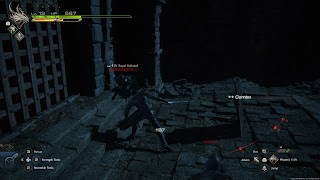
A door on the other side of the meeting room will take you to more stairs. Climb them to find two Sharp Fangs. Through the next door you'll run into another Royal Togynvaldr, and this time he has help in the form of a few Royal Mastiffs. It's easy to forget that the Mastiffs are prowling around, and they can easily mess with your flow as you try to avoid the Togynvaldr's attacks. Make a point to take out the Mastiffs before you engage the greater threat. Otherwise, this fight is the same as the last one, albeit in more confined quarters.
Take out the Togynvaldr and you'll find the exit to the left of where you came in. The next room has a High Potion on your left and a door on the right, which leads into the Green Tower. Snag the Potion at the bottom of the nearby stairs, then make the climb. You'll find two more enemies, two Pinches of Magicked Ash, a Bloody Hide, and a Potion on your way up the tower. Be ready once you reach the top of the tower, as you're about to face down a terrible foe.
Benedikta
Yep, Benedikta's the final boss of Caer Norvant, and she makes for quite the opponent. Spanning several phases that get progressively more difficult, Benedikta will keep Clive fighting for a long, long time, and you'll likely run through all of your supplies taking her down.
During the first phase Benedikta is 'normal', and fights somewhat similarly to Clive, employing a sword for close-up slashes and stabs and magic for ranged attacks. You can expect the following from Benedikta's first phase:
- A series of quick, whirling sword slices
- A quick thrusting attack where Benedikta rises into the air briefly
- Ranged wind bursts
- A spread of five wind blasts that move slowly towards you
- Aerora, a single, fast-moving blast that comes after the spread of magic blasts
- Aeroga, a slower blast that hits the ground and creates an AOE field
- Wind Blade, a series of long-range, wide slashes
- A shockwave that knocks you away from Benedikta, usually used after you've hit her several times
- Sweeping claw attacks
- A ground-pounding claw attack
- Magic blasts fired at you while Benedikta is flying to the side
- Nosedive, an overhead attack similar to Jump - avoid the mark on the ground
- Aerial Slash, essentially the same attack as Wind Blade but with more slashes to dodge
- Aero Rain, a series of magic bursts directed at you as Benedikta flies around the arena
- Aeroga functions the same, though Benedikta will launch three bursts at you rather than one
Benedikta becomes much more mobile in this phase, and you'll want to Lock On to her so you don't lose track of her position. It is quite difficult to close the gap on Benedikta in this phase, so your best bet is to fire magic at her from afar and dodge her attacks. Once she uses her claw attacks or Nosedive she'll give you an opportunity to smash her around with Eikonic Abilities and build up her Stagger. Avoiding Benedikta's claw attacks is easily the most difficult part of this phase, and you'll want to dodge to the side to get away as soon as she comes at you.
Do enough damage and Benedikta will use an attack called Rammelfall to try to flatten Clive. Cinematic actions will give you a chance to Stagger and damage Benedikta. She'll add yet more attacks to her arsenal:
- Tornado, which conjures a large vortex that eats away at your health if you remain too close
- An improved Aerial Slash, which adds vertical slashes alongside the horizontal slashes
- Gathering Clouds / Rammelfall, which tries to suck you into one spot so Benedikta can flatten you with a big rock
- Benedikta will create claws with greater range to try and rake you
- Benedikta will create a rain of small claws into the ground, followed by the large claw from earlier in the fight
- Tornado adds little wind landmines all over the battlefield, in addition to the vortex
- Deadly Embrace, a swift attack that grabs Clive and either pulls him to Benedikta or gives her an opportunity to zip to him
- Twister, a combo attack that Benedikta will use to inflict heavy damage if you get caught by Deadly Embrace and can't get away

