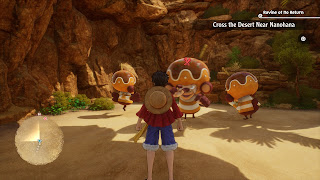
Ravine of No Return
Monsters
- Achisa - Weak to Technique
- Ambling Stonecrop - Weak to Power
- Desert Bandit - Weakness varies
To reach Crocodile, your objective, you first need to get to the Rainbase. This isn't easy, as the Rainbase is located on the other side of the Ravine of No Return, an area with an obscured map that will mess your team up and send you back to the entrance if you go the wrong way. A traveler on the edge of the Ravine of No Return recommends you get a Navi Bird from Nanohana in order to proceed.
On the western outskirts of Nanohana, before you reenter the cave to the Desolate Valley, you'll find a Navi Bird sitting on a bird post. The Navi Bird will only help if you collect Desert Nuts for it. This will begin the Side Story Hungry Navi Bird, which will have you collecting ten Desert Nuts for the creature. You can shoot them off of buildings in Nanohana with Usopp. Pretty simple.
Head back to the entrance of the ravine and you'll find the Navi Bird waiting. It will fly off along the following route:
- Down the eastern tunnel from the entrance.
- East from the clearing with the three Achisa.
- North of the cave area with the statue and the palm trees in the middle.
- North of the clearing with the fallen statue.
- West of the clearing with the fallen statue surrounded by grass. Go east from this clearing and you'll find a dead-end area patrolled by Desert Bandits, guarding a chest that contains Bronze Bat Soup. Another chest containing 14,000 Berries is sitting at the top of a rise in the rear of the clearing, as well. This is the base of Beast Tamer Mooji, if you've accepted his Bounty Hunt.
- North of the clearing with the statue surrounded in purple crystals. Collapsed Joe somehow made it here, and if you give him two Energy Apples he'll give you two Excite Apples in exchange.
Check on your left once you emerge back into the desert to find a chest that's guarded by an Ambling Stonecrop. The chest contains some Bronze Bat Soup. Further north you'll find a save point, as well as a steel door that Zoro can't cut through just yet. (Once you can you'll find Freeze Element Jewelry in a chest beyond the door.) Follow the Navi Bird east to properly exit the Ravine of No Return... and run into some trouble.
Sandora Dragons
Weakness: Speed
Those are some big beasties. The Sandora Dragons are pretty basic opponents, and will use normal melee attacks against one or more of your characters. They can do a fair amount of damage with each one, but you shouldn't have any trouble healing the pain away with Chopper or items. Usopp and Nami will do the most damage in this fight, and Robin and Zoro will provide neutral damage without taking too much in return. Luffy will get called out near the end of the fight to finish off one of the dragons for extra experience. He will do very little damage to them, so leave most of the damage-dealing to Nami and Usopp.
If you want to optimize this battle you can also Paralyze the Sandora Dragons, as suggested by a traveler earlier in the desert. Usopp's Trick Balls - specifically Shocking Balls - and Nami's Thunderbolt Tempo Skill will both do the trick. Once Paralyzed the Sandora Dragons will lay around and do nothing for a turn or two.
You'll earn Sandora Dragon Meat, the Sandora Dragon's Record Cube, and the Sandora Dragon's Power for defeating the two Sandora Dragons. Continue north of here and you'll reach the next stage of your journey, the Great Sandy Desert.
Part 7: Head to Rainbase - Great Sandy Desert


