Main Walkthrough
Tressa's second chapter takes place in the mining town of Quarrycrest, located in the west of Orsterra. To reach the town you'll need to leave Bolderfall and travel south to South Bolderfall Pass. The western exit here will bring you to South Quarrycrest Pass. Head north through the pass to find Quarrycrest.
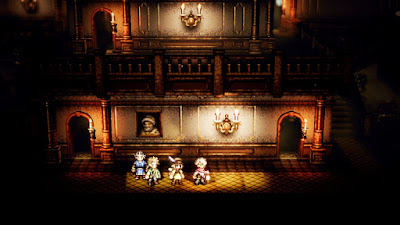
You need to come to Quarrycrest for Cyrus' second chapter, so it's possible you've been here already. If not, it's worth looking around Quarrycrest a bit before getting into the nitty gritty of Tressa's story:
- There's a Townsperson right at the entrance who will tell you you're now in Quarrycrest. Inquire / Scrutinize him to learn Smarter Bartering for Quarrycrest.
- East of the entrance of town is the Inn. Beside it is a chest containing a Pseudo Gold Ore.
- Near the save point in the middle of town is a house with a chest outside containing a Dubious Gold Ore. The Laborer blocking the house has two Fool's Gold Ores to Steal / Purchase that are worth 4,000 leaves apiece. The Laborer himself is incredibly powerful if you Challenge / Provoke him, though if you can beat him and get inside the house you'll find an Elderly Woman from whom you can purchase a Forbidden Spear (for 69,000 leaves, but still).
- Just north of the Provisioner on the west side of town is a Townsperson with a Fortifying Nut (M) that you can Steal / Purchase. Continue up the ramp to the right of her to find a house. Inside is a chest containing a Wind Soulstone (M).
- On the far west side of town is a bridge leading to the Road to Morlock's Manse. The Townsperson standing by the bridge has a Silver-filled Pouch, a Protective Ring, and a Critical Bracelet to Steal / Purchase. The Pouch sells for 8,000 leaves.
On the east side of town you'll find a path to the Quarrycrest Mines, which is a continuation of Quarrycrest.
Quarrycrest Mines
There's more stuff to find on this map, as well:
- The Tavern is in the middle of this area. To the left of the Tavern is an Inquisitive Woman with a Crescent Knife that you can Steal / Purchase. If you Scrutinize / Inquire the Laborer inside the Tavern you'll earn a Discount at the Inn.
- Across a bridge to the west of the Tavern is a wooden crane attended by a Laborer. Beside him is a chest containing an Herb of Valor.
- Across a gangplank near the previous bridge you'll find two Laborers conversing. Near them is a chest containing a Healing Grape Bunch.
- Climb the ramps in the north and you'll come to The Egg Man. You can Steal / Purchase a Pole Mace from him. He'll be part of a Side Story later on. Keep following the ramps and you'll come to a dead end with a chest containing a Fool's Ore Gold. The nearby Laborer has another Fool's Ore Gold and a Silent Bandana that you can Steal / Purchase. The Silent Bandana is especially good if you're looking for a boost to evasion.
That's all for Quarrycrest. On with Tressa's Story. If you turned down the opportunity to trigger Tressa's story when you first entered the town you can go to the Tavern, speak to the Tavern Keeper, choose Hear a Tale, and proceed from there.
Chapter 2
Still following on the footsteps of the mystery author, Tressa will read a little more from her old travel log, then overhear something about a Laborer striking gold. Tressa will decide to set up shop in the town... at least until Mr. Morlock, the owner of the mines, shows up. He seems generous, but there's something weird about the way he'll pay for his own property. (Also, someone ominous is keeping an eye on things.)
Trek up the ramp of the Quarrycrest Mines and Tressa will come across a Migrant Worker who's frustrated by his lack of progress. Purchase the Nondescript Stone he has for 500 leaves, however, and Tressa will discover that the rocks contain gems. This will bring the ominous figure - another traveling merchant by the name of Ali - over to explain what the gemstones are. He good-naturedly ribs Tressa for her inexperience and leaves.
Tressa will polish up the gemstones and sell them for 1,500 leaves. Not a bad profit. Trek up to Quarrycrest Mines again and look for a Laborer on the west side of town. He has another Nondescript Stone for you to Purchase. You can find two more such Laborers up the ramps on the north side of the Mines; buy their Nondescript Stones as well.
Return to the lower section of Quarrycrest once you have all three Nondescript Stones. Tressa will again sell them at the town square - though Ali will promptly show up and upstage her. Once they're done talking, head towards the entrance of Quarrycrest to trigger another cut scene. Ali isn't so bad... though Mr. Morlock, and his henchman Omar, are. Omar will beat the snot out of Ali and drag him away to Morlock's Manse. You'll earn 500 leaves and lose your skystones.
Prep your party, then head west out of Quarrycrest. Your next destination is Morlock's Manse.
Road to Morlock's Manse
A continuation of the rocky canyons surrounding Quarrycrest, the Road to Morlock's Manse is, unsurprisingly, full of enemies to beat up:
- Lloris - Weak to Dagger, Fire, and Wind. Pretty basic melee opponent.
- Great Condor - Weak to Polearm and Bow. Can hit the whole party with Thousand Scythes for decent wind damage.
- Two-handed Hatchling - Weak to Sword, Polearm, and Axe. Specializes in physical attacks. A bit beefy, but nothing special.
- Armor Eater - Weak to Sword, Axe, and Wind. Buffs itself then attacks the party. Doesn't hit that hard, but is difficult to kill because its defenses are so high. Generally safe to leave it until last.
Head west from the entrance to this area, past the save point. The path will split to the north and south. Check to the south to find a chest containing a Healing Grape (M). Check north and you'll find a winding path that ultimately leads to the end of this area. Along the wall you'll find an Inspiriting Plum, a save point, and a chest containing 5,000 leaves to the east of the save point. Grab then items and head into the manse.
Morlock's Manse
A misty manor filled with danger, Morlock's Manse has the following new enemies to fight:
- Morlock's Mercenary I - Weak to Polearm, Dagger, Ice, and Dark. Uses a number of melee Skills. Pretty basic.
- Morlock's Mercenary II - Weak to Polearm, Dagger, and Ice. Similar to the first Morlock's Mercenary, though a bit stronger - in exchange for being easier to stun.
- War Dog - Weak to Axe, Bow, Fire, and Lightning. Hits hard and can use Horrific Claw to seal Boost, but is pretty easy to stun. Knock them out of commission quickly with Tressa's bow.
- Sentinel - Weak to Sword, Polearm, Axe, Bow, and Staff. Buffs its own party, then usually Self-Destructs when it's by itself. Does damage to the whole party, but not a ton.
- Thunder Sentinel - Weak to Sword, Polearm, Axe, Staff, and Wind. Uses Light Grenade and a weak normal attack. Can largely be ignored, or just broken with Trade Tempest while you deal with other enemies.
- Tempest Falcon - Weak to Polearm, Dagger, Bow, and Wind. Can cause trouble with Thousand Scythes against your whole party. Easy to stun with Trade Tempest, fortunately.
You'll start out at the bottom of intersecting stairs that lead to the second floor. Climb them and check the room on the left to find a chest containing a Healing Grape (M), then trek to the east side of the manse. Back on the ground floor you'll find two connected doors leading into a library. A chest in here contains an Energizing Pomegranate (M).
Go up the stairs to the right of the library to find a save point and several doorways. Go through the door beside the save point to find a room with a chest containing a Conscious Stone. You can exit this room on the left to find a balcony pathway. It leads to a dead end room containing a Wind Soulstone (M).
Backtrack to the save point and go down the hall on the right. You'll enter another two-story area. Check the room on the lower floor, to your left, for a Refreshing Jam, then head up the stairs to the second floor. There's nothing in the first room up here, but the second has a purple chest containing a Hasty Helm.
Keep following the path upstairs until it takes you back downstairs. On the west side of the manse you'll find a save point, a chest containing an Olive of Life (M), and a doorway. A cut scene follows when you enter the doorway, and, unsurprisingly, Mr. Morlock will call in help to stop the party rather than dirtying his own hands.
Omar
Weakness: Polearm, Dagger, Staff, Ice, Light
Weakness (Omar's Footman): Sword, Axe, Lightning, Wind
Omar's a nasty combatant. He generally sticks to physical attacks - a normal melee attack, Sideswipe to hit the whole party - though he can also buff his team on all fronts melee. If Mr. Morlock is getting his money's worth then Omar will use Overhead Swing on his next turn, inflicting a heavy amount of damage on one character. When you break Omar and he recovers he'll tighten his defenses, raising his number of defensive shields by two, to a total of nine after being broken twice. For a change the two Footmen are about as dangerous as Omar in the fight, and if you get very unlucky their two group attacks - Violent Slash and Vacuum Slice - can come close to decimating your party, assuming they both use them one after the other.
Tough fight. You really need to take out the two Footmen first, as their attacks combined with Omar's are incredibly dangerous. Focus on breaking both, then wallop one of them with your hardest attacks until they go down. Tressa's Hired Help - Mercenary move really helps during this process, thanks to the defensive buff to your whole party. Don't go after Omar until the second Footman is defeated. Omar is strong, but he's a bit on the slow side and shouldn't get to go that often until you've taken a number of moves. So long as at least three of your characters can target Omar's weaknesses keeping him stunned and away from Overhead Swing shouldn't be too difficult. Olberic's Thousand Spears Skill is especially useful at destroying Omar's shields. Then it's just a matter of keeping your health up while whittling away at Omar's. He may call in reinforcements again, but they'll be weaker the second time around, and it will take a while.
You'll receive Omar's Axe and a Healing Grape (M) for defeating Omar and his goons. Tressa will drive Morlock and Omar out of town, and Ali will reveal the true story behind his father's reputation. He'll then recommend Tressa check out the Merchants' Fair, in far-off Grandport. Guess that's her final destination - though first she needs to make a trip to Victors Hollow.
Main Walkthrough


