Want to know what happens next in the Chrono saga? Try Chrono Cross - The Radical Dreamers Edition for Nintendo Switch, available now on Amazon! As an Amazon Associate I earn from qualifying purchases, at no extra cost to you.
Reptite Lair, 65,000,000 BC - Enemies
Home of the Reptites - though not the home, you'll get there soon enough - the Reptite Lair is an odd dungeon. Upon entering the first major chamber you'll find four Aecyto Weevils, familiar-looking enemies that mill about the room. They're resistant to physical attacks, and require Techs for quick disposal. Once they're gone you'll see a single hole, and dropping into it will take you down to a smaller chamber with another hole. Keeping going down the holes and you'll eventually reach the lowest level of the Reptite Lair.
As you go down levels, however, you'll notice that there are other, nearby chambers with additional enemies and chests. In order to reach these rooms you need to let the Aecyto Weevils on the top level mill around for a while. If you sit and watch them they will eventually drill holes in the ground and disappear. There are four holes in total, each leading to a different course through the Reptite Lair.
The holes usually aren't drilled in the exact same locations, but you'll typically wind up with a pattern of northern, south, east, and west holes. You may need to return to this chamber (a process detailed below) a few times in order to investigate all of the drop points through the Reptite Lair. The holes lead to the following chests:
- First Course (hole is already dug upon entry) - No chests
- Second Course - Mid-Ether
- Third Course - Hi-Potion, Ruby Vest (left hole), Hi-Ether (right hole)
- Fourth Course - Mid-Ether, Ruby Vest (left hole), Elixir (right hole)
(The only thing really worth getting is the Elixir, starting with the hole furthest to the right. Checking out all four courses through the Reptite Lair is needlessly time-consuming.)
Whenever there's an alternate chest listed above you'll need to wait for an Aecyto Weevil on the floor to drill a new hole for you. Along the way you'll also run into Rafflesias, normal plant-type enemies, and Megasaurs, which can be stunned using Crono's Light Techs.
One way or another you’ll wind up in a large chamber full of roaming Reptites. Attack or avoid them as you wish. Also here you’ll find two stationary Reptites, and partially-hidden behind both of them are chests, one containing a Stone Helm and the other a Hi-Ether. You can get at both chests without disturbing the Reptite if you're careful, but so much as touch the Reptite and a Megasaur will join the battle.
On the east side of this large chamber is a north-south corridor. To the south is a Bao Bao and a Mossback, and you’ll want to target the Bao Bao first, as defeating the Mossbacks will allow the Bao Bao to inflict more damage with its normal attacks. (Mossbacks also don’t do anything on their own, so, y’know.) To the north is another Bao Bao and two more Mossbacks, and past that is a Megasaur and two Reptites. Defeating this third group will reveal a save point.
Time to make a choice. If you want to collect more treasures, you can use the doorway on the left side of this corridor to return to the entrance of the Reptite Lair. This will allow you to descend through a different hole and check out the rooms you skipped. If you’re all done with that, save up and head through the doorway in the north. Boss ahoy!
(I recommend teaching Ayla Cat Attack before you fight this boss, as she can perform the Dual Tech Thunder Chomp with Crono once she knows Cat Attack. Thunder Chomp will make the boss battle a lot easier. It’s not a necessity, but why wait?)
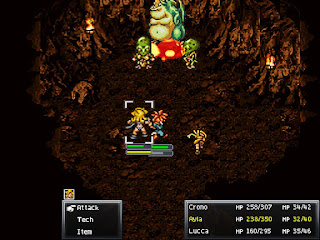
Nizbel
HP: 4,200
Another bruiser enters the arena. Nizbel uses the following attacks:
- A single-target charging attack
- A ground-shaking slam that hurts the whole party
- Electric Discharge, a Light attack against the whole party (only after being hit by a Light attack)
Nizbel is also incredibly resistant to attack, and will take paltry amounts of damage when you hit him. You’d be whittling away at this guy for hours under normal circumstances.
Fortunately, you have a secret weapon: Crono’s Light Techs. Have Crono use Lightning on Nizbel and the dino's defenses will drop for several rounds, stunning him in a similar manner to the Megasaurs. You’ll then have roughly two-and-a-half rounds to inflict as much damage as you can before Nizbel releases the electricity in his body as an all-hitting strike called Electric Discharge. This attack causes around 150 points of damage, and is very dangerous for a softened team. Heal up and prepare for its imminent arrival.
The trick is to use Dual Techs to batter Nizbel as much as possible while he’s stunned, and, as hinted above, Crono and Ayla do best with Thunder Chomp. It’s the most effective attack you can use on Nizbel at this level of power (though don’t use it to stun him in the first place, as it will do almost no damage). Dedicate Crono and Ayla to Thunder Chomp while your third character uses their strongest attack Tech or provides healing support to offset the effects of Electric Discharge. It won’t take too many Thunder Chomps to bring Nizbel down. Barring that, use whatever Double Techs you find strongest to do the damage instead. Fire Sword (Lucca) or Ice Sword (Marle) are good candidates.
Part Nineteen: Fiendlord's Keep, 600 AD


