Part Eighteen: Reptite Lair, 65,000,000 BC
Want to know what happens next in the Chrono saga? Try Chrono Cross - The Radical Dreamers Edition for Nintendo Switch, available now on Amazon! As an Amazon Associate I earn from qualifying purchases, at no extra cost to you.
The Masamune, 1000 AD and 600 AD
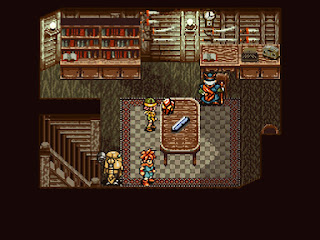
With the Dreamstone and the two pieces of the Masamune in hand, it's time to reforge the legendary blade. Return to Melchior’s home, south of Medina, after finishing up in 65,000,000 BC. With the aid of one of your party members (Lucca or Robo), Melchior will reforge the Masamune.
Take the Masamune to the Cursed Woods in 600 AD and present it to Frog. After a lengthy stretch of flashbacks, where you finally get a look at the infamous Magus, Frog permanently joins your party. Frog will automatically equip the Masamune and the Hero's Badge, which increases the critical hit rate of Frog's normal attacks while he's carrying the Masamune. You should probably leave it on him for the time being.
Take Frog to the End of Time and present him to Spekkio to teach Frog Water magic. He’s not fantastic at casting, but Frog's a decent healer and a good alternative to Marle, who also uses Water magic. Make sure you do this before you go after Magus! Frog is horribly stunted Tech-wise until he visits Spekkio, and you must have him in your party through the next dungeon.
Now’s also a good time to learn your first (likely your first, anyway) Triple Tech, Triple Attack. It requires Crono, Robo and Frog, as well as three attacks you likely already know: Cyclone, Robo Tackle, and Slurp Slash. Triple Attack is one of the less useful Triple Techs in the game, but at this point it will easily be your strongest attack, and can make some of the coming battles a fair bit easier.
Head back to 600 AD and look to the northeast of Fiona’s Villa for a mountain range with a conspicuous wall out front, aka the Magic Cave. Frog will use the Masamune to smash through, creating a pathway to the next major dungeon. You won't get a chance to restock for a while, so make sure you have plenty of Mid-Potions and Shelters on hand.
Magic Cave - Enemies
This area is short. Upon entering you’ll have to face off against two Grimlings and a Vampire Bat. Use magic to defeat the Grimlings. If you didn't take Frog to the End of Time he'll comment on the party's magic, and you should use this opportunity to jog back to the Gate at the Millennial Fair and teach Frog some magic.
Follow the path north to find a mysterious black box, two more Vampire Bats and another Grimling, and a swarm of Grimlings that you can avoid if you’re careful. Fighting this horde will generate an additional battle against two more of each enemy. The exit isn’t far past here. Read the note on the body near the exit, then leave the Magic Cave.
Fiendlord’s Keep - Enemies
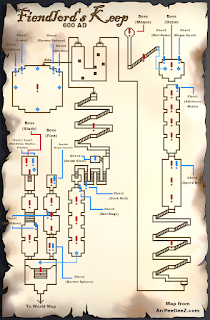
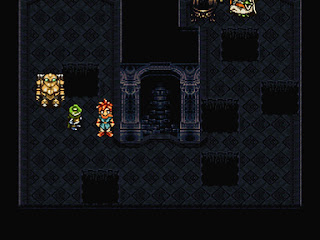
The home of the Fiends is as intimidating inside as it looks from the outside. Begin your trek through here by exploring the east and west wings of the Keep. They’re populated, but… yeah. Freaky, but at this point harmless. You’ll find a Mid-Ether in the east wing and two more Mid-Ethers in the west, as well as a Shelter.
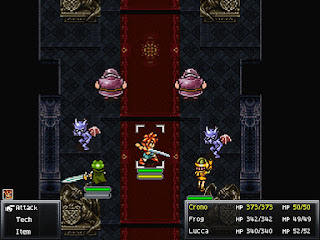
Return to the main hallway. Now that you've visited the two wings you’ll find a save point at the top of the stairs… though touching it will summon Ozzie. His appearance transforms the keep into a non-stop bloodbath from beginning to end, starting with a battle against four Underlings and two Vampire Bats. Standard attacks will wipe them all out.
You now have a choice: East or west. We’ll start with the eastern hallway.
Eastern Hallway
There are four children in the first room down this hall. Speak to the bottom child and say you want the treasure to turn them into Shadows. Wipe them out with a magic attack and check the chest for a Barrier Sphere.
In the next room are three people known to your characters. Each one will turn into two Underlings, two Vampire Bats, and a Sorcerer. Because of the excellent chance of picking up more Mid-Ethers, coupled with high experience and TP, this hallway is probably the best place in the Fiendlord's Keep to grind levels. Lucca's Napalm and Fire II attacks will make short work of everything, though mind that the Sorcerers will absorb any element other than Fire.
In the northern-most room of this wing is an odd, yellow enemy named Flea?. Approach and fight it for an easy kill, after which the killer will lose all of their MP to MP Buster. That's when the real battle begins.
Flea
HP: 4,120
One of Magus's three lieutenants, Flea is tough, but not that tough. He uses the following attacks:
- A kiss that inflicts Fire damage on one target
- A kiss that inflicts Sleep on one target
- Wind Waltz, a spell that inflicts Confuse on one target
- Rainbow Beam, a spell that can inflict Blind on one or more party members
- Rainbow Storm, a spell that can inflict Poison on one or more of your party members
- The Look, a charm attack that induces Crono into damaging the whole party
Flea relies primarily on magic that will inflict status ailments on your party, the most dangerous of his moves being Wind Waltz, which will confuse one member of your party. Use magic or Panaceas to bring your party back up to speed whenever hit by a status ailment, then smack Flea with your strongest non-elemental attacks. Don’t let any party members remain afflicted for too long, as Flea can near-incapacitate your party with enough time. Physical attacks are more useful for dealing damage than magic in this battle.
Check the spot where Flea was standing once he vanishes to find a Magic Capsule. That's one lieutenant down.
Western Hallway
The first hall in the western wing will now be populated by two gangs of four Lancers and one Gaoler. You can fight or ignore them as you wish. In the second room you’ll find five people facing a chair. Talk to the woman closest to the chair to turn them into Lancers. Take them out to make your next opponent appear, and speak to him to begin the battle.
Slash
HP:
- 3,200 (first phase)
- 5,200 (second phase)
Immune: Water (second phase)
Slash is much more straightforward than Flea, though to compensate he has a great deal more HP - and two phases. The phases are split between Slash's choice of weapon:
- For half of the battle Slash attacks with his fists, using single-target jabs and combos, and ending with a Fire attack that hits the whole party. Pretty simple.
- For the second half of the battle Slash fights with his signature sword, the Slasher. The second half is much more dangerous as his damage output rises, but Slash is otherwise quite predictable. He hits one or more targets with his sword, dealing damage, aaaand that's all. No curveballs.
Slash will drop the Slasher for Crono when you win the battle. You'll also unlock a save point in this room. That's two lieutenants down.
Fiendlord’s Keep Interior
Return to the main corridor. The save point where you spoke to Ozzie is back, and this time stepping on it will shuttle you into a hallway filled with forced battles against Underlings, Blue Gargoyles, and Sorcerers. Only Sorcerers are worth using Techs. Grab the Mist Robe from the chest at the end of the hall, then pursue Ozzie. You'll be chasing him for the remainder of your trip through the Fiendlord's Keep.
The next area is full of conveyor belts and blade traps, the latter operated by Ozzie. Move carefully to avoid being hit by the blades and losing HP. Not at all difficult to avoid, and you can heal once you reach the end if any of the blades slam down on your team's heads. Ozzie speeds up the blades halfway through, but making the trip still isn't a big deal. Make sure to grab the Dark Mail from the chest near the halfway point, and the Death Claw for Robo from the chest near Ozzie's crank.
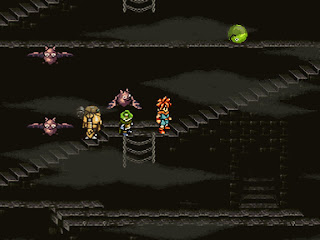
Beyond the conveyor belt gauntlet is a series of stairs, laid out in a side-scrolling format and guarded by enemies. You can ignore the Vampire Bats and the Jugglers that float around the area, but if you get touched by the Roundillos that roll down the stairs you’ll have to fight any nearby enemies. Slide down the chain ladders if you want to avoid combat. Be careful fighting the Jugglers - they alternate between being weak to magic and weak to physical attacks, and you’ll have to swap back and forth to deal real damage.
The next small room looks like a clear path to Ozzie, but it’s actually littered with pit traps. Hit one and you’ll drop into a room with six Lancers. Wipe them out and you can explore the room. There are four chests in the north containing a Shelter, a Barrier Sphere, a Lapis, and a Mid-Ether, and if you check the southeast corner of the room you'll find a glinting Magic Capsule on the ground.
Each time you drop into the room beneath the pits you'll find ‘save points’ to the north, south, east, and west. One of them is an actual save point, one leads back up to Ozzie, and the other two are battles with three harmless ???s. Which is which will be randomized each time you drop into the clearing. Given the amount of experience you earn for fighting nothing, it’s worth it to keep falling down and killing the ???s as you stumble your way over to Ozzie.
(If you want to avoid falling into a pit, skim along the outer wall until you reach the right side of the room, walk forward until you’re parallel with the pillar on your left, walk left until you’re directly south of Ozzie, walk up until you’re just short of the end of the wall on your left, and then slip back to the right wall to continue north. Or just look at the picture above!)
Beyond the pitfalls is another set of stairs, though this time you have to face Outlaws and Roundillo Bombers along with Jugglers. Take out the Jugglers first if Outlaws are present, as they’ll use a powerful combo attack if you go after an Outlaw and don’t defeat it in one hit.
The journey continues. The next corridor features a series of battles against Outlaws, Servants, and Jugglers. Servants are nothing special, and you probably know how to deal with the other two by now. A chest containing a Speed Belt waits at the far end of the hall.
Almost done. There's one last corridor leading north, and if you want to avoid battles you can slip around the dragon statues by hugging the walls. If you decide to fight you’ll face Outlaws, Jugglers, and Servants, none of which should give you much trouble. Grab the Athenian Water from the chest at the end before exiting.
This will bring you to Magus' throne room. This is where the chase with Ozzie comes to a close.
Ozzie
HP: 1,000
Immune: All attacks
Yep, you finally get to fight Ozzie… but, alas, this battle’s a joke. Attack Ozzie head on and you’ll do no damage, as well as receive a vicious, explosive counterattack. Go after the levers surrounding Ozzie, though, and eventually you’ll open a pit beneath him and end the fight. Ah, well...
Two save point sparkles appear in the throne room once you defeat Ozzie. The one on the right is an actual save point. Save and heal - trust us, you want to save and heal - then pop open the chests in the room for a Magic Scarf and a Mist Robe. Prepare your team for a hefty battle, preferably with magical defines in mind, and step onto the glittering spot on the left.
You'll be teleported to one final set of stairs, populated by a horde of Vampire Bats. Feel free to run right past, which, given the next battle, is highly recommended. At the bottom of the stairs you'll come to the inner sanctum of the Fiendlord himself, and he's feeling a bit hostile.
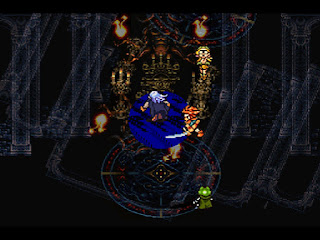
Magus
HP: 6,666
The buildup has been considerable, but it was worth the wait. This is the first truly epic battle in Chrono Trigger. Magus is an exceptionally difficult opponent, especially on your first pass, and will require a great deal of patience and attention to detail to defeat. He uses the following attacks:
- A normal scythe attack
- Lightning II, a Light spell against your whole party
- Fire II, a Fire spell against your whole party
- Ice II, a Water spell against your whole party
- Dark Bomb, a Shadow spell against a single target
- Hell Geyser, a draining spell that slowly depletes HP from your whole party for a short time
- Dark Matter, a powerful Shadow spell against your whole party
Before getting into this fight you’ll want to carefully consider your third party member, since Crono and Frog are mandatory. Magus requires the use of multiple types of elemental magic - Light, Water, Fire, and Shadow - and is not easily defeated if you don’t maximize your coverage. For that purpose, it’s not the best idea to bring Marle in, as she and Frog both use Water magic. That means a tossup between Lucca and Robo. Lucca is better for maximizing damage, while Robo can provide extra healing on top of Frog. If Frog doesn’t have the spell Heal, go with Robo. If he does, choose Lucca instead. Equipped with a Mist Robe she’ll be better suited to warding off Magus’s attacks than Robo.
Magus is a powerhouse. He’s capable of using all four types of magic, and hits everyone in your party with elemental attacks on a regular basis. He’ll also use a spell that will slowly drain your health, and usually renews it every few rounds to ensure that you’re constantly being drained. All this adds up to a lot of pain in a fairly short period of time… and it’s made worse by the fact that Magus counterattacks virtually everything you do.
Put one character on healing duty and watch Magus. If you attack him with spells willy-nilly you’ll discover that they heal him rather than inflict damage. Magus is only affected by elemental spells that match the last spell he used. You'll need to counter with the following attacks:
- Lightning II - Lightning (Crono)
- Fire II - Flamethrower / Fire / Napalm (Lucca)
- Ice II - Water (Frog) or Ice (Marle)
- Dark Bomb - Laser Spin (Robo)
Halfway through the fight Magus changes tactics, dispensing with his elemental counters. At this point you can use any spell or attack you like on Magus, with full effectiveness. After lowering his magical defenses Magus will use Dark Matter, a spell of incredible power that can inflict 250 or more HP of damage to your whole party. Dark Matter will probably KO anyone at half health or less. Someone has to be on constant healing duty at this point to prevent Magus from wiping out your team. The other two members should maul him with their strongest Techs and Duals Techs. The fight takes a while (Magus has 6,666 HP!), but you will, eventually, win the day.
Upon defeating Magus you’ll be treated to a major revelation, a dream sequence, and a trip back to 65,000,000 BC. Well done! That was not an easy battle!

