 |
| Final Fantasy VI copyright Square Enix. Images used for educational purposes only. |
(Note: If you did not save Shadow on the Floating Continent, this side quest focuses on saving Relm instead. You'll need to do this before you can recruit her over in Jidoor.)
Use the Falcon to make your way to the Veldt on the east side of the World of Ruin. If you haven't been here since reaching the World of Ruin, you should pick up Gau on the Veldt. Simply put three people in your party and wait for him to show up while poking around the Veldt. He'll rejoin the party as long as you don't hit him.
Along the southwestern coast of the Veldt you’ll find the Cave on the Veldt.
Cave on the Veldt - Enemies
A familiar dog guides you through this cave. Follow it and you'll come to a chamber with a small group of hunters, standing around a fire. Look to the northwest of the group for a chest containing a Berserker Ring, then head through the door in the north. This leads to an unseen intersection with two branches:
- To the west is a chest containing a Tigerfang, one of Sabin's best weapons, defended by a creature called the Death Warden. It uses Instant Death attacks on a regular basis. Wipe it out with Fire.
- To the south is the path forward.
Follow the path south, through three more chambers, until you find a door beside a switch. Hit the switch, check all the way south for an Ichigeki (this is essential to recruiting Shadow, so don’t miss the Ichigeki), then backtrack a short ways. The switch you hit moved a rock in the previous chamber, allowing you to head east and south.
You'll see Shadow and Interceptor as you head east, on a platform you can't reach from here. Head north. The continued path eventually leads to a save point, and, beyond, the fallen Shadow. Approaching him triggers a boss battle.
Behemoth King
HP: 19,000 (both forms)
Weakness:
- Fire, Poison (first form)
- Fire, Holy, Healing (second form)
Absorbs: Instant Death (second form)
Drops: Behemoth Suit
Surprise! Somehow this enormous beast was hiding in the corner of the chamber. The Behemoth King uses the following attacks:
- Normal physical strikes
- Devil Claw, which inflicts damage and removes Reflect status (first form)
- Blizzara / Blizzaga, Ice spells (first form)
- A four-hit combo of physical attacks (second form)
- Sleeping Gas, which can inflict Sleep status (second form)
- Death, a spell that can OHKO a character (second form)
- Meteor, a non-elemental spell against your whole party (both forms)
A tough enemy, but not that bad. The Behemoth King likes physical attacks, but it’s at its most painful when it uses magic to damage to one or all members of your party. You can’t use Reflect to get out of this, either, as the Behemoth King can dispel Reflect with Devil Claw. The Behemoth King’s big problem is its lack of HP, so go after it with any Fire attacks you have, as they’ll inflict double damage. Do enough and it will die...
... returning in a back attack as an undead version of itself. The new Behemoth King is pretty similar to the original, though now it can KO characters with Death, and may put your party members to Sleep. It can and will also use Meteor, a very painful spell that will probably kill any characters it hits who aren’t at full health. The second Behemoth King remains weak to Fire attacks, though it now also gains a weakness to curative spells. You can use a Phoenix Down on the Behemoth King to kill it instantly, if you'd rather not fight.
You'll receive two Behemoth Suits for defeating the Behemoth King. Save Shadow and you’ll jump to Thamasa, in the far southeast corner of the map. After a flashback cut scene similar to his previous dreams (which changes if you saved Relm instead) you’ll leave Shadow to rest in Strago’s house. Leave town and reenter and he’ll have left.
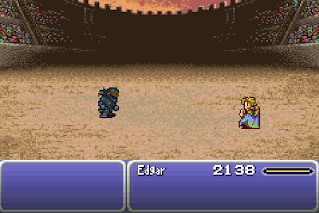
Hop in the Falcon and fly to the northwest corner of the map. Here you’ll find the Dragon’s Neck Coliseum, a betting ground for warriors. You can bet an item, send one AI-controlled character in to fight for you, and, hopefully, win a slightly-superior prize in exchange. Save before entering, set up one character to fight solo...
... and bet the Ichigeki. Shadow's your opponent. Beat him and you’ll get to keep the Ichigeki - as well as Shadow himself. He'll join the party, and from this point on you don't need to worry about him running off after battles.
(In case you're wondering, yes, Shadow still joins the party if you lose the fight. The downside is that you lose the Ichigeki, which is one of Shadow's best weapons. He's pretty easy to beat, so just reload your game and give it another go if Shadow somehow wins.)


