Crystal Story: Dawn of Dusk Steam Page
Welcome to Crystal Story: Dawn of Dusk! An action RPG with a retro look, Crystal Story: Dawn of Dusk mixes a fantastical story with running, jumping, stabbing, and setting things on fire. You'll need some fast reflexes to survive the experience. (A controller is also recommended.)
This guide will take you through Crystal Story: Dawn of Dusk, from beginning to end. You occasionally need to hop back and forth between locations, so rather than dividing the guide up into individual pages we'll just put everything here. Any content added to the game later will probably go in separate guides, with the main game relegated to this page.
Anchor Links (Currently a bit fidgety, but they work)
How to Play
Crystal Story: Dawn of Dusk is an overhead action RPG, similar in feel to 2D The Legend of Zelda games. You play as Mina, a young girl who has the innate ability to wield fire, and you need to explore a strange, dreamlike land, moving back and forth between a few important locations. Puzzle-solving is quite important in Crystal Story: Dawn of Dusk.Mina can do a number of different things as she explores:
- Walk (directional keys). You can move Mina in cardinal directions or diagonally.
- Run (hold down Z key or Shift while moving). This is useful for zipping Mina past danger, and for dashing up slopes.
- Jump (Space key). Mina can perform a small hop. You'll need to do this to avoid enemies, and to get over pits. Running and jumping at the same time will carry Mina further. Once you acquire a specific ability Mina will also be able to use Fireopes, which allow her to whip her way across larger gaps when jumping.
- Attack (X key). Once Mina has a sword she'll perform a slice. Hold down the attack button and Mina will perform a whirling attack instead. Later on when you hold down the button Mina will also unleash a shockwave from her sword, assuming she's at full health.
- Arts (C key, change selected Art with the A key). At the beginning Mina can use a Fireball to roast enemies. Later on she'll gain the ability to hurl - and remotely detonate - Bombs. You have unlimited amounts of both.
- Lance (S key). There are Lances located throughout the game that Mina can pick up and use to stab enemies. Hold down the attack key for a few seconds and Mina will hurl the Lance. Lances have limited durability, so you'll need to keep picking up more as you poke around the game.
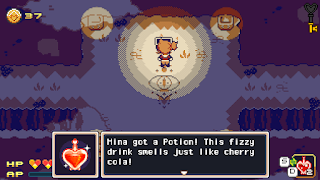
- Potion (also S key). You'll find Potions spread throughout the game, and using one restores one of Mina's hearts.
- Attack. Mina swipes at the monster, inflicting 10 points of damage (once she has a sword, anyway). Normal attacks occasionally miss.
- Charge. Mina attempts to charge up AP. This puts you in a small arena, in which you need to reach an orb to complete your task. More on this below.
- Item. Mina can use an item to heal herself, typically a Potion.
- Arts. Mina can use a charged-up version of one of her Arts to damage the enemy. You need to build up 3 AP before Mina can use an Art.
Home?
Blight Bog
- Head north. Press C to use a Fireball attack and burn a group of bushes in your way. Collect the Iron Ore left behind.
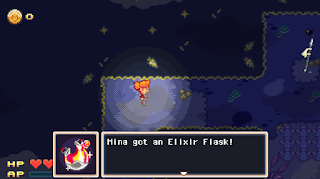
- Past the bushes to the north is an Elixir Flask. This doubles Mina's health when filled.
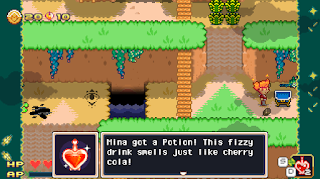
- Check along the south side of the bog. You'll see a path you can't reach, as well as a conspicuous bush on your side of the wall of trees. Ignite the bush with a Fireball to burn open a path to the south. There are two chests along this path, one blocked by a flower that you can ignite to explode. The eastern chest contains a Potion, while the western chest contains 50 mynt, the game's currency.
- Go east to find an Iron Lance sticking out of the ground. Lances can be jabbed at enemies (D key), or thrown at enemies (hold down the D key). Lances get used up over time, and should be collected on a regular basis. You'll find them all over the place, so it's unlikely that you'll run out of Lances.
- Look north. You'll find a blobby enemy. Stun it with a fireball, then jab it with the Lance. It guards a flower that you can ignite with a Fireball. The chest near it contains a Potion for restoring health. The exploding flower stuns a nearby ghost, and if you stab the ghost you can go north to find a chest with another Potion.
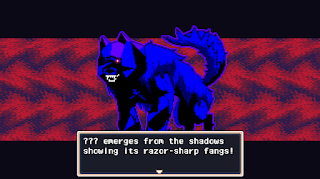
- Go east, fighting or avoiding enemies. Eventually you'll encounter ???, and advance to a turn-based battle that you can't win.
- After losing the fight you'll wind up on a beach. Speak to the figure to the north to leave.
Home
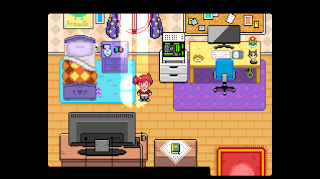
- Back to Mina's bedroom, though this time it looks normal. Inspect the various parts of the room for text descriptions of Mina's belongings.
- Go out into the hall to find a Roomba named Chumba. Inspect it for 10 Mynt.
- Go to the kitchen to meet Mina's mom. Cut scenes take Mina away from the house.
Matterhorn Woods
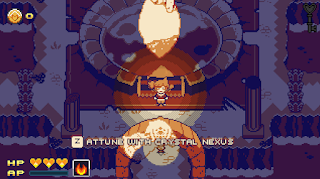
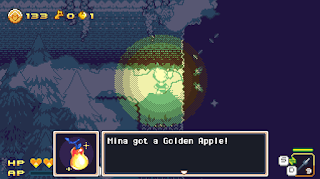
- Approach the Crystal Nexus (the big, pink crystal) to activate Mina's Fireball attack. Use it to light the wood near Claude. He tells Mina to collect 20 Apples.
- Burn the leaf pile southeast of Claude to find an Apple. Burn the grass to the northeast to find another screen.
- Go north on the next screen to find an Apple by a tree. Burn the tree to collect three more Apples.
- Go back south, take a left, and burn the grass to the north to get at an Apple. Climb the ladder to grab a Potion from a chest.
- Go back south, take the eastern path, and run up the hills (z button) to collect an Apple. Do the same on the west side of the trail to get at a tree that you can burn for two more Apples.
- There are two pits near this second apple tree. Both drop you into an underground stream that takes Mina back to the start, and you'll find an Apple along the way.
- Perform a running jump (space bar) to get over the southern pit and collect an Apple. Do the same with the northern pit to keep going north. Blow up the flower on your right to get at a chest containing a Potion.
- Burn and run your way north. Burn the tree in the northest for two more Apples.
- Climb the ladder in the northwest. Make your way along the upper grassy ledges to collect an Apple. Head south along the bridges to find two trees with five more Apples.
- Drop off the faintly-marked ledge near the tree on the right to return to the start. Head back north and drop into the right pit in the far north. This will land you underground, but this time you'll be on an upper platform.
- Burn the grass on your right to get at a chest containing a Potion.
- Take a left and go south. Use Fireballs to stun the hopping slimes, then run past them to get at the final Apple, in the southeast of the screen. Stun the slimes again, return to the north, and drop off the ledge to the west of the opened Potion chest to return to Claude. Speak to him.
- After the battle you'll be in a snowy clearing. Check the east side of the clearing for a chest containing a Potion, then enter the hole in the north.
- Head north to find a familiar figure.
- Go north in the water, following the flying fairy creature.
Fortress Ruins
- Approach the Crystal Nexus, the giant crystal in the middle of the ruins, to regain Mina's Fireball ability. This also refills her Elixir Flask, giving her six hearts instead of three. The Crystal Nexus does not do this a second time.
- Look north of the Crystal Nexus. There are two stores up here. Claude's offers items that are too expensive for Mina, while Spider's Eye offers some more-affordable Potions. Between the two shops is a door that you need to open, and next to the door is Udon, the cat, who will save your game and restore Mina's health. Check in with Udon whenever you complete a section of the Fortress Ruins.
- Take the northwestern path from the Crystal Nexus. At the end on the next screen is a chest containing a Potion. Up and to the left of the chest is a Cat Statue, sitting among some burnable grass.
- Walk back the way you came until you see a Knight Signet on the ground. Shoot a Fireball south of here to reveal a path. Follow it to the next screen. You'll find the way to a Piece of the Master Key, up on a ledge. You need three pieces of this key to complete the dungeon, so that's one down.
- Return to the Crystal Nexus and take the northeastern path. Past a few slimes and bushes you'll find a dead-end clearing with a crystal orb. Hit it with a Fireball, then return to Claude's to find a chest out front containing 50 Mynt.
- There are two moving platforms with bushes on them near the eastern crystal puzzle. If you burn the bushes just as they're approaching the crystal balls in the north you'll spread the fire and trigger the crystal balls. This opens the northern gate, granting you access to the Bright Sword. Note that you also have to trigger the central crystal ball to open the gate.
- Return to the Crystal Nexus and take the southwestern path. You'll come to a clearing with a slime statue, a floor tile to the right of the statue, and a slime. Use the Bright Sword to knock the statue onto the floor tile, revealing stairs on an island to the right.
- You'll find an underground passage. Use Fireballs and sword swipes to knock enemies out of your way, notably the big, floating ball that keeps swooping in to hit Mina. On the east end of the passage you'll find a chest containing an Amethyst Eye, along with a Potion.
- Take the southeastern path from the Crystal Nexus. You'll find three statues. Perform a spin attack with the Bright Sword (hold down X) while standing in the middle of the statues to destroy them all. This opens the gate to the south.
- Head south. You'll find a clearing with a circling ghost, a few blobs, and braziers in the corners. Light the braziers to make the ghost vulnerable, then launch a Fireball at it to stun it. Hit it with the Bright Sword to make the ghost explode. The ghost continues circling once it explodes, so you can do this as many times as you like. You can destroy three things in this area:
- The boulder to the east, which hides a Potion.
- The wall to the west, which opens a passage. On the other side is a mole. He'll offer you three chests, each containing a Potion.
- The boulder to the south, which covers the way forward.
- Go south. Past a battle area you'll find a clearing with a stone statue. Approach it with the Cat Statue and the Amethyst Eye in your inventory to create a passage elsewhere in the Fortress Ruins.
- Trek back to the beginning of the Fortress Ruins, then take the southeastern path from the Crystal Nexus. Hit the statues blocking the path with a Fireball, then a sword swipe. You'll wind up in an arena with three blobs that you can't hurt. Use Fireballs to light the braziers in the corners to make the blobs vulnerable, then take them out. A chest appears containing a Potion.
- Head east. Beyond a spike-leaping gauntlet you'll see another Piece of the Master Key on a ledge, out of reach... or at least it was, until you set the Cat Statue and the Amethst Eye in place.
- Head to the Spider's Eye and Talk to the owner. (Watch out for a beam attack as you're approaching the stores.) She'll give you the third Piece of the Master Key when you exit the store.
- Save at Udon, then go through the locked door between the two stores. Run north in the next hallway until you hit a boss battle.
Shadow Mina
- One or more copes of Shadow Mina launch shockwaves at Mina from the sidelines. Stand still so you avoid the nearby spikes, then jump to avoid the shockwaves.
- Mina stands in the middle of a group of circling slimes that slowly approach. Use Fireballs to toast and stun them, or just jump to avoid the group.
- A huge slime drops from above. Jump over the spikes on the sides of the battlefield to get out of its way. Once its shadow stops following Mina the slime is about to hit the ground. There are sometimes Potions in the corners of this arena.
- Three invulnerable slimes approach Mina. Either light the torches to make them vulnerable and wipe them out, or move to avoid them until time runs out.
- You'll be sent back down to the Fortress Ruins. Speak to the owner of the Spider's Eye for a Cardinal Voucher. Then speak to Claude to redeem the voucher for a Cardinal, a form of trasportation. You can choose from one of three colors, but... you'll always wind up with the red one.
- Speak to Udon, outside Claude's, for the choice to hop onto the Cardinal. You can use the Cardinal to fly around the world map. There are two Crystal Nexuses where you can debark, and you want to head to the one closer to the north, in the southwest of the map. It's marked on your minimap in the bottom-left corner of the screen.
Blight Woods
- There's a three-way intersection at the entrance of Blight Woods, and the north and west routes lead to dead-ends. (As well as an empty chest in the west.) Go east, then north, burning bushes as you go. There's another intersection ahead, but the chest on the left is empty and the path to the right is currently blocked.
- Continue north. You'll find the locked gate to a mansion. Burn the bushes to the left of the entrance to clear the path to a chest containing a Potion.
- There's an apparent dead end to the south of the gate, but if you check the wall on the right you'll find a hidden path to a crystal orb. Hit it with a Fireball to open a gate back near the entrance in the south. The gate guards a chest containing a Mansion Key.
- Use the Mansion Key to go through the gate in the north.
Lofgren Manor (1)
- You're now inside the foyer of a multi-level manor. Speak to Udon, in the northwest corner of the room, to save your game and replenish Mina's health. Note that you can pick Iron Lances off of the many suits of armor spread throughout the manor, if you want some extra range.
- Sliding blocks prevent you from going east, so head west from the entrance. Continue west two screens until you come to a clock. Approach the clock, defeat the slimes that appear, and wait until the clock chimes. A Mansion Key falls out of the clock when it chimes.
- Run north of the clock, using the gaps in the walls to avoid the sliding blocks. Time your approach carefully or they will sweep you back to the start. In the manor's owner, and once he leaves you can snag a Potion from a chest. Use the Mansion Key on the door to the right.
- This hallway has creeping, slug-like enemies that you need to avoid, as touching one will sends you back down to the entrance of the manor.
- Head east through the second floor hall, paying close attention to the mirror along the north wall. It will show you the reflection of a chest along the south wall, out of sight. The chest contains another Mansion Key, which you can use on the door at the east end of the hallway.
- This area is populated by a few blobby enemies that generate electrical charges. In order to defeat them you'll need to hurl Lances their way. Hold down the D button for a few seconds to hurl a Lance.
- This hallway has three sets of armor with card suits on their faces. You can set the suit on the armor by striking the armor with a weapon or an explosion. The portraits behind each set of armor, as well as a few more portaits spread throughout the manor, reveal the solution to the puzzle:
- Set the right-most suit of armor to spades (green)
- Set the middle suit of armor to hearts (red)
- Set the left-most suit of armor to diamonds (blue)
- Grab the Mansion Key from the west end of the hall after completing the puzzle. Use it to unlock the nearby door.
- There's nothing special on the fifth floor of the manor besides enemies. Fight your way to the east and go up the stairs.
- To the west on the sixth floor is a gap in the floorboards. As long as you have a Lance in your inventory Mina's magic will convert it into a Fireope when you try to jump across the gap. If you fail to jump you'll fall through the floor and back to the fifth floor.
- Swing to the west end of the hall. A statue will rise up from the floor and try to smash Mina's head in. The floor down and to the right of the statue is cracked, and you can lure the statue into smashing through the floor.
- Trek back to the second floor and use one of the slugs to return to the entrance, so you can save your game and heal at Udon. Go back up to the second floor and enter the hole in the floor created by the statue.
- Check the chests to the north of the ladder for a Mansion Key. (The other chest is empty.)
- A block prevents you from going any further north in this room. We'll come back here once we can use Bombs in Lofgren Manor.
- Make your way back up to the fifth floor of the manor. You can use the key on the door at the west end of the hall.
- Head east through this corridor until you hit a little cut scene, followed by an assault of electrical spirits. Use the flowers along the corridor to stun them, and Lances to defeat them.
- Head back east to properly meet Whiskur. After a conversation he'll give you a Mt. Kaboo Key. He'll also give you a Steamed Crab Bun, and drop a Potion.
- Follow the path at the east end of the hall and you'll wind up back in the basement. The chest here is a mimic, and it will ferry you back to the entrance of the manor. Speak to Udon to leave for the world map.
- Fly a little ways southeast on your Cardinal to find your next destination, again marked by a Crystal Nexus.
Mt. Kaboo
- Upon arrival a ghostly creature possesses Mina, unlocking Bombs. You can use these to destroy barriers, such as the one on your left that's blocking the path to Udon. Press the C button once you deploy a Bomb to set it off early. For the moment you can only use Bombs on Mt. Kaboo. Press the A button to switch between Bombs and Fireballs.
- Use Bombs to destroy the large ice blocks by placing the Bomb inside the block's mouth. Then fight your way up the mountain. Aside from some Lances along the way you won't run into anything special besides enemies and the occasional cluster of bushes. You can overcome both with Bombs, and, in the case of the enemies, a sword swipe afterward.
- At the top of Mt. Kaboo you'll find a chest containing a Potion. You'll also find a locked gate. If you come here before visiting Lofgren Manor this gate will remain closed, but with the Mt. Kaboo Key you can get through just fine.
- Use Fireball on the statue at the top of Mt. Kaboo. This will teach Mina the Bomb Art, allowing her to hurl Bombs anywhere, not just on Mt. Kaboo.
- Head back to Blight Bog, and trek through to Lofgren Manor.
Lofgren Manor (2)
- Check the new chest in the foyer to receive a Cellophone. Mina immediately gets a call from Whiskur with instructions on what to do next. You'll need to find a key to meet up with Whiskur again.
- Make your way up to the second floor and use the ladder you opened with the statue earlier. Use a bomb on the block in the basement to get to the north end. This will put you on a balcony above another floor. Hurl a Lance at the chandelier hanging above the lower floor to knock a key onto the ground.
- Return to the foyer, then head east. A line of moving Nurikabe (the blocks with the mouths) keep pushing you south. Time a Bomb throw correctly as you run north and you can blow them up before they push you south. Do this to reach the north end of the corridor. Ideally you move a few feet, toss out a Bomb, wait for the block to swallow it, then move a few more feet. There's light coming through windows that roughly illuminate where you should stand before throwing a Bomb.
- At the end of the hall you'll find two doors. The door on the left leads to a huge portait of Mina's mom. Throw Bombs at the right and left sides of the bottom of the painting to close its eyes further up, whichi opens a gate on the upper floor. You can do this again on a smaller portrait, back out in the hall, to receive a Potion.
- Go back out into the hallway and take the right door.
- There are pits on this floor. If you head north and Fireope over the first pit you'll find the gate that you opened earlier.
- If you try to Fireope over the second pit you'll get bounced back to the first floor by a ghost. Toss a Bomb to stun the ghost, then Fireope over and defeat it with your sword. Check along the southwestern path to find a chest containing a Potion, behind two more of these ghosts.
- Go west from the entrance. You'll see an electrical pad. You need to lure one of the electrically-charged spirits onto this pad.
- Head east from the entrance and then northwest, using Bombs to blow up blocks and to drive away the ghost that keeps trying to grab Mina. Lure one of the electrical spirits gradually south with you, and over to the electrical pad.
- Slice or otherwise touch the spirit when it's on top of the pad. This stuns it in place, supplying power to the door in the north and opening the exit. Run up there, avoiding the grabby ghost.
- Assuming you knocked the Mansion Key down earlier, you'll now be in the room where you can snag it. Do so, then touch the slug roaming the room to return to the foyer.
- Go through the locked door one room west of the foyer.
- Lure the electrical spirit onto the pad, then touch / stun it to trigger its electricity attack and activate the pad. Watch out for slimes.
- Lure the first electrical spirit onto a pad, then approach the statue to bring it to life. Lay down a Bomb near the statue when it smashes the floor to blow it up and reveal a second spirit. Lure it onto a pad as well.
- Head down the eastern hall. One electrical spirit is roaming free, while another is trapped behind a block. There are two slugs in the hall that you need to avoid, as touching one will send you back to the foyer.
- Hop over the spikes (you'll need a running jump) and go east. Use a Bomb to wipe out the ghosts blocking the way. There's an electrical spirit in the far east. Lead it back west to the electrical pad. There's a block that can wipe out the spirit along the way, so you may need to try leading one a few times.
Blight Woods (2)
- South and on your right from the entrance to Lofgren Manor, through a secret passage
- East of the entrance to the manor
- West of the entrance to the manor, in front of a chest
- West of the entrance to the manor, on a tree that needs to be burned (3 apples)
- Southwest of the entrance to the manor, in front of an empty chest
- Southwest corner of the Blight Woods
- North of the southern entrance of the Blight Woods
- East side of the woods, across from the path to the second section
- North of the entrance
- On a cliff near the entrance - Go northwest of the entrance, up a ladder, then back south to burn the tree (2 apples)
- Up the east path and over to the west, encircled by blocks that you can destroy with Bombs
- In a tree, up a ramp in the northeast (2 apples)
- Behind some rocks, up a ramp in the northwest
- In a tree at the end of a long trail full of enemies and obstacles in the north of this area (3 apples)
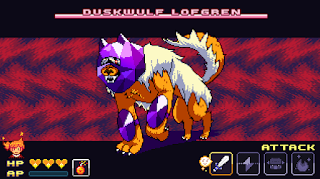
Duskwulf Lofgren
- Poison attack - An arena with a grabbing ghost - Equip the Fireball art and knock the ghost away, staying close to the center - There may be a Potion behind the ghosts on the edges of the arena
- Electric attack - Surrounded by whirling electrical spirits - Jump over the spirits as they close in, then again as they move back out
- Something falls from above - Falling giant slime - Run around to avoid the massive slime shadow, jumping to avoid any smaller slimes - There may be a Potion in the arena
- Razor sharp fangs - Big bite attack - Hurl a Bomb before the duskwolf bites Mina

