Forest of Symbols - Enemies
- Bandit - 1,875 HP
- Bloodworm - 1,750 HP
- Bugbear - 1,500 HP - Weak to Fire
- Garuda Eagle - 1,885 HP - Weak to Fire
- Robber Axman - 600 HP - Weak to Light
- Stingray - 1,000 HP - Weak to Fire
- Witchette - 910 HP - Resists Fire, Wind
The primary challenge facing the party in Marze, the Forest of Symbols is a bandit-filled, swampy dungeon that you'll need to brave with a split team. Your main character's partner depends on whom you chose at the beginning of the game:
- If you chose Claude as your main character then you'll have Celine in your party, whether you recruited her permanently on not during the trip to Krosse Cave. Celine's a useful magic user, though Claude will need to work hard to keep enemies out of her hair while she casts spells. Make sure you enter the forest with lots of restorative items, as Celine can't heal and Claude only has Sword of Life (level 20).
- If you chose Rena as your main character then you'll have Dias in your party. Dias is a swordsman, like Claude, though his normal attack is a touch faster. Dias is much stronger than your party (unless you've been power-leveling), which makes this whole affair rather easy. Let Rena handle the healing while you carve up the enemies as Dias.
In either case you'll want to spend your characters' SP and BP to buff up their skills before entering the forest. Celine will have whatever she had left upon leaving Krosse Cave, if you didn't recruit her, while Dias starts off with 200 SP and BP.
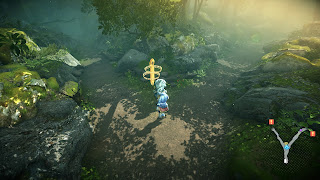
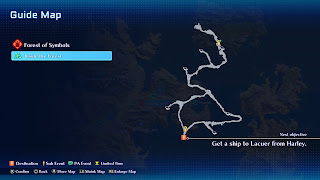
Both parties start off at a crossroads when you enter the Forest of Symbols. Both paths ultimately lead to the same spot, though going northeast from the Save Point is a much longer, more dangerous slog. The tradeoff is that you can find two chests going this direction:
- The first is on your right, just before you first enter the muddy terrain, and contains three Smelling Salts.
- The second is right in your path as you veer west, and contains an Amber Robe.
The northwestern path, by contrast, is shorter, and leads you to only one chest. You'll find it down a split on your left as you head north. The chest - which is guarded by two enemies - contains a Knight's Shield+. (Don't forget to give this to Claude later if you're playing as Rena.)
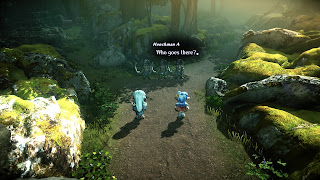
In the north you'll hit a cut scene (I assume this also happens for Claude players), and be introduced to the Enemy Leaders mechanic as you take on a group of Bandits. Enemy Leaders are special foes that grant their side special buffs - but onl until their shields are broken. Once this happens they will create a Break Effect, and any enemy caught nearby will similarly be stunned. Stunning multiple enemies this way creates a Break Chain that damages any enemies who touch the effect, and the damage increases as the Break Chain grows.
(In other words, go after the Enemy Leader first. Pretty simple.)
Once the Bandits are gone you can continue to the west, though more Bandits will get in your way after a short trip. Take them out the same way as the first group. Northwest of this small clearing are two enemies guarding a chest, and if you take them out you can claim the contents: 1,000 FOL.
Head northeast from the clearing where you fought the second group of Bandits. A third group of Bandits will appear as you hit a crossroads. Take a left after wiping them out and you'll find a short, dead-end path with a chest at the end. The chest contains five Crystals.
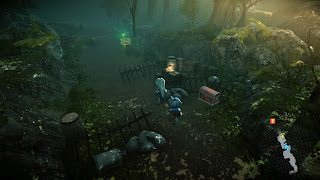
To the north you'll find signs of the end of the Forest of Symbols as you run into some crude palisade barriers, a chest containing three Resurrection Elixirs, and a Save Point. What you run into past here depends on who is leading your party.
Claude - Snow Ogre
Weakness: Fire, Light
Resists: Dark
Rena - Azam Gille
HP: 17,100
Accompanied by four Shielders, Azam Gille is quite the troublemaker, and the tougher of the two potential bosses. Unlike most of the enemies in the Forest of Symbols Azam and the Shielders can damage Dias, and if he gets caught between them they can quickly whittle down his HP.
Take control of Dias and lead everyone away from Rena. Sweep around behind the Shielders, catch them a few times with normal attacks or Arts, then flee as they start to bunch up. Air Slash is a good alternative if they're on both sides and you can't escape. So long as Dias stays nimble and doesn't linger in one spot for too long, you can slip between the enemies and take them out, one or two at a time. Leave Azam for last, as he's pretty easy to defeat on his own, so long as Dias is facing him solo.
If you're playing as Rena you'll receive a House Key, and can use it to open the cabin where the bandits were staying. Head back towards the town and you'll hit a cut scene where the two parties meet up, which goes off automatically if you're playing as Claude. Dias leaves, and Claude, Rena, and potentially Celine join ranks once more. (Don't worry, Dias will be back... and sooner than you think.)
Leave Celine's Home once you regain control of the party, back in Marze. Head to the nearest exit, on your right, and Celine will stop Claude and Rena. After another night in Marze you'll be ferried on your way once more, to the port town of Harley.


