Part 30: Fighting the Ten Wise Men
Main Walkthrough
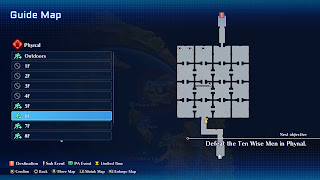
Phynal Region - Enemies
- Dark Crusader - 61,500 - Weak to Light, resists Water, Dark
- Otiph - 49,500 - Weak to Earth, resists Water
- Rikka - 78,000
The final battle approaches. The party has defeated three of the Ten Wise Men - but that still leaves the other seven, and they're all camped out at Phynal, the northern stronghold Claude, Rena, and company failed to infiltrate last time. Better give it another go.
Despite this being the final battle you are not barred from returning to the rest of Energy Nede. If you have any outstanding side quests to complete or gear to collect, now's the time to do it. There are two places in particular that you should visit before heading to Phynal:
- The Fun City Arena. If you play through the Duel Battles for each character you can collect powerful weapons, unique to that character. You probably don't need to do this for every party member, but collecting the weapons for your favored party isn't a bad idea.
- For a Few Fol More. Between the Field of Might and Princebridge is a small island with a shop, secreted away inside a forest. The vendor here charges through the nose, but his items are some of the best that you can buy. If you have a lot of FOL sitting around, you may want to spend it here.
If you think your party needs some further powering-up - you'll want to be level 70+ before you tackle Phynal - you can also complete more Guild or Challenge Missions. Both will provide your party with more resources.
The region surrounding Phynal has a few things to see, so we'll check those out first:
- In addition to the fishing spot on Phynal Pier, you can find another one if you look north of the pier, along the shoreline.
- Behind Phynal is a small clearing that you can only reach via the Bunny Call Super Specialty. You'll find a chest back here, as well as a Raid. You can safely grab the Reflectig Plate from the chest, just... keep well away from the Raid.
And that's that. Head to Phynal.
Phynal - Enemies
- Erikodus - 114,000 HP - Resists Fire
- Master Wizard - 120,000 HP - Resists Fire, Water, Wind, Dark
- Medusa Lizard - 200,000 HP - Resists Fire, Water, Earth
- Mirre 64 - 135,000 HP - Weak to Wind
- Niquia LM - 30,900 HP - Resists Fire, Water, Wind, Earth
- Phantom Phoenix - 390,000 HP - Resists Fire, Wind
- Quidonya - 94,100 HP - Weak to Light
- River Slug - 135,600 HP - Weak to Light
- Takikodus - 156,000 HP - Resists Water, Wind, Light
The enemy headquarters is still as intimidating as it looked the first time around, and as you approach you'll see three figures waiting in the first area. Make sure you save before getting too close, as they are not here to provide a warm welcome.
Zadkiel, Raphael, and Camael
HP:
- 358,700 (Zadkiel)
- 427,800 (Raphael)
- 288,250 (Camael)
Weakness: Fire, Earth, Dark (Camael only)
Hoo boy, what an introduction to the final dungeon. Zadiel, Raphael, and Camael are not a big deal individually, but fighting all three at once is a bit of a trial. They have the following attack patterns:
- Zadkiel is the closest thing the group has to a frontline attacker, and he either swipes at your characters with his weapon or emits a beam of energy that hits everyone in the line. He can also use Guard, which creates a shield to negate all damage to Zadkiel for a short time, and Mental Drain, which steals MP.
- Raphael teleports around, and can drop in beside a character and temporarily pull them into his cloak. He also uses Thunder Storm to hit your whole party, and Cure All, to restore his team.
- Camael has a ranged energy ball attack, and can use the Noah Spell to hit your whole party. He can also use the Delay Spell to slow a character's movement speed.
There are, roughly speaking, two ways to approach this battle:
- The first is to try and wipe out the enemy from weakest to strongest, in which case Camael is your first target. He has several weaknesses and much less HP than the other two Wise Men. Attack him relentlessly with Claude's Rock Explosion attack until he falls. After that you can go after Zadkiel and then Raphael. Make sure someone is always picking on Raphael, so he can't use his cloak attack or Thunder Cloud.
- The second is to go after Raphael first. Thunder Cloud is an annoying attack that goes off far more often than Camael's Noah, and hits a bit harder to boot. This will also stop Raphael from sucking your characters into his cloak. After Raphael's gone the battle gets much less hectic, and you can quickly wipe out Camael. Zadkiel is not a major threat on his own.
Regardless of your approach, you want to smack Raphael and Camael whenever you see them casting Spells. Thunder Cloud and Noah are both quite painful, and getting hit by multiple instances of both, back-to-back, and prove fatal to your party.
You'll receive Sacrificial Dolls for defeating Zadkiel, Raphael, and Camael. That's six down, and now you can properly enter Phynal. Get ready for a long, painful ascent. A few notes about the enemies you'll face inside the dungeon:
- The Quidonyas and River Slugs of Phynal can eat your party members, removing them from the fight. If all of your party members are eaten at once you'll get a Game Over. Hit both enemies from afar, until you manage to juggle or stun them.
- The Erikodus and Takikodus look and attack similarly. Go after the Erikodus first, however, as they're faster, a bit more dangerous, and have less HP.
- The Niquia LMs in the dungeon can slot onto the Erikodus and Takikodus, granting both a significant power-up. Try to take these little flyers out before this happens.
- The Phantom Phoenixes are basically minibosses, given their amount of HP and powerful Shadow Flare Spell. Use anti-air Special Arts and any attack Spells you have to bring them to ground.
- As the name implies, Medusa Lizards can Petrify your party members. Catch them in a crossfire and don't let up until they're stunned.
Phynal is divided into floors, and is the second-largest dungeon in Star Ocean The Second Story R. (The largest dungeon is in the post-game.) We'll tackle this place one floor at a time.
1F
Upon entering Phynal you'll find yourself at a crossroads, with three directions you can go.
- To the northwest you'll find a side room with chests containing a Spark Whip for Ernest and six Magic Canvases. If you use the teleporter at the end of the corridor you'll arrive at a dead end on the second floor, though you'll also find chests containing eight Magic Clays, a Beta Clip for Opera, and Lotus Eaters for Ashton.
- To the northeast you'll find a similar side room with chests containing a Symbology Dictionary for Leon and a Mithril Shield.
- To the north is... a corridor.
All three directions lead to a teleporter to the second floor, though only the northern and northeastern paths will let you advance.
2F
There are two locked doors on the second floor of Phynal, and you can't open them from here. Regardless of how you got to the second floor, head to the teleporter in the northeast to proceed to the third floor.
3F
Take a left from the teleporter on the third floor and go north. There's a side room up here with chests containing three Angel Statuettes and ten pieces of Iron. Head back the way you came and proceed east. Take a right when the passage redirects you north and you'll find a side room with a chest containing Fists of the Titan for Bowman.
Yet again, there are locked rooms up here, and you're forced to head to the next floor. The teleporter is north of the treasure room containing the Fists of the Titan.
4F
Head north of the elevator and take a left. You'll find a side room with chests containing Sylvan Boots and two pieces of Mithril. Head northeast and you'll find a room with a control panel that allows you to cycle through three colored locks. If you activate the blue pillar in this room you'll open the door in the north, which lets you get at chests containing an Atomic Puncher for Precis and five Mechanic's Toolboxes.
This room is a dead end. With access to the control panel, however, you can begin to open up the doors on the previous levels, each of which is linked to the colored panel on the fourth floor:
- If you deactivate the red locks you can get at a treasure room in the middle of the second floor, which has chests containing a Robe of Deception+ and a Ruby Pendant+.
- If you deactivate the yellow locks you can get through a door in the west of the third floor, which is your next destination.
- If you deactivate the indigo locks... ah, yes, you can't do that yet. Still, note that there's a locked door in the east wing of the second floor.
Going back and forth between the panel room on the fourth floor is a bit of a journey. If you're not interested in the treasure, deactivate the yellow locks and leave it at that.
The western path that you've unlocked on the third floor will teleport you up to the west wing of the fourth floor. Take a right and you'll find another color control room. Set the color to red, then head west to find the teleporter off of this floor.
5F
Head east and you'll come to a Save Point, a sure clue of something nasty to the north. Before trekking north, however, you should look further east. There's a locked door over here, but there's also a control panel that deactivates the indigo locks. This will open the door to the north and get you to a teleporter back to the fourth floor.
You're now in the east wing of the fourth floor. Check the side room as you head south and you'll find chests containing Rune Shoes+ and a Shadow Cross+. Continue south on this floor and you'll find a teleporter to the third floor, which, in turn, leads to the second floor, creating a shortcut back to the entrance of Phynal. You don't really need it, now that you can Fast Travel back to the fifth floor, but... whatever.
Speaking of which, head back to the fifth floor, use the Save Point, and get ready for a nasty fight to the north.
Michael and Haniel
HP:
- 720,000 (Michael)
- 675,000 (Haniel)
Weakness: Water (Michael)
Absorbs: Fire (Michael)
No Effect: Wind, Earth, Light (Michael)
Resists: Dark (Michael)
This fight is a pain. Michael and Haniel are quite a bit stronger than the previous Wise Men, and can thoroughly trash you with their attacks. Their attack patterns are as follows:
- Michael is a Fire user, and loves to employ his signature Spicule attack against the whole party. This tends to do the most damage in this fight, inflicting heavy damage to the whole party. He'll also use the Explode and Eruption Spells for AOE damage at a closer range.
- Haniel is a bit less aggressive, and likes to fire missiles that slowly home in on targets. He also has a painful beam attack that can inflict various status ailments, and can use Tractor Beam for AOE damage, as well as to stall any characters caught in the beam.
Haniel is a major nuisance in this battle, but Michael is the undeniable greater threat. The best way around this is to protect as many characters in your party against Fire as possible. Flare Rings, Witch's Boots, Dueling Suits, Colorless Scarves, and plenty else besides can deaden the effects of Michael's attacks, if not fully negate them. You'll also want to avoid elemental attacks where possible - though if you can work Water into your strategy, go for it. Michael is vulnerable to Water, and Haniel takes normal damage.
Unlike other battles, where you typically want to separate enemies, you should try to catch both Michael and Haniel in a crossfire this time around. Neither one moves especially fast, and if you can lure them into a two- or three-way attack they won't be able to escape. If one does get out, make sure you keep an eye on your healer. They like going after healers.
You'll receive a Faerie Tear for defeating Michael and Haniel. Eight down. Go back and save, then head north to find the teleporter off this floor.
6F
Just north of a Save Point on this floor you'll find a series of square rooms. Each has a color lock console, but most of them only allow you to activate one or two colors at a time. You need to navigate through these rooms in the proper order to make it to the exit in the north. Take this route, which will get you some chests along the way:
- Deactivate blue, then head north
- Deactivate green, then head east two rooms
- Deactivate red, then head south
- Deactivate blue, then head north two rooms and west one room
- Deactivate yellow, then head west one more room and south, to find a chest containing a Shield of Athena
- Head back north, deactivate green, then head west one room
- Deactivate red, then head north to find chests containing three Refreshing Syrups and a Gigawatt Stunner for Chisato
- Head back south, deactivate green, and head east one room
- Deactivate blue, then head east and deactivate red, then go back west and head north to find a chest containing a Bouro for Dias
- Head back south, then east
- Deactivate yellow, then head north
- Deactivate blue, then head back south
- Head west and north to the final room, then deactivate green to open the final door
There. A bit tedious, but not as bad as it looked. The next teleporter is north of the final room in the puzzle.
7F
Head north on the next floor. You'll wind up in a wide room, and a chest in the north of the room contains two Thunder Rings. This and one other item on this floor hint at what's coming, and suffice it to say that you'd better hope you can protect against Wind damage.
Travel west out of this room. This next corridor is a dead end, though if you turn north at your first opportunity you'll find a side room with chests containing a Thunderclap Rod for Celine, five Medicine Bottles, and five Conductor Batons. Head back south and east, and keep going east out of the central room until you arrive at a Save Point. Use it, then head north. Trouble's waiting.
Lucifer
HP: 850,000
Resists: Earth, Dark
No Effect: Water, Wind, Light
The second-in-command of the Ten Wise Men (Two Wise Men, at this point), Lucifer is easier than Michael and Haniel but still no pushover. He has several painful attacks:
- A single-target lightning attack
- A teleportation attack that harms anyone nearby
- Word of Death, which can instantly KO one character
- Wind of Decimation, a heavy Wind Spell against the whole party
- Demon's Gate, a heavy Dark Spell against the whole party
Highly mobile, Lucifer will zip all over the battlefield, using Wind attacks to decimate your party. This proves quite painful if you don't have Wind protection. The flip side, of course, is that Lucifer becomes somewhat harmless if you do have Wind protection, only capable of doling out pain with Demon's Gate. Get your characters up to a minimum of cutting Wind damage down to 1/2 to make healing more manageable, if not outright negating the element, then surround Lucifer and let him have it. If you can pincer him Lucifer Breaks without much of a fuss, and then you can beat him to a pulp.
Nine down. Only one Wise Man left to go. Head north to find the teleporter out of here.
8F / 9F
Take a left after leaving the teleporter. You'll find a side room with chests containing four Potions of Epiphany and three Wonder Drugs. Also over here is a locked door, and on the other side is a Save Point. You'll have to find a way through. Go east and use the teleporter in the northeast.
Follow this winding path a ways to the northwest until you hit a crossroads. To the north is a side room with two chests. They contain a Dueling Helmet and eight Re-Creation Gems. Further west is a teleporter back to the eighth floor, where you'll find a side room with three chests. They contain seven Smith's Hammers, two Goddess Statuettes, and a Dueling Suit.
Continue east of the treasure room and you'll find the locked door you spotted earlier, along with the Save Point. A console near the door will open it up, creating a shortcut. Otherwise... all that awaits you is one last door, near the Save Point.
This is it. The final battle awaits beyond the door. Go through and you'll be toe-to-toe with the last of the Wise Men, and he's easily the strongest of the bunch. If you need to go out and level or collect some new equipment, this is the time to do it. You can Fast Travel back here whenever you're ready. Otherwise...
Gabriel
HP: 1,000,000
The biggest and baddest of the Ten Wise Men, Gabriel puts up a heck of a fight. He relies almost entirely on Spells, and all of them hit hard. Expect the following attacks from Gabriel:
- Divine Wave, a spreading shockwave the damages anyone it touches
- Southern Cross, a Spell that hits the whole party
- Time of Truth, a triggering move that grants Gabriel access to more Spells:
- Stone Rain, a rock-falling AOE Spell
- Explode, an AOE Fire Spell
- Noah, a Water Spell that hits the whole party
- Earthquake, an Earth Spell that hits the whole party
- Star Flare, a Light Spell that hits the whole party
- Song of the Gods, a heavy AOE Spell
- Faerie Healing, which restores some of Gabriel's health
Gabriel moves slowly around the arena, starting off with a quick cast of Divine Wave to hurt anyone that zips towards him. He then casts the occasional Spell until you do enough damage. At this point he'll switch to Time of Truth, which summons a giant figure over Gabriel's head. This quickens Gabriel's spellcasting and grants him access to attacks that will hit almost every element. His attacks generally hit the whole party, as well, so you're in for a fun time.
To prep for this battle you should equip armor and accessories that either deaden or outright nullify as many elements as you can manage. This will allow your characters to ride out some of Gabriel's attacks, if not all of them, and survive long enough for your healer to go to work. Then surround Gabriel and absolutely pummel him with Special Arts and summons, preferably via neutral attacks. Heal and revive characters as needed. So long as your healer stays alive, you will eventually beat Gabriel... though it will take a while.
Defeat Gabriel, and... congratulations! You've beaten Star Ocean The Second Story R! You can now watch the ending play out. How it plays out depends on the relationships of your characters, and if they developed meaningful bonds you'll see sequences of them together. There are maaaaany different character combinations, so you may want to beat the game a few times to see how your characters fare together. Regardless of how things go, you'll receive the Hero of Light (Claude) or Hope of Nede (Rena) Achievement for beating the game. Well done!
Post-Game
Completing Star Ocean The Second Story R is not the end of the road. You have three more options for pushing the game forward, if you're so inclined:
- You can start a new game. Assuming this is your first playthrough of Star Ocean The Second Story R, you've never seen things from the perspective of Claude / Rena, depending on whom you chose as your starting character. Each of them also has one party member unique to their playthrough, and given that you could only recruit eight party members, you can now try the game out with the other half of the cast. The main story doesn't change, but you'll see a lot of new material on the second go-around.
- You can start a New Game +. Once you've beaten Star Ocean The Second Story R you can start over again with all of the items, equipment, levels, and unlocked data from your cleared save. This makes the second go-through much easier than the first.
- You can reload your cleared save (denoted by a gold star) and travel to City Hall in the Centropolis. Assuming you triggered Private Actions waaaay back in Kurik, you'll find a familiar NPC waiting in City Hall. Speaking to her will make Gabriel a MUCH stronger boss, and the only way to beat him is to power up in a special post-game dungeon known as the Maze of Tribulations.


