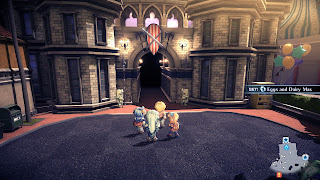
While you're exploring Fun City you're likely to come across the Fun City Arena. Located in the northwest of Fun City, the arena is a combat-oriented 'minigame' that will pit your characters against a variety of challenges. If you're victorious you'll win a wide array of powerful prizes.
This guide will take you through the Fun City Arena in Star Ocean The Second Story R. This place can get a little rough, so don't expect an easy win unless your team members are approaching level 100.
Basics
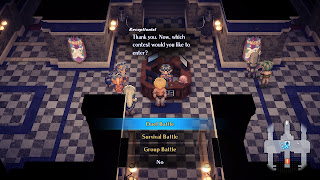
The Fun City Arena is similar to the Lacuer Armory Contest back on Expel, albeit with more options. There are three different types of battles available:
- Duel Battle, which pits one character of your choice against a monster, and you must win four battles in succession
- Survival Battle, which pits one character against fifty rounds of progressively more powerful monsters
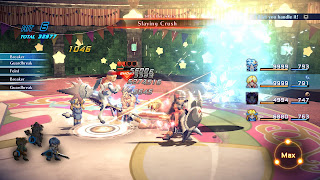
- Group Battle, which pits the whole party against themed groups of monsters
Each contest costs 2,000 FOL per attempt. During these battles you keep your normal equipment, but your character can only use a limited pool of items. If your character is knocked out or otherwise incapacitated - Petrified, eaten, etc. - the battle immediately ends in a loss. If your character loses they will need to be restored to full health outside the battle.
Duel Battle
The Duel Battle is a one-on-one against four enemies in a row. If your chosen competitor makes it through all four matches they will earn a prize, in addition to all the experience gained from defeating the enemies in the Duel Battle.
Duel Battle consists of five different ranks of difficulty: E, D, C, B, and A. Each rank is tougher than the last, with a recommended level of 10 for E Rank and a recommended level of 70 for A Rank. Unsurprisingly, the prizes you can earn get better with each rank. They also vary depending on who is fighting, at least to a degree:
- If any melee characters (Claude, Ashton, Dias, Precis, etc.) are competing, you'll receive:
- An IC Materials Set (Rank E - five each of Mechanic's Toolbox, Magic Canvas, Magic Clay, Magic Film, Fountain Pen, Spectacles)
- A Body Improve Set (Rank D - Ointment of Veda, Potion of the Winds, Illusion Doll, Victory Card, Mental Potion)
- An HP Recovery Set (Rank C - Sweet Syrup, Refreshing Syrup, Resurrection Mist, Sweet Potion)
- If any magic users (Rena, Celine, Leon, or Noel) are competing, you'll receive:
- A Jewel Set (Rank E - Moonstone, Orichalcum, Meteorite, Mithril, Damascus, Rune Metal, Star Ruby)
- A Defense Improve Set (Rank D - Witch Powder, Immunity Pill, Medical Rinse, Revival Card, Faerie Card)
- An MP Recovery Set (Rank C - Sour Syrup, Herbal Potion, Potion of Merlin, Mixed Syrup)
- Claude - Saad Blade+ (Rank B), Famed Sword Veinslay (Rank A)
- Rena - Knuckles of the Moon+ (Rank B), Fellpool Nails (Rank A)
- Celine - Ruby Rod+ (Rank B), Rod of Jabbering (Rank A)
- Ashton - Lotus Eaters (Rank B), Devil's Horns (Rank A)
- Welch - Furious Handy Stick (Rank B), Violent Handy Stick (Rank A)
- Opera -
- Precis - Atomic Puncher (Rank B), Megawatt Puncher (Rank A)
- Bowman -
- Ernest -
- Dias - Blade of Ruin (Rank B), Chrome Nightmare (Rank A)
- Leon -
- Noel - Grizzly Clasp (Rank B), Death Fang (Rank A)
- Chisato -
- 10 Battles - Rainbow Diamond - Crafting material
- 20 Battles - Ring of the General - +10% Defense
- 30 Battles - Mithril Helmet - Headware
- 40 Battles - Star Guard - Shield
- 50 Battles - Secret Manual 'Augment' - Unlocks the Augment Combat Skill
- Equip some heavy close-range Special Arts on one of your hotkeys and long-ranged Special Arts on the other. Vary your approach based on your enemy.
- Do what you can to mitigate instant-kills. The Quidonya and River Slug battles, for example, require you to remain at a distance, so have a ranged solution prepared. Some of the enemies can Petrify you, so you may want to equip an accessory that avoids Petrification. (See below.)
- Equip a Symbol of Antiquity. This will protect you from all status ailments, including Petrification. You'll receive a Symbol of Antiquity by defeating the Raid behind Phynal, which is quite do-able before the post-game, or by completing the Expel Boss Rush Group Battle (see below).
- Don't be too quick to rush in on stronger enemies. Many of them will ignore flurries of attacks and just smack you back. Be ready to counter attacks, and don't be afraid to just run away from foes. Wait for the opportune time to attack.
- Wear Bunny Shoes. They will make it much easier to escape tough situations.
- Don't forget your items. You get a decent stock of them, and you'll likely need them to survive these battles. (Unless you're playing as a healer, mind, but... spellcasters are not a great fit for Survival Battle.)
- Beat the game at least once
- Complete the Cave of Tribulations, including defeat Gabriella Celesta
- Defeat Iseria Queen by summoning her via Gabriella Celesta's Silver Trumpet
- Defeat Gabriel with his limiter deactivated
- Head of the Wolfpack (Level 30)
- Party: Anyone
- Prize: 50 BP
- A battle against a Coquettish Whip and five Wolfheads. It's highly unlikely that you'll lose this rather basic battle, if you made it all the way to Energy Nede.
- Expel Boss Rush (Level 50)
- Party: Anyone
- Prize: Symbol of Antiquity
- A five-part Chain Battle consisting of various bosses from your time in Expel, ending with a rematch against Cynne. You're way stronger than this lot by now, unless you've been avoiding every battle possible.
- Jumpin' Gelatin Infestation (Level 50)
- Party: Anyone
- Prize: Sorcerer's Knuckles+
- A battle against a group of Otiphs and Clear Gelatins, all of which can replicate themselves. Spells that hit the entire field will make your life easier. The Clear Gelatins don't do much until attacked, so go after the Otiphs first.
- Three Knights of Nede (Level 50)
- Party: Men only
- Prize: Light Cross
- A battle against two Insane Lords, two Dark Crusaders, and two Athul Athuls, using only your male characters. If you didn't recruit Noel you won't have a healer, so use Special Arts at a distance and avoid getting pincered.
- Armory Contest Redux (Level 60)
- Party: Anyone one party member
- Prize: Deadly Edge
- A four-part Chain Battle for one against the contestants from the Lacuer Armory Contest, ending with Dias. The first three fighters are weak, but Dias can put up a good fight. Bombard him with Special Arts and watch his movements. (Note that you can send Dias himself to fight Dias, if you want. Confusing.) This is the only way to forge the Aeterna, if you missed out on the first Deadly Edge earlier in the game.
- Slip Past Their Shields! (Level 65)
- Party: Anyone
- Prize: Soul Shield
- A battle against five Magic Defenders and one Master Wizard. Do what you can to slip past the Magic Defenders so you can stop the Master Wizard from casting Spells. Combat Items, Spells, and Summons are all fair game.
- The Goddess Festival (Level 65)
- Party: Women only
- Prize: Formation Manual 'Rage'
- A battle against Lavarre, a Succubus, and two Arachnovias, using only your female characters. Depending on whom you recruited this can be quite a tough battle. Use Spells to wipe out the Succubus, Special Arts for the Arachnovias, and anything you like for Lavarre.
- Nede Boss Rush (Level 75)
- Party: Anyone
- Prize: Formation Manual 'Training'
- A three-part Chain Battle consisting of the bosses you fought on Energy Nede, except for the Ten Wise Men. Take out the weaker enemies (the Arachnovias, the Guard Hand's cronies, Lavarre) before tackling the stronger stuff. The Barchian in the third round is particularly vexing, so try to keep the fighting away from it until you've cleared out everything else.
- Dance of the Phoenix (Level 75)
- Party: Anyone
- Prize: Ring of Lightspeed
- A battle against two Zinaes and a Phantom Phoenix. Anti-air attacks will prove invaluable in this crowded battle. If you've already gone through the Maze of Tribulations you'll have a Phantom Slayer, and you can use it to wipe out the Phantom Phoenix in a single hit.
- The Lizard's Den (Level 75)
- Party: Anyone
- Prize: Colorless Scarf
- A battle against two Fenrir Beasts and a Medusa Lizard. Overall painful, thanks to their fire breath attacks and ability to Petrify / Paralyze your party. If you find your characters getting weak you can use one member as bait, steering the enemies on a wild ride while your healer brings the rest of the party back on line. Don't get caught in a crossfire!
- Ten Wise Men Marathon (Level 85)
- Party: Anyone
- Prize: Love Force
- A five-part Chain Battle against all of the Ten Wise Men. In the first you'll fight Zadkiel, Jophiel, and Metatron, which is pretty straightforward, aside from the occasional case of Petrification. The rest of the battles are the same as before - you just don't get a break in-between. (Level 85 is a bit low for a recommendation. Maybe try 100+ instead.)
- No Weapons, No Problem (Level 130)
- Party: Only fighters
- Prize: Valiant Shield+, Valkyrie's Bracelet+
- A battle against a Brigand Ogre, a Giant, and a Geo Guardian. You have no healer this time around, so you'll need to be very careful. Ignore the Geo Guardian at first and wipe out the other two enemies. Once they're gone, work the Geo Guardian down to its third form. If you're lucky (or just very strong) you'll Break it and blow right through its third form and take it out. If not, back off and used summons / ranged attacks. Note that there are no spellcasting restrictions on your summons, so you can set Rena and / or Noel up with healing Spells.
- The Demon Ritual (Level 130)
- Party: Only Symbologists
- Prize: Valiant Mail+, Valkyrie's Garb+
- A battle against a Phantom Devil and two Lesser Devils. The lack of fighters here really hurts. Equip Rena with a Phantom Slayer so you can swiftly dispatch the Phantom Devil, then use her as a distraction to draw the Lesser Devils around the arena while your other casters use Spells... or you use summons, if Rena is all by herself. (This fight isn't as difficult as it sounds, honestly. Rena's not a great frontliner brawler, but she's not hopeless, either.)
- Do I Smell Gunpowder? (Level 130)
- Party: Anyone
- Prize: Valiant Boots+, Valkyrie's Boots+
- A battle against two Life Flayers, two Mind Flayers, and a Manic Gunner. If your characters get caught between any two enemies, they are probably dead in an instant. Draw the battle away from your healer and use Bunny Shoes to stay out of reach of incoming bullets. The Mind Flayers will obliterate MP, so rely on summons to do a lot of damage if the battle wears on.
- A True Survival Battle (Level 200)
- Party: Any one party member
- Prize: Planeteer
- A four-part, one-on-one Chain Battle against a Hell Savant, a Hellmaster, an Aulbear, and... Gabriella Celesta. The first three enemies aren't so bad, but fighting Gabriella Celesta solo is... certainly something. (I'll, er, come back to this. I thought I was doing well, but as soon as Gabriella showed up she absolutely creamed poor Claude.)
- The Ten Wise Men Return (Level 200)
- Party: Anyone
- Prize: Symbol of Divinity
- A five-part Chain Battle against the Ten Wise Men. This is virtually identical to the Ten Wise Men Marathon, with one big difference: Gabriel fights without his limiter. You can only unlock this fight by completing that battle in the first place, so use the same strategy - and make sure you come out of the Lucifer fight as fresh as you can manage.
- The 'Twin' Archangels (Level 200)
- Party: Anyone
- Prize: Winged Bracelet
- A battle against Gabriella Celesta and Iseria Queen. Inarguably the most difficult fight in Star Ocean The Second Story R, though the strategy you used to beat those two bosses more or less works here... it just takes a lot longer. Good luck!


