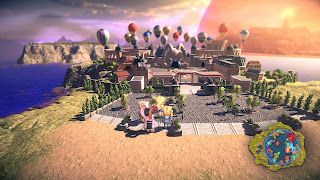
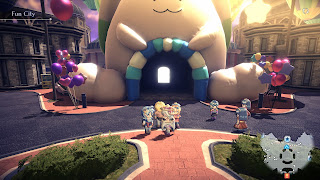
During the second half of Star Ocean The Second Story R you'll gain access to a flying creature known as a Psynard, and one of the places you can visit via Psynard is Fun City. An amusement park in the northeast of Energy Nede, Fun City is a place for the team to relax and enjoy themselves, which is a nice change of pace from... everything else that's going on.
There is a short period of time late in Star Ocean The Second Story R where you'll come to Fun City as part of the storyline. This guide will not address that visit. Instead, we'll focus on what Fun City is like the rest of the time. You can get a great deal of out Fun City - and significantly power up your characters in the process - if you pay this place a visit.
Admittance
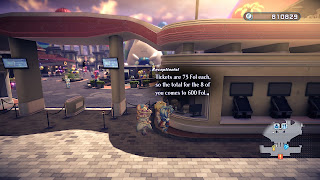
When you first visit Fun City you'll need to pay for tickets at a booth on the right side of the front gate. Tickets are 75 FOL apiece, so the larger your team, the more you have to pay. (Though by this point in the game, that much money is an absolute pittance.)
Because you need to pay to get inside Fun City, you can't Fast Travel to anywhere but the front gate. Once the story brings you to Fun City you'll receive an N.P.I.D., a pass that lets you enter without paying the admittance fee. This will allow you to Fast Travel within the park as you please.
As soon as you get inside, check the little park right in the middle of Fun City, north of the shop kiosk. There's a Unique Spot here, A Whimsical Playground, which will earn you a Dream Bracelet+.
Shops
There are a few shops in the main area of Fun City. They are as follows:
- The Item Shop is on the left side of Fun City's central kiosk. They sell the usual array of restorative items, ingredients, and crafting materials. Of note are the Keen Kitchen Knife, Magic Camera, and Beret, all useful for Item Creation.
- There's a cafe on the right side of the central kiosk. Their selection is surprisingly robust compared to other Restaurants in the game.
- The shop in the northeast is a, er, 'Fanfic Convention'. You can purchase a variety of Fanfics inside, all of which are basically useless. (That sounds like some sort of meta commentary. Don't yell at me, I didn't make the game.)
- The Inn is to the west. Yep.
Nothing special, in other words - though for the most part, you aren't here for the shops.
Bunny Race
The building in the north (if you can call it a building) contains the Bunny Race. Here you purchase tickets from a mascot inside, then enter the race track in the north and bet on racing bunnies. If you manage to choose which bunnies will come in first and second place, you'll win the prize corresponding with their numbers. Pretty simple, right?
Yes, and... no. Bunny Race has some nitty-gritty mechanics that require greater explanation. We'll have a look at Bunny Racing in greater detail in another section of the guide.
Cooking Master
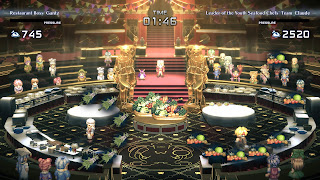
The building in the northeast contains the Cooking Master competition. Here you choose one of your characters to compete against another chef to create a dish that will satisfy Yarma, Demon Food God, the emcee of the competition. It costs 1,000 FOL to enter the Cooking Master competition, and the competitor must have a Cooking IC level of at least 1.
We'll discuss Cooking Master in more depth in another section of the guide. If you're looking for a quick breakdown, however, this is how it goes:
- You choose one of your characters to compete
- The emcee sets a food theme and brings in an opponent
- You grab ingredients from a big heap of food in the middle of the room
- You run to the counter in the southeast
- You choose up to ten of a particular ingredient
- You try to time button presses to a meter that fills on the right side of the screen
- After three minutes the points you earned from cooking are totaled up, and a winner is declared - and if you won, you get a prize
nside, though only the middle one does anything of note. Speak to her and she'll provide accurate stats on a variety of topics, such as your success rate at Item Creation, how many battles you've fought, how many monsters you've defeated, and so forth. Of particular interest for completionists is the percentage of the game's treasure chests that you've found thus far.
- Claude and Rena. Available after saving Mirage from Metatron but before reporting to L'Aqua to head to Phynal. Check out front of the Fun City Arena to find Mariana, who apparently survived the fight with the Ten Wise Men. She'll collapse, and wind up at the Inn. Speak to Mariana to receive a Silver Cross, then speak to her again for a Ring of Lightspeed.
- Claude and Dias - Rena only. Available once you've reached the end of the story, before proceeding to Phynal. Check the Fun City Arena and you'll find Claude and Dias, about to have a sparring match. After the match you can choose to speak to either man, receiving a relationship boost with the one while taking a hit with the other.
- Celine - Rena only. Available if Celine knows the Compounding IC, and Rena has a high relationship score with Claude. Approach the Fun City Arena and Celine will run out, pursued by a bunch of lovestruck people. Choose to follow Celine and Rena's relationship with her will improve. Choose to stay out of it and Rena will discover a bottle of liquid. Returning it to Celine will give Rena a big relationship bump with her; throwing it out will give her a smaller bump with Celine; and putting it on Rena will give her a relationship bump with Claude. If you choose to leave Fun City without finding Celine - she's at the Inn - her relationship with the whole party will suffer.
- Ashton and Precis - Claude or Rena. Available if Ashton and Precis have a high relationship, and Ashton knows the Sword Dance Special Art. Check in the Fun City Arena and you'll find Ashton demonstrating moves for Precis. Precis learns the Super Holograph Special Art.
- Welch - Claude or Rena. Look outside the Cooking Master building. Welch is arguing with a merchant. Either option boosts your relationship with Welch, though attempting to mediate has more of an effect.
- Leon - Claude only. Enter Fun City and you'll trigger a PA with Leon, who is watching a performance with a bunch of other kids. If you stick around for the whole thing Claude and Leon's relationship will get a nice boost, while leaving early hurts their bond.

