Enjoy the Cooking IC in Star Ocean The Second Story R? Want to put your skills to the test? Look no further than the Cooking Master competition, one of three major mini games located in Fun City. More a test of your reflexes than your nose, Cooking Master is a fun way to pass the time - and earn yourself some high-quality Cooking ingredients, if you prove speedy enough.
The Basics
The building in the northeast of Fun City contains the Cooking Master competition. Here you choose one of your characters to compete against another chef to create a dish that will satisfy Yarma, Demon Food God, the emcee of the competition. It costs 1,000 FOL to enter the Cooking Master competition, and the competitor must have a Cooking IC level of at least 1.
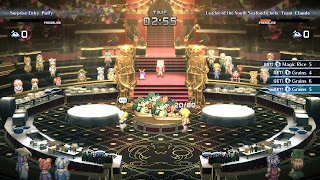
At the beginning of a round of Cooking Master the emcee will announce the theme for the battle. This determines the ingredients you'll be using, and the dishes you can make. The ingredients are piled in the middle of the room, and you'll need to run over to the pile and grab a bunch before you can start cooking. Your character can carry up to 80 ingredients at once, so you'll need to make periodic return trips to the pile of food.
Approach the counter in the southeast to start cooking. You can choose up to ten portions of a single ingredient, in a single round of cooking. Once you've chosen your ingredients and portion size you'll trigger a circular meter, around which the portions appear during the first rotation. During the second rotation you need to watch the progression of the meter and try to tap the confirm button as the meter reaches each of the ingredients around the circle. The better your timing, the better the resulting dish - and the more points you'll earn.
In addition to timing, your can earn extra points from your dishes by using premium ingredients. When you're choosing which ingredient to use you may see some of the titles displayed in yellow. These ingredients will yield higher-quality dishes if prepared correctly. In general you want to create these dishes first to build up your point lead. You won't get as many of these premium ingredients, however, so you'll need to judge which ingredients you use accordingly.
You have three minutes before the contest ends, and you need to make as much high-quality food as possible. Once the timer runs out you'll be allowed to finish whatever you're working on. At that point the game will check your score against your opponent, and if your score is higher you'll win a prize.
As you're playing your character may build up Pressure, displayed in the top-right corner of the screen. The more Pressure you have, the faster the cooking gauge moves, correspondingly making it harder and harder to prepare your meals. If the Pressure gauge fills up the match will immediately end in a 'Pressure KO', and you'll lose.
Pressure accumulates for seemingly a few different reasons:
- Failing a dish outright
- When the opponent does especially good in a round
- Falling too far behind the opponent's score
Opponents
For the majority of matches in Cooking Master you'll be facing voiceless nobodies. They get progressively better over time, but you shouldn't have much trouble with any of them once you've mastered the basics. Play Cooking Master with the same character enough times, however, and eventually you'll be pitted against two unique opponents.
Puffy
If you play through enough matches as one character you'll eventually run into Puffy. A recurring antagonist in the Star Ocean franchise, Puffy is much more challenging that the average chef, as she racks up points quickly - and her performance seems to have an effect on yours, as Pressure builds up fast if you don't perform well. That said, Puffy is just about the only opponent who is likely to get a Pressure KO herself, so if you hold out long enough you may just win by default.
If you lose to Puffy you'll face her again in the next match, assuming you use the same character.
Yarma
If you manage to defeat Puffy you'll have to face Yarma himself as an opponent. Unsurprisingly, Yarma is by far the most difficult chef you'll face, and he's the only one who is likely to get over 10,000 points, as Yarma usually gets the top score for each of his dishes. You'll need quick reflexes and near-perfect timing to beat him, as Yarma isn't going to suffer a Pressure KO.
If you manage to defeat Yarma - not an easy feat - you'll receive five Ingredients of Yarma, rather than the normal prize for that theme (listed below). You'll also unlock the Five-Star Chef Achievement, and if you decide to challenge Cooking Master with that character again they can choose their opponent.
Prizes
The nature of the game does not change much based on the theme of the competition. The prizes you receive for winning, however, do vary depending on the theme:
- Desert Battle - 5 Sweet Fruits
- Full Course - 1 Sweet Fruit, 1 Marenne Oyster, 1 Top Quality Tuna, 1 Organic Vegetable, 1 Magic Rice, 1 Wobbly Slime, 1 Gelatinous Slime
- Seafood Battle - 5 Marenne Oysters, 5 Top Quality Tunas
- Slime Battle - 1 Wobbly Slime, 1 Gelatinous Slime
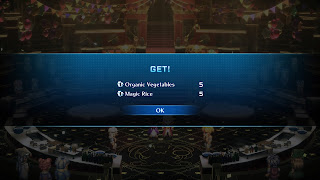
- Vegetable Battle - 5 Organic Vegetables, 5 Magic Rice
On the whole the Cooking Master challenge is not that difficult, so long as you don't panic while prepping your food. Here are some suggestions to help you come out on top:
- Ignore your opponent. Completely. Focus on what you're doing. Some opponents are better at cooking than others, but this won't matter much once you get the feel for the minigame. After a while you'll be surprised at how thoroughly you stomp each opponent.
- Choose a character with a high Cooking level to maximize your results. Having the Taste Talent - which you'll discover by using the Cooking IC - doesn't hurt either. The higher your character's Cooking level, the more manageable the cooking process... and the less Pressure you'll receive for fouling a dish.
- Fill up to 80 ingredients whenever you approach the pile of food, and don't go back for more unless you have less than 10 of an ingredient left. Spend as little time at the food pile as possible.
- Ideally you want to prepare as many of a single ingredient as you can each round. If this means going with a lower-quality ingredient over something better, then go for it.
- The amount of points you receive per portion depends on when you press the confirm button. Ideally you want to press it just as the meter is traveling past the closest edge of the food icon. This will take some practice.
- If you're having trouble timing the path of the cooking gauge, then pay more attention to the circles that appear around the food items. Once the circle is more or less directly on top of the icon you can press the button and expect a good result.
- Getting a 'Perfect' result on one item during a food prep round will double the points for all of the items you prepared during that round. Ideally you want to get 'Perfect' scores on every item, but even managing it on one is a big help.
- Don't rapidly press the button when prepping food. This will earn you many failures, and rapidly build up your Pressure gauge. Take each ingredient one-at-a-time.
- If you check the bottom-right corner of the screen when approaching the counter you'll see an option to re-use your previous ingredient. Doing this over and over with a 'normal' ingredient will save you a ton of time, as you tend to get lots of the lower-quality ingredients.
- There's also an option to use a 'Random Ingredient'. This is also a solid time-saver, as it allows the game to choose an ingredient for you. Only use this option when you have lots of each ingredient in stock, however, as the game will maximize the portion of the ingredient it chooses - even if that portion is only one serving. Random Ingredient works best when there are very few ingredients to choose from, such as during a Slime Battle.

