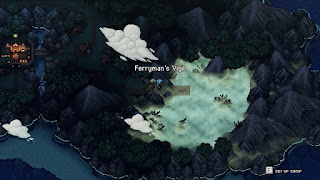
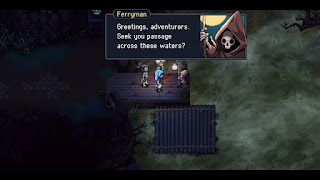
Garl is out of the party for the foreseeable future, and the team needs to do something about it. New party member Seraï suggests heading to Ferryman's Vigil, where they may find something to help Garl's condition. Stock up on meals at a campfire, then trek east of Lucent to find the docks.
Seraï will eventually negotiate passage once you speak to the Ferryman. There's no coming back from this place without completing it, so make sure you're prepped!
Flooded Graveyard - Enemies
- Arentee - 110 HP - Weak to Moon, Poison
- Gulgul - 49 HP - Weak to Poison
- Lonzon - 75 HP - Weak to Sun
The first save point of the area is a short walk west of the Ferryman's raft. If you jump into the water north of the raft and swim as far as you can you'll eventually find some Mushrooms, but they're probably not worth the bother. Head west to run into the first group of enemies in this area, a quartet of Lonzons. Seraï's Venom Flurry is a handy move for this battle, given how spread out they all are.
Southwest of the landing where you fought the Lonzons is a little side area where you can find some Onions. Skim along the southern edge of the map as you head west and you'll find some Potatoes, shortly before running into a stately-looking gentleman who suggests you leave. There's a house here that we'll check in a moment.
Trek north of the gentleman and you'll run into some new enemies, Gulguls, along with an Arentee. The Gulguls can hit hard, and their move naming make them difficult to predict, but they don't have much HP. There are many Bell Peppers to pluck in their little clearing. Wander east of here, looking to the north, and you'll spot a shrine with telltale torches out front. Enter it and claim the chest inside for some Shimmering Daggers for Seraï.
Wander back to the gentleman and his manor, down south, and head inside. A Lonzon and two Galgals will drop in to greet you as you walk through the... foyer? Check the north end of this passage and you'll find a climbing wall that will take you to the roof. On your left you'll find a chest containing Obsidian Ore. There's a gap in the stonework near the chest, and you can drop through it and land back inside the building, not far from another chest. This one contains the Recipe for Hearty Stew.
Return to the roof of the building and head northeast. You can jump down into the water up here to access the rear of the graveyard. Head north - ignore the second stately fellow wandering around, he's no help - and you'll run into a group of three Galgals and a Lonzon. Northwest of their clearing you'll find some Grains.
Duke Aventry
Poor guy. Duke Aventry is more of a miniboss than a full-on area baddie, and you shouldn't have too much trouble with the fight. Duke Aventry uses the following attacks:
- A strong, single-target melee wallop
- Tournade, an AOE attack
Do your best to time your blocks on the normal hits, chip away at the Locks when Duke Aventry is charging up, and otherwise use your strongest attacks. Heal as necessary. Tournade has five Locks, so expect to use Moonerang and / or Venom Flurry to get through them all.
Duke Aventry will let the team pass after the battle, and he'll even teach Zale a new Skill: Dash Strike. Nice.
Before proceeding further, look to the right of the skull that forms the entrance to the next area. There's a pillar sticking out of the water, and just above it is the top of a chest. You can jump down to open the chest, which contains a Rainbow Conch. There, now you can go inside.


