

Choosing Your Character
Your first task in Sea of Stars is to choose the leader of your party. You can pick one of two characters:
- Valere is a monk who walks the path of the Guardian Goddess Luana. She uses Sword and Moon attacks, and is arguably your strongest attacker at this point in the game.
- Zale is a blade dancer who walks the path of the Guardian God Solen. He uses Sword and Sun attacks, and can heal your party members.
Both characters will be in your party regardless, and you can change your party leader on in the game, so ultimately this choice is not that consequential. Go with the character you like more.
Once you've chosen the leader of the party the game begins. Valere and Zale will be joined by Garl, a physical fighter who leans towards defense. He uses Blunt attacks, and can heal your party members. Garl will be your tank for the span of the demo, and he'll come in just as handy as the other two. And speaking of combat...
Combat
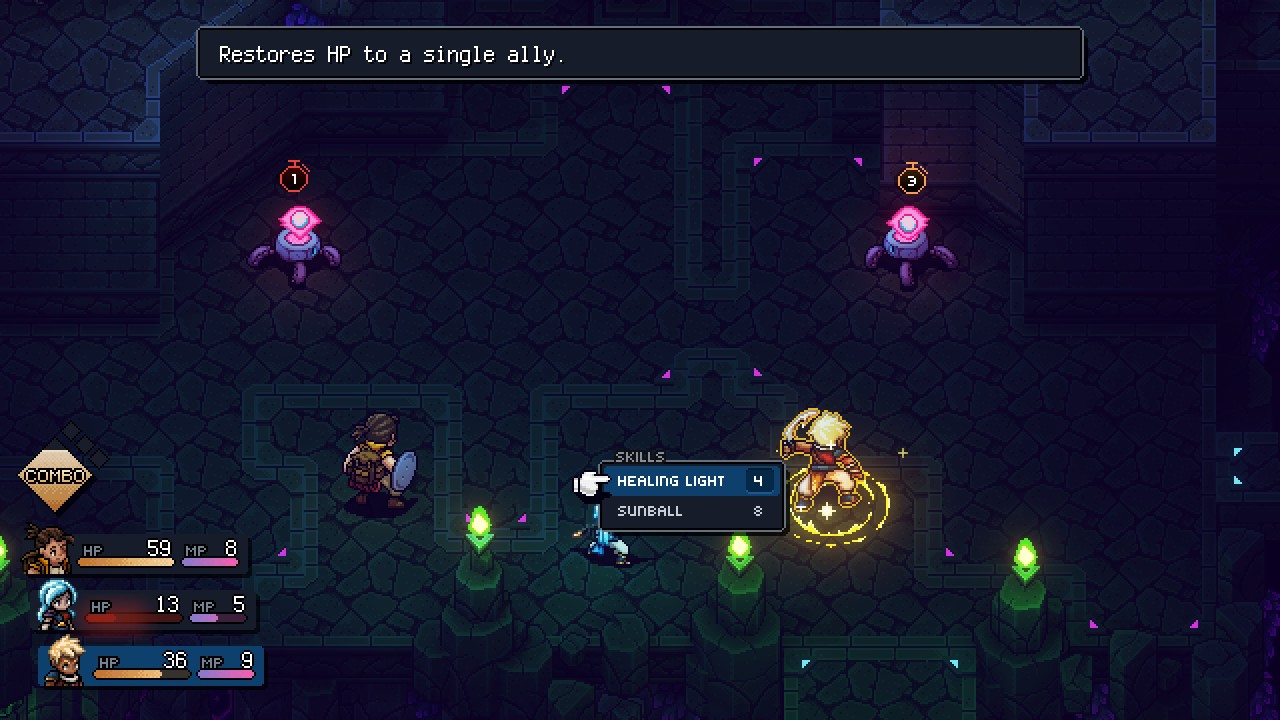
Sea of Stars is a turn-based RPG. Your party faces off against enemies in the field - enemies that you can avoid altogether if you wish, as there are no random battles - and you need to reduce their Hit Points (HP) before they can reduce yours. Magic Points (MP) are used to activate Skills which can inflict extra damage. All standard JRPG combat procedure.
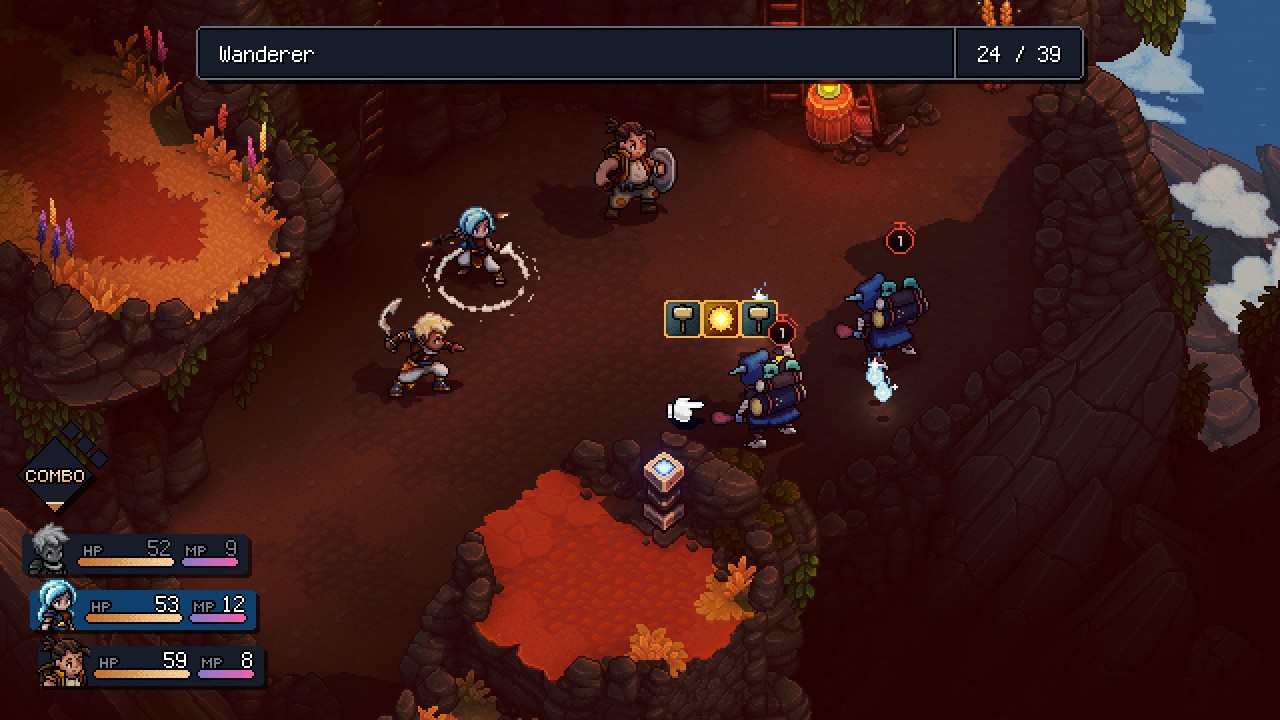
Sea of Stars throws in a few extras that make the game a little more interesting, however. First up are Weaknesses and Locks. Some enemies will show up with a bar of icons (Locks) over their heads. These represent attack types, all of which your party members can use. Inflict these types of damage on an enemy and you'll weaken an attack that they plan to use on their next turn. Break all of the Locks and the enemy's planned attack will be halted. Bosses make use of powerful moves on a regular basis, and your survival will often hinge on breaking one or all Locks before the attack goes off.
Next up are Timed Hits and Blocks. Whenever one of your characters uses an attack or a Skill you can boost the effect by tapping the confirm button just before the move goes off. Similarly, you can weaken the effects of an enemy's attack by tapping the button just before the move hits one of your characters. The proper timing varies from one attack to the next. You don't have to time these actions to succeed, though they make certain battles much easier.

Third is Boosting. Whenever your characters hit an enemy with a normal attack they will scattered sparkles on the battlefield. This is known as Live Mana, and you can use Live Mana on a character's turn to bolster their next attack. (How you do depends on which version of the game you're playing, though you need to enter a special mode via one of the buttons to begin Boosting.) If you plan on unleashing something powerful, you may want to strategically save any Live Mana for a critical moment.
Last are Combos. If characters are available to take their turn and have sufficient Combo Points (CP) they can sometimes combine their moves together into more powerful Combos. Combos typically have a greater effect than Skills on their own, and can target multiple weakness types at once, depending on the Combo. Breaking Locks is the most efficient way to earn CP. Your current CP is displayed above your party's HP in the bottom-left corner of the screen.
Beyond these more novel mechanics, there are a few other things you should know before you get on with combat:
- Your turn order is up to you. Whenever your turn comes up you can move freely between your party members and choose who gets to move next.
- Enemy turn order is displayed as small timers above their sprites. Once the number reaches zero the enemy will attack.
- Characters can replenish their MP by hitting enemies with normal melee attacks. This should encourage you to use Skills often, as there's no need to horde MP.
- Items are obtained via Cooking, which we'll look at once you reach a camping site. You can hold up to ten items at one time, limiting your resources. It's wise to Cook often.
- If a character gets knocked out they will be revived automatically after a few turns, assuming you don't revive them yourself. The stars over their head indicate how many turns it will take before the character wakes up. This isn't the ideal way to bring someone back to life, especially in boss battles, though sometimes you won't have a choice in the matter.
- Enemies will drop resources on the ground when defeated. You need to pick them up - as in move over and grab them - to earn your rewards.
In addition to everything above, you can find two additional combat aids in the menu, under the Relics menu. Here you can choose whether or not you want to activate the Amulet of Storytelling, which adds 100 HP to everyone and heals the party after battle, or the Sequent Flare, which makes it clear when you've successfully timed a hit or a block. In short, if you want an easier experience, activate these two Relics.

Mountain Path
Enemies
- Wanderer - 39 HP - Weak to Blunt
You'll gain control of the party on an autumnal mountain path. Take a left from the starting point and you'll find ledges leading down the cliff edge to a cave. Inside is a chest containing a Solstice Mage Ring. This is a handy accessory if you learn to time your blocks properly.
Climb back up the cliff to the starting point and head east, then south. After dropping down several ledges you'll find a clearing. Check up the ledges on your left to find a chest containing 90 gold.
To the east, accessible via a ledge and a ladder, you'll find a lower clearing with two Wanderers. This is your first taste of combat in the demo, so you may want to pick a fight and check it out. Look above for a quick battle tutorial. Check the top of the ladder and to the northeast of the Wanderers for some Grains, which will be used for Cooking a bit later on.

Climb the ladder next to the Wanderers to make your way up to a ledge, then drop down. There's a tightrope on your left that will lead you southwest, where you'll find more ledges to the south. Check the plant next to the ledges for some Potatoes. Head down the ledges and you'll find a series of gaps leading to device which will trigger a bridge.
Use the bridge to head southeast. Check northeast as you walk along this path to find more Potatoes, then head southeast to the edge of the screen to exit the mountain path. At this point the demo skips ahead in the story, and you'll next find yourself in town.

Brisk
A salty port town, Brisk will deposit your party straight into the local tavern. If you speak to the locals you'll receive some hints as to the team's adventures to get this far. Head to the northwest of the tavern and you'll find a group of pirates with whom the team has business - and if you agree to an armwrestle, it becomes clear that you'll be helping them retrieve something.
After the armwrestling you can explore Brisk. Parts of the town are currently blocked off, but there's nevertheless a few things you should check out:
- If you check the upper deck of the tavern - yes, it's a boat - you'll find a room where you can settle down for the night and speak to the various NPCs in the party. Check the fireplace to trigger nighttime.
- Around the middle, near three guards, is a Merchant who runs an equipment shop. You should have enough to afford a Rock Lid for Garl and one Power Belt for any of your three party members. Don't forget to equip your new items in the menu.
- On the other side of the three guards, also in the middle of Brisk, is a Merchant who sells a variety of vegetables. You'll need these to Cook meals, though for the moment you have plenty.
- West of the vegetable stand is your first save point, a magic-looking tome. Make liberal use of save points to ensure you don't lose any progress.
- The Arcane Armlet, a normal piece of equipment
- The Artful Gambit, a Relic
- The Eye of Yomara, an accessory that displays enemy HP and weaknesses in combat
The item of particular interest here is the Artful Gambit. When equipped this Relic will reduce everyone's HP by a whopping 95%. That said, it also boosts damage output for Timed Hits, and reduces attacks that you successfully Timed Blocked to 1 HP. This Relic is not recommended for newcomers, as you really need to know your attack timing to avoid being slaughtered.

Brisk is also home to a few hidden treasure chests. Snag their contents before you leave town.
- Check the northeast of Brisk to find a small beach. On the north end of the beach is a chest containing six Seafood.
- North of the tavern you'll see a Villager who looks a bit like a chef. To the left of him is an alleyway with two more NPCs. There's a hidden path beneath the buildings, to the right of the NPCs, that will bring you to a chest containing Teal Amber Ore.
- Check the two western-most buildings in Brisk. There's a chest on top of the one on the right, and you can use a ladder on the building on the left to reach it. The chest contains Pirate Garb, a piece of armor for any of your party members.
- In the far, far west of Brisk is a chest containing a Seashell. It's partially hidden behind the top of a palm tree.
There's more to see in Brisk, but you can't reach anything else in the demo. Head west through town until you see a northbound path near the save point. This will take you out of Brisk.
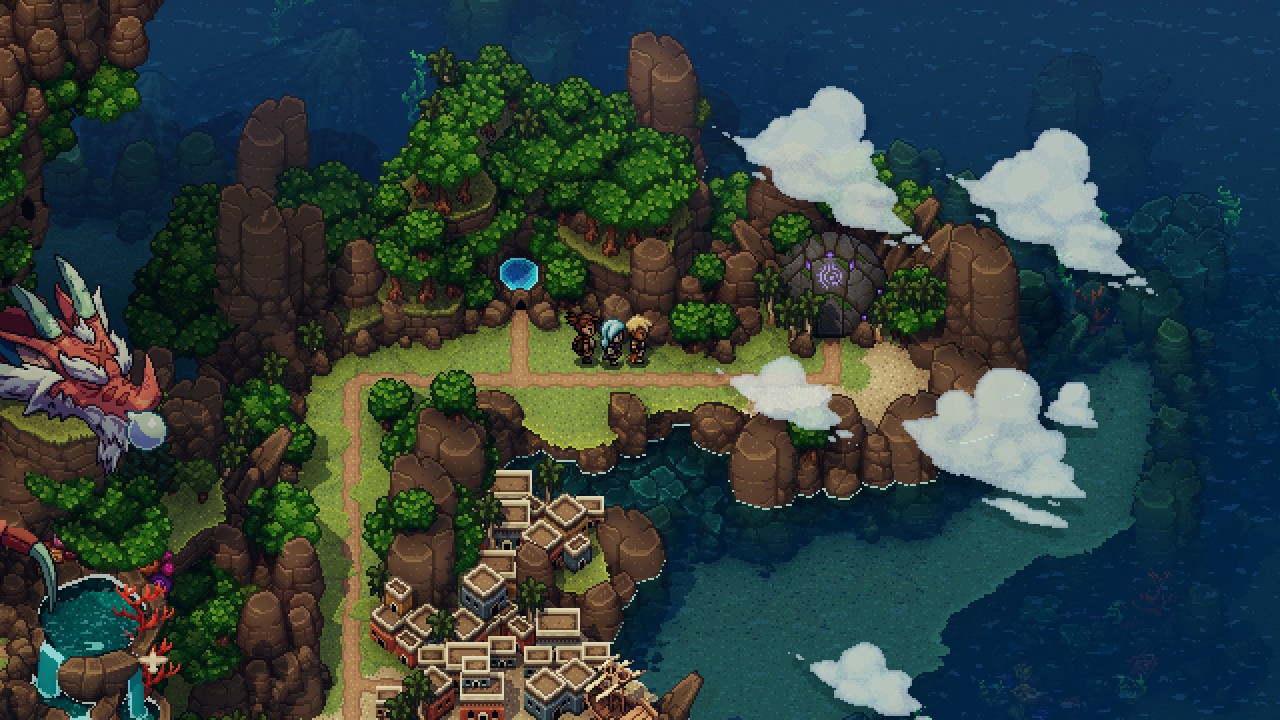
You're now on the world map. Here you can explore a narrow path leading north and south from Brisk. At any point along here you can open up a campsite, which allows you to speak to party members, restore everyone's health, and save your game. You can also use the campfire to do some Cooking, which we'll look at now, alongside another mechanic you've just unlocked.

Cooking and Fishing
As you explore Sea of Stars you'll pick up a bunch of ingredients, and you can use these to Cook up various dishes. The process is simple enough: Interact with a campfire once you've started Camping, choose the Cook option, and select your meal(s). If you have the necessary ingredients you'll create new items. You can find more ingredients as you explore, or buy them in towns.
It is important to note that you can only hold ten restorative items at once. There's no hoarding in Sea of Stars. Choose your items carefully. (I recommend Mushroom Soup and Herbed Fillet, myself.)
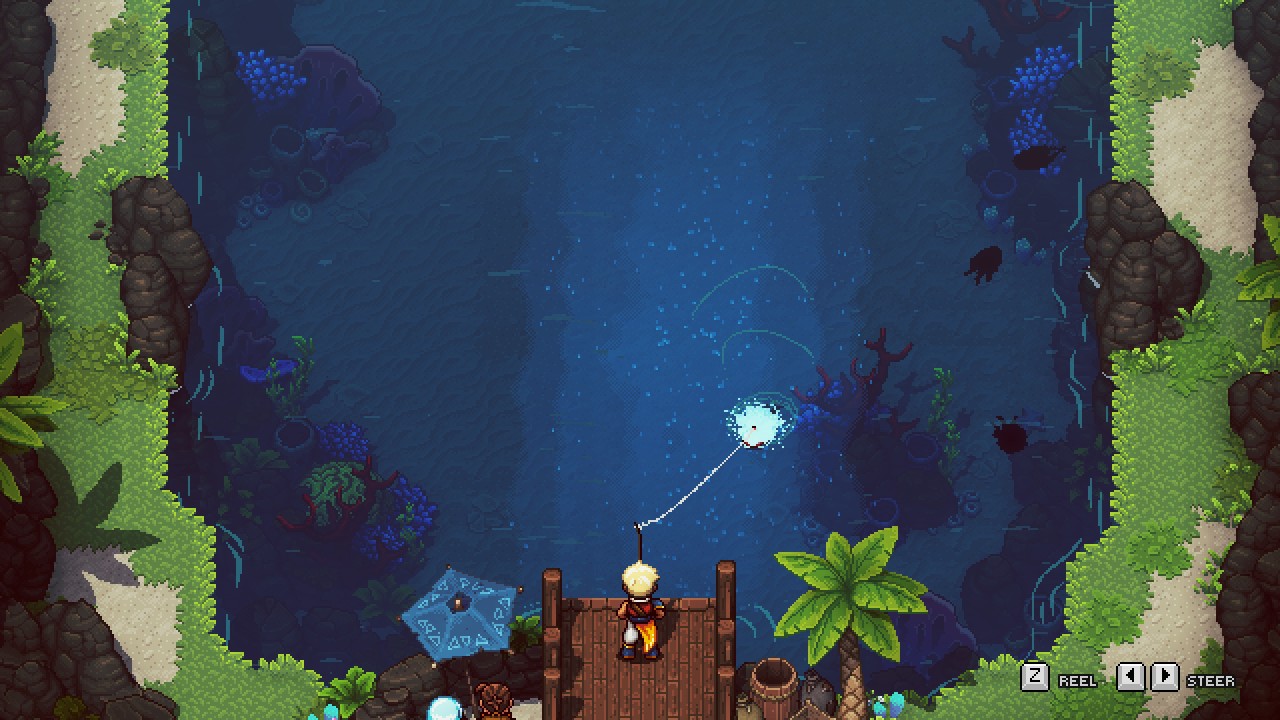
Up to this point in the game you've retrieved your ingredients through purchase or foraging. There's another option available, as well, now that you're on the world map: Fishing. North of Brisk you'll find a small Fishing Lake where you can drop your fishing rod into the water and try your luck. Fishing in Sea of Stars is a little different from other, similar games:
- Press the confirm button (varies by system) to cast your lure
- Use the directional pad to move the lure as it flies north
- Press the confirm button again to drop it into the water, hopefully near some fish
- Reel the fish you've hooked in by holding down the confirm button and steering with the directional pad
Once you've snagged a fish a light blue stream will run down the middle of the pond. In order to maintain your line you need to keep the fish roughly within the stream, avoiding the sides of the pond. The fish will fight the whole way, so make liberal use of the directional pad. You want to steer the fish into the stream without fighting too much, as the integrity of the fishing line will degrade if you and the fish are pulling in the opposite directions for too long. The line will flash red if it is close to snapping.
If you successfully catch a fish you can turn it into Fillets, which are useable as Cooking ingredients.
Aside from Fishing and Camping, the only other optional thing you can do on the world map in the demo is visit a small location to the south of Brisk, where you can hear a music track from the full game. Head northeast of Brisk once you're ready to push the plot forward.

Abandoned Wizard's Lab
Enemies
- Arcane Sentry - 52 HP - Weak to Moon, Sun
- Crystal Tulip - 1 HP
- Wanderer - 39 HP - Weak to Blunt
- Wizzcroube - 38 HP
The Abandoned Wizard's Lab is the primary dungeon you'll face while exploring Sea of Stars' demo. Enter the location from the world map and your pirate buddies will open the way inside the lab.
Immediately inside you'll find some sort of crystalline contraption to the north, a campsite with a save pint to the northwest, and a purple cube that you can climb. Start by pushing the cube to the north by using your Mistral Bracelet (control input varies), which creates a small gust of wind. Above the northern gateway is a chest containing a Green Crystal.
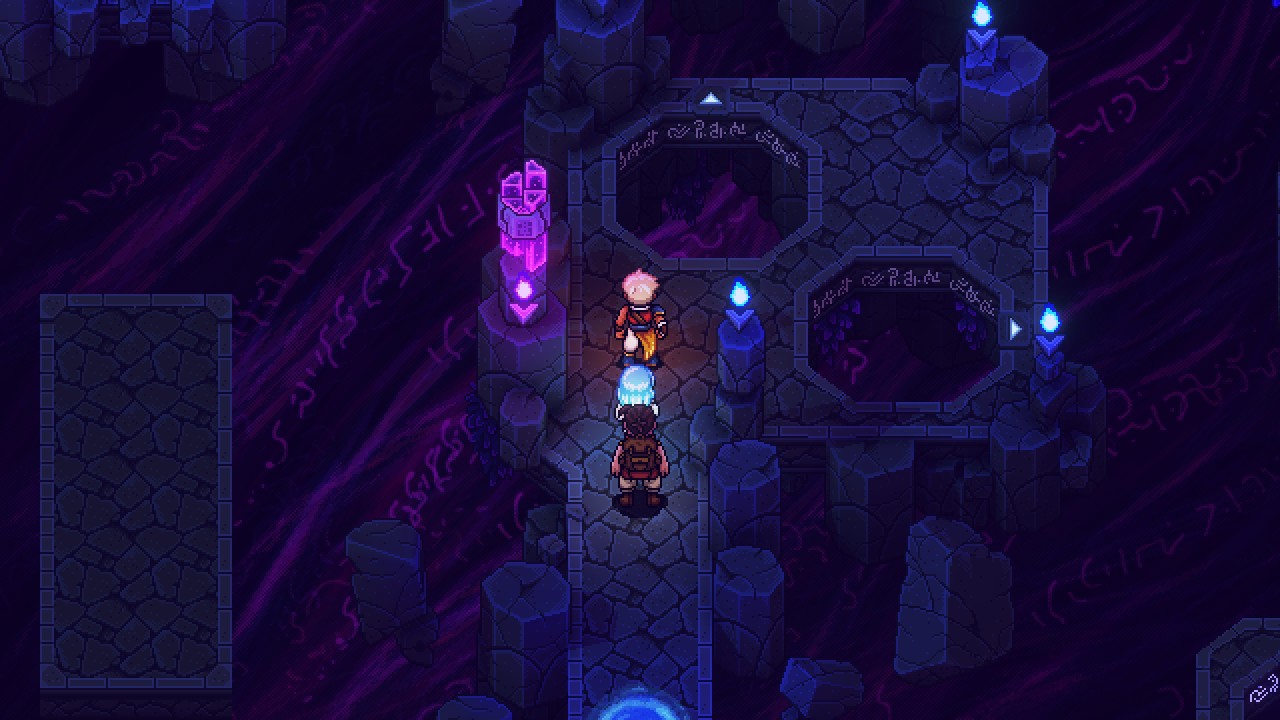
Step onto the central altar and interact with the small, white-topped device on your right. You can insert the Green Crystal into the device to create a beam of light, activating a portal to the north. There are two more crystals located elsewhere in the lab, and you'll need to find them - and use different combinations of the crystals - to find your way to the end of the dungeon.
Green Crystal Path
The first section of the dungeon contains a clearing with two Arcane Sentries and a Crystal Tulip. If allowed to take its turn the Crystal Tulip will use Detonate, a self-sacrificing, high-damage move on a single character. Ideally you want to break a few of its Locks before this can happen to mitigate the damage inflicted.
Head north after wiping out the enemies and step onto the lit floor tile with the pink rune. This will lower a section of the floor. Head back south and hop / climb your way to the west. On the higher ground you'll find a chest containing a Teal Amber Staff for Valere, as well as a blue floor tile.
Press the blue floor tile to reactivate the pink tile, then hop your way east and use the other side of the upper floor to drop down to the pink tile. Touch it again to restore the flooring and reveal a chest in the northeast. Check the chest to receive a Blue Crystal. Once you have this item you can return to the entrance of the Abandoned Wizard's Lab.
Blue Crystal Path
Heal and save at the campsite, if you feel the need, then head back to the crystal altar. Swap out the Green Crystal for the Blue Crystal to create a new gateway in the north. The next area contains a series of pits that will ferry you elsewhere in the room. Small white arrows beside the pit indicate which way you'll travel.
Hop into the northern pit from the entrance, then climb the ledge to the northwest of where you land. You'll find two Wanderers you can fight. Check to the east of the Wanderers to find a ledge above a pit. Hop into the pit and it will ferry you to a northbound path, where you'll find an Arcane Sentry and a Wizcroube. Wizcroubes can use an AOE attack called Bubble Drop which will prove quite annoying, and should be prioritized.

Drop down the ledge to the east of the enemies, head south, and take a left. You'll find a ladder, which leads to a series of stepping stones, which then leads to another pit. The pit will drop you down near a blue floor tile. Activate it to raise an enemy-covered section of floor in the southeast. Double back around to this new area, wipe out these enemies - Moonerang is quite handy in this fight, given their numbers - and hit the pink floor tile that appears once your foes have been wiped out.
This will activate a pink-tinged pit to the northwest. Hop inside and you'll head back towards the entrance. Climb up to the spot where you fought Wanderers earlier and look to the south. A path has appeared to a lever. Pull the lever to raise another pit near the entrance. Return to the first pair of pits, north of the entry portal, and if you use the pit on the right this time you'll drop down near a white diamond to your north. Interact with it, then return to the portal via the pits and leave.
Light Blue (Blue and Green) Crystal Path
Heal and save, then approach the crystal altar. You've now activated a second white-topped device. Insert the Green Crystal into the new device and you'll green a light blue portal to the north. Head inside.
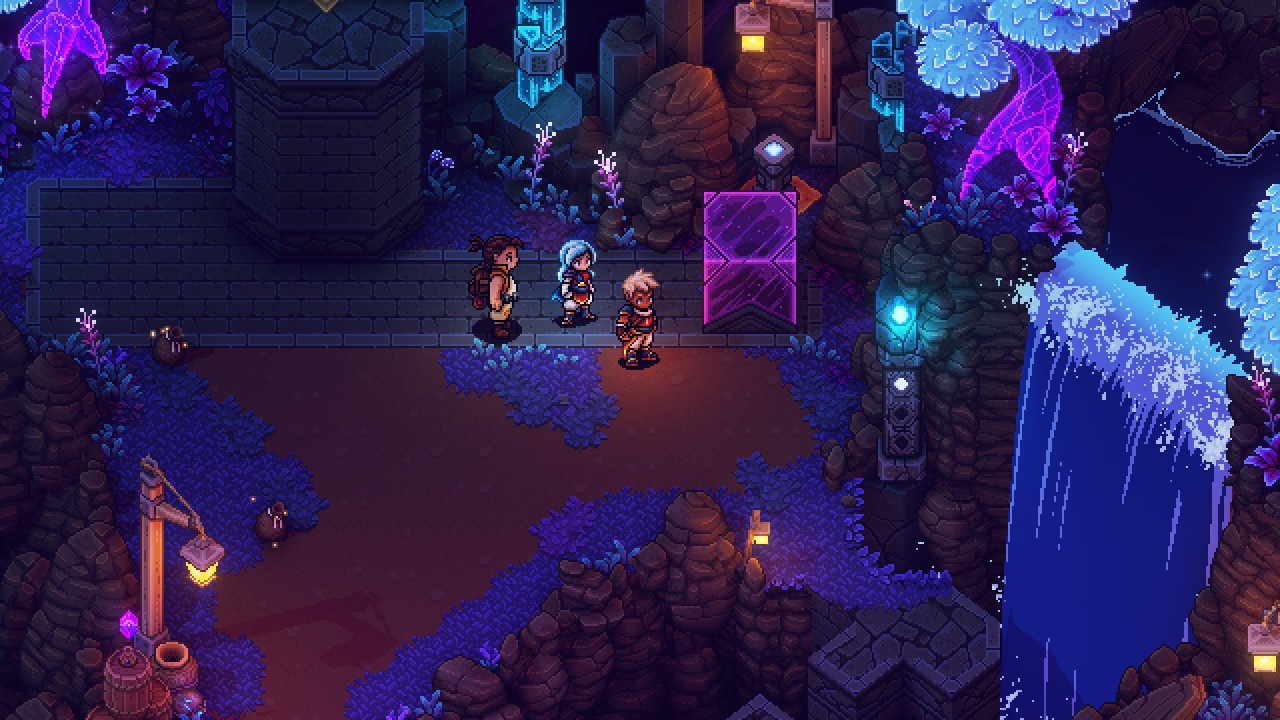
The next area stands atop a pond rimmed with waterfalls. Hop your way to the west (watch where you jump or you might end up in the water) and you'll find a white diamond device, next to a chest containing a Silver Blade for Zale. If you interact with the device you'll spawn a group of enemies to the north. Take them out.
Northeast of the enemies is a purple cube that you can move with your Mistral Bracelet. Slide it west and you can get at another white diamond device, which also spawns enemies. Kill these as well. Push the cube north and then east to create a path up to a third white diamond device, which, unsurprisingly, spawns more enemies. Defeating these will reveal a chest behind a nearby waterfall, and inside the chest is a Red Crystal.
You now have all three colored crystals. Head back to the portal and return to the entry hall. You now have three choices for your path forward. You only need to take one, though if you want to make the most of this dungeon you should try out all of them.

Yellow (Green and Red) Crystal Path
This area contains jumping blocks across pits, some of which will fall out from under you. You need to only jump onto the blocks that have yellow lights. The first set of blocks to the north demonstrate this, as you can only use the center block. Enemies wait on the other side.
There are many more blocks ahead. Take a left at this clearing and go up the stairs. Step on the tile at the top and it will reveal the path across the blocks: Bottom left, middle left, middle, middle right, upper right. There are yet more enemies waiting for you to the north.

There's another cluster of jumping blocks up here, though there are far more - and there are two runes to activate, each of which will show you only part of the path across the blocks. Take this route to get across the blocks:
- Start with the right-most block
- Hop north two blocks
- Hop west three blocks
- Hop north two blocks
- Hop east three blocks
- Hop north to the end
On the other side of the blocks you'll find the Scroll of Bash Drop. This will teach the Bash Drop Combo move, useable by Valere and Garl. Note that you need to use the scroll via the menu, as an item, to teach the characters the Combo.
Go up the stairs to the right of the scroll to find a white diamond that will activate the last of the crystal devices, then use the lever on your left to activate a floating platform back to the entrance.

Red Crystal Path
This route will earn you a bit of treasure. Plug in the Red Crystal only and it will bring you to a large room filled with pushable purple blocks, colored gates, floor runes that deactivate the gates, and a pair of switches to activate in the north. Your goal is to push two of the purple blocks onto the purple tiles in the north.
You can fiddle with this puzzle for a while and eventually get to the goal - or just do the following:
- Push the southwestern block to the right and up to deactivate the blue gates
- Push the northeastern block down, left, and down to deactivate the light blue gates
- Push the southeastern block right and up to deactivate the green gates
- Push the western block that's on the blue rune to the left, up, and left to warp it to the other side of the room, then push it up, left, and down so it's beside one of the blue gates
- Push the southeastern block that's on the green rune right, up, and right to warp it to the other side of the room, then push it down, left, down, right, and up to deactivate the blue gates again
- Push the northeastern block to the left and up onto one of the purple tiles
- Push the middle block that's on the light blue tile right and up, onto the other purple tile
Do all this and you'll reveal a chest in the north. It contains a Green Leaf, a ring that will boost one character's HP. That's all for this area.

Pink (Blue and Red) Crystal Path
This route will also earn you a bit of treasure. Pop through the portal and you'll be facing a cliff that you can climb. Do so, heading gradually northwest, until you see a white diamond device on your left. This will reveal a final stretch of climble rocks further up the cliff.
At the top of the cliff is a Fishing Lake. Next to the water is a well, and inside is a mystery person who lost their watch to a fish. They want you to get it back. The fish with the watch has white sparkles floating off of it, and moves around more - and more quickly - than the other fish. You'll likely have to try a few times before it grabs the lure rather than the normal fish.
Hand the Golden Watch to the person in the well once you've snagged it. They'll thank you by giving you a chest. The chest contains Mage-Knight Armor. Grab it, equip it, and return to the portal.
With that you've explored all of the Abandoned Wizard Lab's areas, save for one. If you combine all three crystals you'll create a white portal that will take you to the final area - and the dungeon's boss. This thing is tough, so make sure you equip all the items you've found, heal, stock up on curables via Cooking, and save.
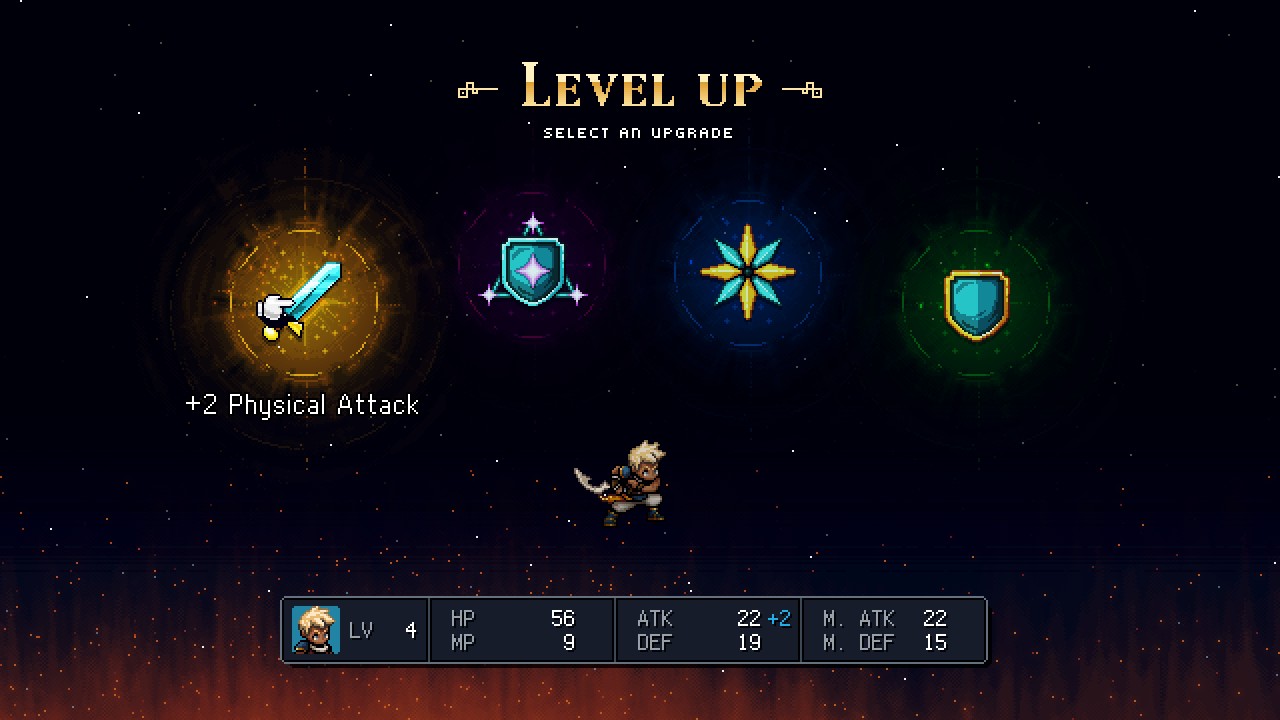
(You should be at level 4 by now, though if you want to play it safe you can leave the dungeon and return, which brings the enemies back to life. Level 5 is enough to see you through the fight that waits.)

Chromatic Apparition
Weakness: Sun, Moon (normal form) / Physical attacks (alt form)
Resists: Physical attacks (normal form) / Magic attacks (alt form)
This thing is a bit of a doozy, considering it's an early boss. Sporting two forms and a wide arrange of attacks, the Chromatic Apparition can slice your characters down to size if you don't take a careful approach to this fight. It uses the following attacks:
- Shapeshift, which changes it to a different form
- A melee slam (normal form)
- Summons in a Crystal Tulip (normal form)
- A multi-shot orb attack against a single target (alt form)
- Arcane Singularity, an AOE attack (alt form)
This fight takes part over two phases, and switches back and forth between them every now and then. The Chromatic Apparition starts off in its normal form, where it either smacks your characters or summons in Crystal Tulips to blow you up with Detonate. In the second phase the Chromatic Apparition will take on a magically-inclined alt form, and here it either uses a high-damaging orb attack or Arcane Singularity, which hits the whole party.

The Chromatic Apparition's weaknesses switch between forms, so you want to use Sun and Moon Skills during its normal form and normal attacks during its alt form. Try to conserve some MP for the alt form, as Arcane Singularity can rip your party apart if unleashed at full power. Combos will help you get through the Locks. Dealing with any Crystal Tulips summoned in is of relatively high priority, though not if Arcane Singularity is in play.
Your characters should focus on the following:
- Valere will be your primary Lock-picker via her Moonerang Skill, as it can hit Chromatic Apparition multiple times if your deflection skills are up to snuff. Try to keep Valere on the offensive as much as you can.
- Zale can do some damage with Sunball, though his MP is better saved for Healing Light. He and Valere are both good at slicing through Sword Locks, as well.
- Garl is your only option for Blunt Locks, though he's also a great healer with Nourish. He and Valere can inflict a bunch of Combo damage on the alt form with Bash Drop, if you picked it up earlier.
This fight isn't that bad as long as you weaken Arcane Singularity. At full strength it will hit everyone in the 50s, which is more than enough to take down weakened characters. Save your Combos for taking out Locks, use Mushroom Soup to heal, and keep on attacking.
Defeat the Chromatic Apparition, and, congratulations! You've completed the Sea of Stars demo! The plot ends here, though you can reload your old save and continue to explore if you like. There's also a message at the end which will send you back to Brisk for a little extra something. (Hint, it's the Hidden Market, which we discussed above.)
That's all for the demo. Consider trying out the full game! It's danged good!