Part 26: Black Light Burns
Main Walkthrough
Time to target another Mothercrystal. Before you set sail on the next major quest, Fire and Ice, you'll need to head back to the Hideaway for info. There are a few new things waiting for you:
That's all for now. Head to the Map Room, near the Mess, and speak to Vivian. She'll outline the approach to Drake's Breath, the second Mothercrystal. Head east onto the Boarding Deck after speaking to Vivian to find Jill. She'll reveal the true extent of her aims, and the quest will be underway. Your next destination awaits.
Drake's Breath - Enemies
- Akashic Hornet
- Akashic Minotaur
- Akashic Thorn
- Akashic Worgen
After several cut scenes you'll be set loose on a craggy landscape. Follow the path for a bit and you'll eventually come to three pinches of Magicked Ash, not far from a gate. On the other side is a little garden teeming with Akashic monsters. They should all be quite familiar to you by now.
Head through the gate on the other side of the garden to find stairs. There are three spools of Steelsilk partway up, and past that are some Akashic Worgen protecting five chunks of Wyrrite. Keep climbing and you'll come to another garden, and the monsters within count an Akashic Minotaur amongst their number. Wipe out the mooks or they will prove quite a nuisance while you try to dodge the Minotaur's charging attacks.
You'll find a Potion and four Sharp Fangs up the slope from the Minotaur's garden. Look to your left and you'll also find a chest containing The Breath of Wind (Aerial Blast). The gate past this point leads to a sizeable arena, which should set off some alarm bells in your mind.
Akashic Morbol
Now that's a blast from the past. Despite looking more or less the same as the first Morbol you encountered, the Akashic Morbol has some new tricks up its man sleaves. You can expect to see the following attacks:
- A two-part, horizontal tentacle slap
- An overhead tentacle slam
- An underwater tentacle attack that creates a field of tentacles which will try to slap Clive
- An AOE puff of noxious smoke that charges for a few seconds
- An oil spit that leaves behind huge pools of goop which will slow Clive and drain his health
- Worse Breath, which is the same as Bad Breath but will slowly track horizontally
- Acid Rain, which leaves a large number of big oil puddles all over the battlefield
- Wild Rage, which will send the Morbol dashing at Clive
- Giant Leap, which sends the Morbol flying into the air in an attempt to crush Clive - comes at the end of Wild Rush
The first phase of this battle is similar to the first Morbol battle, just a bit trickier. The only move that may put you off your game is the field of tentacles, which clog everything up. Get to the edge of the battlefield and focus on dodging the tentacle slaps. That aside, stay close to the Morbol, keep on its flanks, and chip away at its Stagger bar with Eikonic Abilities.
Things get worse once you've Staggered the Morbol, as it will start to use a combination of Acid Rain, Wild Rage, and Giant Leap to pulverize Clive. Dodging towards the Morbol doesn't work well with the rush this time around, so leap to the side and do your best to avoid the oil patches. Stand still once the Morbol leaps into the air and wait until it is just about to hit ground before you dodge. The Morbol will be stunned for a seconds after it lands, giving you a great chance to mash it up. After this combo the Morbol's attacks will go back to normal.
You'll receive Magicked Ash and Meteorites for defeating the Akashic Morbol. The group will then move on to the next area of this journey.
Mt. Drustanus - Enemies
- Bomb
- Dragonet
- Red Mousse
- Salamander
- Scarlet Scorpion
Hot stuff. Follow the rumbling path through Mt. Drustranus, picking up a Potion and a High Potion along the way, until you come to an open area with several Scarlet Scorpions. Despite living in a volcano your fire attacks will work just fine on them. There's a gate ahead, though despite how it looks there are actually two different paths you can take:
- If you go through the gate you'll fight several Scarlet Scorpions and a Dragonet on the other side. You can find a Potion by taking this route.
- If you look to the left of the gate you'll find a somewhat-hidden climb up into some more chambers. You'll fight more Scarlet Scorpions up here, as well as a Salamander. The Salamander is similar to the other small-scale draconic foes that you've fought up to this point. You can find a Potion and three Bloody Hides by taking this route.
The two paths will link up again at another gate, and beside the gate is a chest containing ten spools of Steelsilk and ten Bloody Hides. Slip beneath the gate to find a Potion, and... and scary-looking bridge. A cut scene will put you on the other side of the bridge, where you'll run into a squad of Scarlet Scorpions and Bombs.
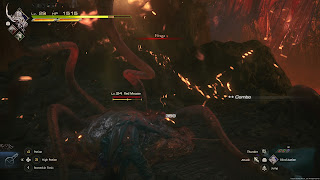
Take a right at the battle zone to find a Potion, and the way forward. Before long you'll find a High Potion, as well as a drop in the path. Take the drop and you'll be pitted against a Red Mousse, a blobby creature that enjoys tentacle slaps and throwing its weight around. The Red Mousse uses the following attacks:
- Tentacle slaps
- Body slams
- Firaga, which hits the ground for AOE damage
The Red Mousse is a bit tougher than it looks, given its surprising speed, but ultimately shouldn't give you any trouble. Dodge its slaps and deliver Eikonic Abilities aplenty to Stagger it. There's a Potion off to the side of the Red Mousse's little arena, and you'll find a chest containing Mythril Wristlets by a rock in the middle.
Beyond the Red Mousse's platform is a conspicuous open area. You know what that means.
Flame Lizard
Another familiar face. The Flame Lizard is a new version of Fafnir, from the Greatwood, and it is unsurprisingly tougher than its predecessor. The Flame Lizard uses the following attacks:
- A charging headbutt / bite across a long distance
- A crushing claw attack the Flame Lizard Fafnir rises into the air, then brings one foot down on you
- A lengthwise rolling attack
- A sweeping tail attack
- A leaping crush attack which sends the lizard flying into the air, curling into a ball and then slamming down at Clive multiple times
- Incense, which lights flames on the lizard's back
- Firewater, a flaming beam attack
- Overdrive, which merges several moves - the Firewater beams, several melee slashes, and an AOE belly slam - into a single combo attack
This fight is even more similar to the Fafnir battle than the Akaschi Morbol was to the Morbol. The Flame Lizard uses similar attacks in general, only adding a few new ones for flavour. Your goal is still the same: Stay in front of the Flame Lizard, attack its head whenever possible (this does more damage), and wait for the Stagger to kick in. Once it does, unleash as much damge on the lizard's skull as you can. All of your Eikonic Abilities work well, though an unrelenting dose of Ignition to the Flame Lizard's face seems to get through its health faster than anything.
Once you've Staggered the Flame Lizard it will start to use Overdrive. This move is not as dangerous as it looks, and oddly enough you should stay close to the Flame Lizard while it is going off. If you force the lizard to turn while using Overdrive it will miss the majority of its attacks. The only time you should back off is near the end, so you don't get caught by the bellyflop. Not too bad overall.
You'll receive a Gnarled Scale and Sharp Fangs for defeating the Flame Lizard. Your next destination is the fire-lit ladder across from the boss arena. Grab the Potion at the bottom of the ladder, then make the climb. Through the door at the top Jill will be reunited with an old friend, and you'll be ushered into a new area.
The Oratory - Enemies
- Ironblood Commander
- Ironblood Crusader
- Ironblood Fanatic
Follow the path. You'll find a Potion and a High Potion, and when you reach a set of stairs large numbers of Ironblood Crusaders will flood the area. They're simple enemies, and shouldn't bother you overly much. Take a left at the bottom of the stairs to find a door.
Up more stairs and past a Potion you'll find a hallway with an Ironblood Fanatic. These hefty boys are more or less the same as other 'big' humanoids you've fought before, with one difference: They know Crea y Cwm, an swiping attack that will send Clive flying into the air if it connects. This fight is nevertheless pretty basic. More enemies will show up down the hall shortly after you begin fighting the Ironblood Fanatic, though Jill and Torgal can handle them.
Take a right down the hallway to find a Potion at the far end, as well as a hallway on your right. The Ironblood Commanders past this point can be a bit of a nuisance, thanks to their defensive stances, though Eikonic Abilities will rip right through their blocks. Look on your right after defeating a group of foes to find a small balcony with a chest. The chest contains 1,200 gil.
Backtrack to the previous room and look on your right for a door. (It's easy to miss.) Beyond are three spools of Steelsilk. Climb the stairs to find a High Potion, as well as another long hallway to the Inner Sanctum. There's another High Potion and a Potion in this hall. There's also an obvious exit point on your right, and beyond it you'll find a bridge guarded by a final contingent of Ironbloods, including another Ironblood Fanatic. One large AOE will take out the mooks so you can focus on the Fanatic, though be prepared for more to show up as the battle wears on.
At the far end of the bridge is a Potion. Check to the left of the gate to find a chest containing The Grace of the Inferno (Will-o'-the'Wykes). Head through the gate to watch a cut scene, and - after quite a while - get into a fight.
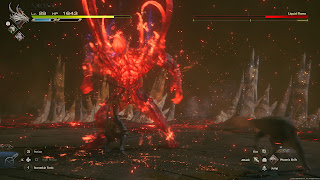
Liquid Flame
Liquid Flame uses the following attacks:
- Various melee punches and combos
- Two melee stomps in succession
- A melee swipe followed by a charging tackle
- Fiery Impact, a quick downward punch that results in an AOE explosion
- Eructation, which creates an AOE field of fire under Clive's feet
- Firaga, a fireball launched at Clive in a straight line
In addition to its moves, Liquid Flame's arena will damage Clive if you stay too close to the edges, as it is lined with magma.
This battle is largely defined by its melee combat. The Liquid Flame will seek to get in close to Clive, and it is quite effective at beating your face in with its punches and kicks. It is possible to Parry its moves - especially if you activate a Limit Break before the Liquid Flame goes into a flurry - though you'll likely find dodges more effective in the long run. Try to keep the Liquid Flame near the center of the arena so you don't get caught on the edges and take damage.
Stagger the Liquid Flame once and it will use Swelter, shrinking the size of the arena. It will then begin using some new attacks:
- A transformation into a quadrupedal creature that uses an AOE whirl
- A transformation into a flying creature that then sprays the ground with a breath blast
- Eructation, an improvement that creates multiple AOE fire fields
During this second phase you need to be careful of Liquid Flame's transformations. It tends to segue straight into them after a combo, and while it is easy to avoid the flying transformation's breath the quadrupedal AOE swing can knock you for a loop. Get away as soon as a transformation happens, then use ranged magic uhntil Liquid Flame changes back. Aside from the smaller arena the fight isn't all that different.
Stagger Liquid Flame again and it will use Eleventh Hour. During this lengthy attack it will split into multiple copies of itself, and they will run around the arena, first dashing at you as quadrupeds, then breathing fire as fliers. Liquid Flame ends the attack by creating a huge AOE field that will explode after a few seconds. Stop your offensive as soon as Eleventh Hour goes off and focus exclusively on dodging. Don't try to attack anything or you'll get punished. Avoiding the AOE field at the end is ideal, though it is possible to dodge from within the field if you have good timing.
Once the Liquid Flame finishes Eleventh Hour it will use Flagrant Wyvern and Flagrant Coeurl, both of which are transformative attacks that send it flying towards Clive at greater speeds. These are usually followed by Fiery Impact. The fight gets more intense - but the Liquid Flame also needs more time to recover between attacks, a sign that you're almost done. Keep dodging, and use the rest periods to get in your remaining hits. It won't take long, and if you're running low on HP you can use your Limit Break to pound your way to the finish line.
You'll receive Liquid Flame and Magicked Ash for defeating the Liquid Flame. Many cut scenes follow, and, well, suffice it to say that your mission was successful... and another is close on its heels.
Main Walkthrough


