Recommended Level: 37
The second half of Temenos's third chapter takes place in the distant town of Stormhail. To get to Stormhail you'll need to travel to Montwise, a city in the east of the Crestlands. If you haven't visited Montwise already the fastest route is to jump back to Flamechurch, where Temenos began the game. Head east until you hit Montwise.
Travel to the north end of the Western Montwise Pass and you'll find a Guard in front of the entrance to the Northern Montwise Pass. Have one of your characters beat him up with their Path Action and he'll let you by. Beyond the Western Montwise Pass is the Southern Stormhail Snows, and Stormhail itself is down the northwestern path.
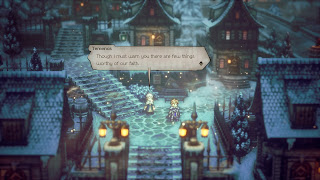
Upon arrival Temenos will be prompted to begin his chapter right away, assuming he's in the party. If you'd rather look around first you can head to the Tavern later and choose Hear a Tale when speaking to the Tavern Keeper. The Tavern is on the left side of the central, northbound path through Stormhail.
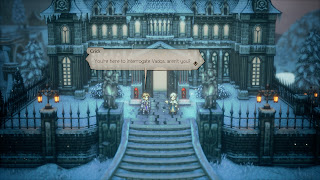
Having put a stop to the villainous Vados the Architect in Canalbrine, Temenos has followed his tracks to Stormhail, home of the Sacred Guard. They've agreed to allow Temenos to interrogate the pontiff's killer, and given that their HQ is a short walk northeast of the entrance to Stormhail, he might as well get started right away.
Unsurprisingly, Temenos runs into Crick - literally - as he approaches the building. The pair banter a bit, then head inside to arrange a meeting with Vados. It should come as no shock that Vados never 'officially' arrived in Stormhail. Temenos decides to investigate the Sacred Guard, and Crick, disgruntled, goes along with the idea.
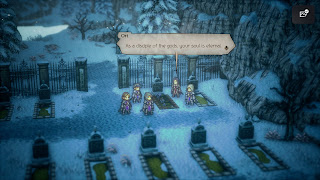
Head east of the Sacred Guard's headquarters. You'll find a graveyard, and in it a trail of blood, leading away from Stormhail. Things will happen, and when you regain control you'll need to check a conspicuous brown lump at the end of the blood trail, a short distance from the graveyard. This will trigger a lengthy series of cut scenes, and by the end you'll need to make for the Inn, in the northwest of Stormhail. Choose to stay the night.
Head to the Sacred Guard headquarters the next day. Temenos will make an unfortunate, disturbing, unsurprising discovery out front. Temenos will perform another Mind Palace routine, and you'll need to Guide the figure who appears to receive a hint. Follow the figure to the second floor of the Sacred Guard Headquarters, and check the library in the west wing. Then follow the figure onto the building's rafters and check the support that extends out near the huge stain-glass window in the middle of the headquarters. Return to the lower levels to discover a new passage. Dungeon time.
Forbidden Shrine
Enemies
- Accursed Armor - Weak to Polearm, Axe, Staff, Fire - Drop / Steal Olive of Life (M)
- Albino Bat - Weak to Polearm, Bow, Staff, Dark - Drop / Steal Forget-Me-Do
- Frostwing Serpent - Weak to Polearm, Bow, Staff, Fire - Drop / Steal Healing Grape (M)
- Light Guardian Mk. II - Weak to Sword, Axe, Staff, Dark - Drop / Steal Light Soulstone (M)
- Lightning Elemental - Weak to Wind, Dark - Drop / Steal Almighty Soulstone
- Plains Drake - Weak to Axe, Bow, Staff, Dark - Drop / Steal Fool's Leaf
- Revenant - Weak to Sword, Dagger, Bow, Staff - Drop / Steal Refreshing Jam
- Thunder Remnant - Weak to Sword, Polearm, Axe, Wind - Drop / Steal Thunder Soulstone (M)
Aha, secrets abound. Follow the torchlit path north, then east. Dip down the stairs to the south to find a chest containing a Gleaming Amulet before you go too far to the east. On the other side of the bridge ahead is a chest containing an Olive of Life (M), as well as some stairs.
Head down the stairs and proceed north until you see a candle-lit statue on a pedestal. To the left of the pedestal is a chest containing a Healing Grape (M). To the right the path continues, down a set of stairs. Look north of the bottom of the stairs to find a small side room. In this room is a chest containing 15,000 leaves.
Continue east and you'll find your way to a save point, next to a northbound path leading to the end of the dungeon. Check the wall to the west of the save point and you'll find a hidden pathway next to the stairs leading down here. At the other end of the path you'll find a chest containing a Magic Breaker.
Head north of the save point. Temenos will find a hidden, likely forbidden library, and someone else will find him.
Deputy Cubaryi
Weakness:
- Polearm, Axe, Staff (first phase)
- Polearm, Axe, Bow (second phase)
- Dagger, Bow, Fire, Wind, Light (third phase)
- Polearm, Staff, Wind, Dark (fourth phase)
Steal: Refreshing Jam
This battle has been a while coming. Cubaryi knows the following attacks:
- A normal melee strike
- Triple Thrust, a three-strike melee attack on a single character
- Sacred Slash, a melee strike on one character that lowers their elemental defense
- Luminescence, a Light spell against your entire party
- Icewind, an Ice spell against your entire party
- Nullifying Shield, which prevents debuffs from sticking
- Reflecting Shield, which nullifies elemental attacks and reflects spells back on your characters
- Poison Shield, which Poisons anyone who attacks it with a weapon
- Nullifying Shield II, which prevents debuffs from sticking and buffs Cubaryi's stats
- Shining Sword, a charged attack that hits the whole party for melee damage, then Light damage
- Noxious Sword, a charged attack that hits the whole party and inflicts Poison that lasts a long time
- Sacred Purifying Blade, a charged attack that hits the whole party and wipes out any buffs


