Recommended Level: 18
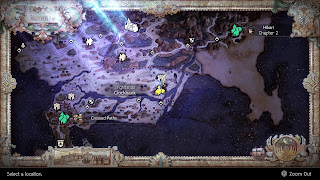
The second chapter of Partitio's tale takes place in Clockbank, a swanky city in the east of the Brightlands. Ride a boat over to the eastern continent, head down to the Eastern New Delsta highroad, and walk east. Once you reach the Southern Clockbank Highroad you'll find the path to Clockbank a short jaunt away.
If Partitio is in the party he will nudge the player into starting his chapter right away. If not - or if you decide to turn the offer down - you can start it up by visiting the local Tavern. It's north of the entrance from the highroad and on your left as you head up some stairs. Choose Hear a Tale when speaking to the barman to begin the chapter.
Ever on the lookout for opportunity, Partitio is wowed and intrigued by Clockbank's glitzy facade. He decides to look around and see what's what. Head north to the Industrial District, then head west once you find the Inn. There's a sort of blind alley passage over here, and if you hit the right spot you'll find a cut scene. There's no indication of where you have to go, you just need to find the correct place in town.
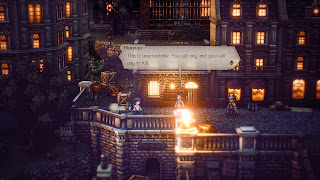
Partitio will find a man named Thurston trying to wring money out of a boy named Will. Partitio will step in and stop Thurston from harming Will, an act of kindness that's spotted by an enterprising journalist named Ori. Ori will fill Partitio in on the Roque Company, which just so happens to be owned and operated by Mister Roque, the former business partner of Partitio's father. Partitio decides to have a chat with Roque.
Approach the front of the factory in the north of the Industrial District to trigger another cut scene. A distracted fellow named Floyd will bump into Partitio. He'll point you towards the company office, next door to the factory. Partitio will find Thurston inside, and the weasel will claim (falsely) that Roque isn't there. Partitio leaves, amicably enough... and decides to have a look at the factory instead. It turns out to be rather dangerous, as Floyd, the engineer from earlier, is working on a boiler that explodes. Partitio boldly claims that he will find a metal that can serve as an adequate container for a boiler.
Head to the Armory, a short walk southeast of the factory. The Armorer just happens to know of a material Partitio could use, and hands over five pieces of Clockite. Take it back to Floyd in the factory. Floyd declares it a failure, since it's too difficult to work. Partitio decides to track down a clockmaker for advice, and one just happens to be in the Tavern in the south end of Clockbank. Switch to night and Hire the man for 1,000 leaves, then lead him back to the factory. It will prove a success, and the pair will toast their fortunes in the Tavern.
(Before you proceed with the story, check out the company office again. You can now come and go as you please, and you'll find a chest containing a Slashing Glaive in the small, darkened storage room on the east side of the ground floor. This will get Partitio back up to speed on the arms race if he's falling behind.)
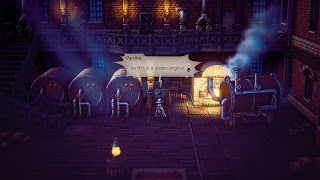
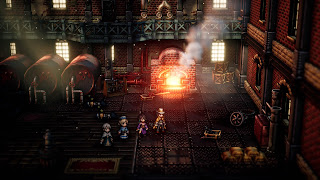
Head to the factory. Floyd's new steam engine is gone, and Partitio will be cornered by some Guards. Spears, Fire, and Lightning will take them down easily enough. In the aftermath of the fight Partitio will decide to have a look around. (And yes, in case you'd been wondering, now's the point that the factory fills with enemies.)
The Roque Company - Factory
- Dire Night Raven - Weak to Spear, Bow, Lightning, Light - Drop / Steal Inspiriting Plum
- Guard - Weak to Spear, Fire, Lightning - Drop / Steal Inspiriting Plum
- Ice Curator - Weak to Bow, Staff, Fire - Drop / Steal Ice Soulstone
- Sentinel - Weak to Sword, Spear, Axe, Bow, Staff - Drop / Steal Ancient Sentinel Core
- Wicked Wasp - Weak to Spear, Dagger, Bow, Fire - Drop / Steal Dual Leaf
- Wind Guardian - Weak to Sword, Bow, Lightning - Drop / Steal Wind Soulstone
- Spear, Axe, Fire, Lightning (Garnet)
- Sword, Axe, Bow, Light (Mysterious Bones)
- Bite, which inflicts melee damage on one character
- Scratch, which inflicts melee damage on the whole party
- Garnet digs in the ground and unearths a Fire Soulstone that deals Fire damage to the whole party
- Garnet digs and summons two Mysterious Bones to join the fight
- Garnet digs and uncovers a nut that buffs its stats for five turns
- Gnaw Bone, which restores some of Garnet's health by feasting on the Mysterious Bones
- Mark Prey, which acquires a target for Garnet - on the next turn Garnet will use Nibble to inflict heavy HP and BP on that target if the dog isn't Broken
- Howl, which buffs Garnet's attack and gets rid of any debuffs
- Intimidate, which debuffs your party members' attack power
- Rampage, which inflicts moderately-heavy damage on random party members five times
- Shred to Pieces, which is effectively the same as Nibble only Garnet won't use Mark Prey first
- Garnet runs wild, which increases Garnet's number of attacks per round to three
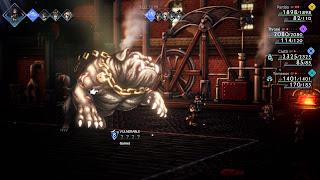
This fight isn't especially complicated. Garnet likes to inflict a lot of melee damage, which is no surprise, since it's a dog, though the occasional Fire attack can catch you by surprise. After a whole it will likely dig up some Mysterious Bones to join the battle, and their attacks are as strong as Garnet's. Break Garnet once and it will start to use the Mark Prey / Nibble combo to target single characters.
Break Garnet enough times and it will begin to 'run wild', unlocking Howl, Intimidate, Rampage, and Shred to Pieces. All of these can prove quite painful to your characters, especially since Garnet can now also take three turns per round. If you get unlucky Garnet will take all three of those moves in a row, which often happens after it is Broken, and the onslaught of melee strikes will take a considerable toll on your party's health.
The best way to survive this fight, especially the later stages when Garnet is running wild, is to use Hired Help - Mercenary via Partitio or another Merchant. This will do very little damage to Garnet, but it'll raise everyone's defenses for a few turns, making Garnet's physical attacks more manageable. Ruffian is also useful since it debuff's Garnet's attack, though Howl makes this less useful later on. Elemental attacks are almost non-existent in this fight, so anything you can do to raise your team's defense is advisable.
After that, all you really need to do is target weaknesses, get rid of the Mysterious Bones when they appear, and heal as necessary (which will be often - bringing a Cleric along is advisable). Breaking Garnet in the rear half of the fight can be hazardous since it will bunch up the dog's moves, so always make sure your party is in tip-top fighting shape before you get rid of Garnet's final shields.
Garnet will flee after the battle, and Roque will take its place. He and Partitio strike a ludicrous bargain for the rights to Floyd's steam engine, and Ori, who was listening in, will point Partitio to a place where he can earn some capital: Wellgrove, on the western continent. Chapter complete!
... almost. There's one last thing you can do. During the cut scenes at the end of the factory you may have noticed a ladder on your right. It was inaccessible before, but now that the story is out of the way you can climb the ladder. At the top is a room, and inside the room is a chest containing a Prosperity Charm. This handy accessory will boost the number of leaves you receive whenever you win a battle.

