Part 26: Head to the Ice Block Ruins
Main Walkthrough
The Straw Hats are ready to tackle their next Memoria challenge, and this time it's quite grim: They're headed to Marineford, site of a massive war between pirates and Marines. When you speak to Lim about heading into Memoria you'll receive a warning that you should be level 34 at a minimum before entering this chapter, so go grind in the Ice Block Ruins for a bit if you aren't strong enough. You may also want to cook up restorative items with Sanji, and have Robin upgrade your accessories to maximize everyone's stats.
Approach Lim in the Strange Place and Franky will gain the Skill Strong Cola Charge. You'll then be shunted into Memoria and off to Marineford. And upon arrival... you'll immediately run into some Sailors. That didn't take long. They're easy to defeat as long as you target their weaknesses. The next battle, though...
Smoker
Weaknesses:
- Technique (Smoker, Sailor A)
- Power (Sailors B, E)
- Speed (Sailors C, D)
Ah, this guy again. Smoker hasn't changed much since you fought him in Alabasta... and possibly Water Seven... but you're short a few members in this fight, specifically Luffy, Zoro, Sanji, and Franky. Ouch. Get Robin over to engage Smoker while everyone else takes on the Sailors. Smoker's White Launcher hurts, but it won't do enough to Robin to be a major concern, and Chopper can heal her up if need be. Nami's Thunder Lance Tempo is a good option for quickly clearing the field, if you can spare the TP.
You'll earn three Usopp's Cube Fragments for defeating Smoker. You're not out of the woods yet, though...
Kizaru
Weaknesses:
- Power (Kizaru, Sailors C, D)
- Speed (Sailors A, B)
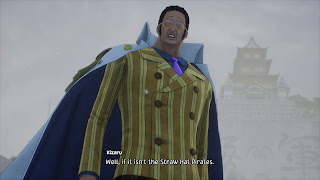
A new face, and an unwelcome one. Though Kizaru brings fewer Sailors along for the fight than Smoker, you only have Zoro, Sanji, and Franky in your party to counter the admiral. Kizaru uses the single-target Skill Ama No Murakomo Sword, alongside normal attacks, to damage your party, and has the usual boss benefit of rendering attacks completely ineffective now and then. He also has a positional advantage at the start of the fight.
Use Bond Move to get your fighters in their proper positions. Sanji can take on Kizaru alone, while Franky should start wiping out Sailors with some help from Zoro. As long as you get Zoro away from Kizaru your crew shouldn't be in too much damage of going down. Kizaru will likely be the last man standing, and once he is the Straw Hats can gang up on him to end the fight. Getting him down to half health will do it.
Alas, the only thing you'll receive for driving Kizaru away is... another fight.
Captain Tomack
Weaknesses:
- Technique (Captain Tomack, Officer with Long Sword)
- Speed (Sailors A, B)
- Power (Sailor C)
This is a relatively simple fight, despite the size of Captain Tomack. Your foes like their melee attacks, for the most part, though the Officer with Long Sword will occasionally hurl bombs at characters in other areas. Tomack can also use Ultra Megaton Smash to hit everyone in his area for appreciable amounts of damage.
You start off at a disadvantage in terms of positioning, so move your team around to get Zoro in front of Tomack while Sanji and Franky take care of the Sailors. Tomack is more fragile than he looks, and won't take too many hits to go down. As long as Zoro is alone in Tomack's area you shouldn't have too much trouble.
You'll earn Captain Tomack's Record Cube, Captain Tomack's Power, and Zoro's Cube Fragment for defeating Captain Tomack. The fighting continues...
Kizaru and Aokiji
Weaknesses:
- Kizaru (Kizaru)
- Speed (Aokiji)
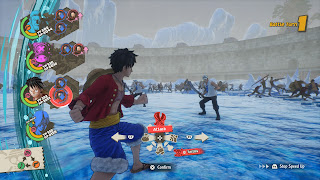
The two-on-one suddenly turns into a two-on-three as Jinbe and Crocodile join Luffy for this battle. Luffy is a prime target for Aokiji, but he's perfectly suited to battle Kizaru. Jump out of Aokiji's area at the beginning of the battle with Bond Move and leave Aokiji to Jinbe and Crocodile. Have Luffy hit Aokiji from afar if he takes out Kizaru before Jinbe and Crocodile defeat their opponent.
This battle may be a bit annoying since Aokiji's AOE attacks can still hit (and sometimes Freeze) Luffy in other areas, and all you can real do is hope Jinbe uses Heal should Luffy be put under wraps for a few turns. Bronze Bat Soups are a good way to heal everyone if your team is in trouble. Keep in mind that you can't revive Jinve or Crocodile if they get knocked out, so make sure they stay alive.
You'll receive Aokiji's Eye Mask, Jinbe's Clogs, Kizaru's Sunglasses, and two Luffy's Cube Fragments for defeating Kizaru and Aokiji.
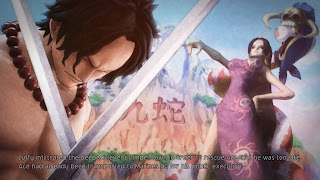
A big cut scene follows, and your team will need to fight off a pack of Sailors with Ace, Luffy's brother. Ace's AOE attack will wipe out or badly damage most of the Marines, and a quick zap from Nami will finish them off. You'll receive two Zoro's Cube Fragments and a Sanji's Cube Fragment for winning this fight. Immediately after, though...
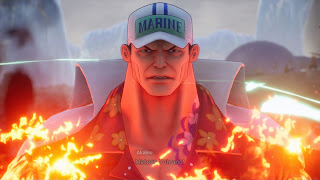
Akainu
Weakness: Technique
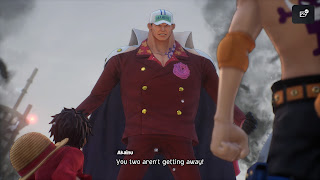
Despite fighting on his own, Akainu is quite the opponent. Aside from his physical attacks he can use Great Eruption on a single target to deal significant damage, and is capable of hitting everyone in the party with Meteor Volcano, Burning an unlucky few in the process. As with most major bosses Akainu will occasionally take no damage from your attacks.
This is one of those odd fights where you should put everyone in the same area as Akainu, since he can already hit everyone on the field anyway. Robin and Zoro will do most of the damage, while Chopper Heals the area whenever Akainu hits everyone too hard and / or inflicts Burn. Luffy or Sanji can fill in the final slot in your party - most likely Luffy, since you'll get extra experience for defeating Akainu with the captain of the Straw Hats. Ace helps throughout the battle, though he won't do a ton of damage.
You'll receive Akainu's Corsage, Ace's Hat, a Luffy's Cube Fragment, and a Sanji's Cube Fragment for defeating Akainu. Alas...
Akainu
Weakness: Technique
Yep, the electricity makes a comeback. Akainu is the same here as in the previous fight, he just hits harder. Use foods to buff your stats and keep Chopper on hand to Heal the whole party whenever you take too much damage. The fight will end once you get Akainu down to half of his health...
... and, alas, the party will be forced to retreat from Memoria. Lim will take everyone back to Waford, and on the way everyone will learn new Skills and gain extra upgrade slots for their existing Skills. Hopefully you've been collecting Cube Fragments, 'cause you're going to need a lot of them. (Franky will also gain upgrade slots, a sign that you'll finally start finding Cube Fragments for him.) Nami and Franky will also gain more Accessory Slots. Last, you can claim all of the Grand Log: Marineford entries as Objective rewards.
Once you're back in the real world the party will have a rest. The next morning they'll discover that Sanji is missing, as he's off hunting mushrooms. Better track him down. Bit of a deescalation, that...
Part 28: Recruiting Brook - Waford
Main Walkthrough

