

Part 35: In Good Faith - Marylea
Need some quality headphones to connect to your PC? Try the JBL Tune 720BT, now available on Amazon! As an Amazon Associate I earn from qualifying purchases, at no additional cost to you.
Monsters
- Flying Eye - Strong to Wind, weak to Light
- Flying Mouth - Strong to Wind, weak to Light
- Flying Nose - Strong to Wind, weak to Light
With Marylea fallen and the Grand Grimoire lost - again - the party must look to bringing their leader back from the brink. Glenn has been faced with a gruesome realization, and the events of his past life flooding into his brain have put him into a coma. The team calls in Magnolia to help, and she sends everyone into Glenn's Mind to put the pieces back together.
Head north. On your right you'll find your merchant buddy, who, as ever, has everything you need to get through the area. You'll also find an anvil. The presence of both of these things should be a strong hint that you'll be facing trouble ahead, and not just puzzles.
To the north you'll run into some trouble, though Magnolia will help dispel it. You'll also find a purple gate. Enter it and you'll appear on a chain of islands filled with, you guessed it, orbs. Similar to the first time you helped Magnolia, you'll need to use the memories contained within these orbs to create a path for yourself. On your right is an orb containing the Beach fragment, which you should remove.

To the north is another sphere. Insert Beach to create a path further north. Up here you'll find Flying Eyes. These little creeps can Blind you, but otherwise aren't a huge deal. North of the Flying Eyes you'll find a fragment of a passage, and the orb containing it. Ignore the orb for a moment and travel northwest through the fragment to find a chest containing two Sweets. Then backtrack and pluck the Dungeon fragment out of the orb.
Head back south, grabbing Beach along the way. To the right of the entrance is the orb where you first got Beach. Place Dungeon in this orb to create a path leading southeast. You can grab Dungeon again from the orb on the other side. North of here is another orb where you can insert Dungeon, and on the other side, again, is an orb for retrieving Dungeon.
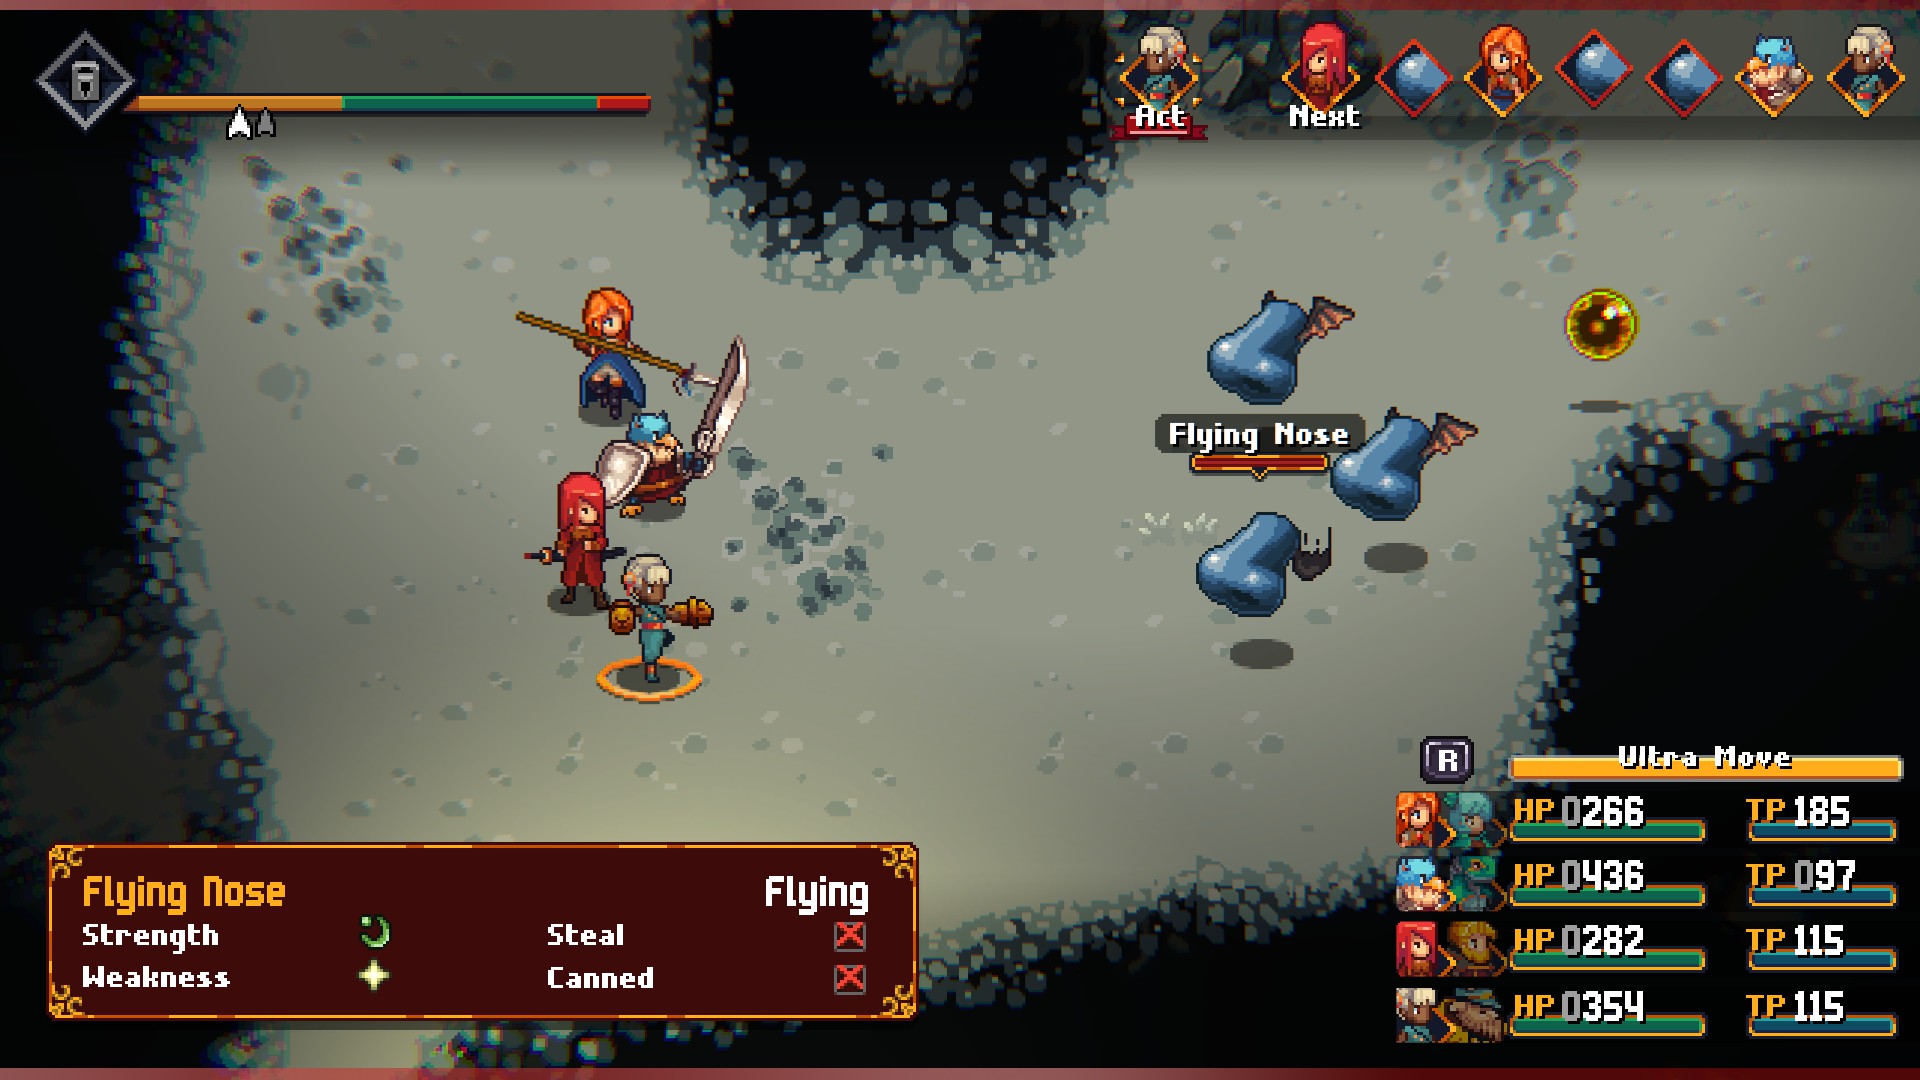
To the north you'll battle three Flying Noses. They can put your characters to Sleep, but are otherwise pretty similar to the Flying Eyes. East of them is an orb that contains the Ship fragment. Travel through Ship to find another orb. Retrieve Ship from the second orb, then replace it with Dungeon. This will allow you to double back to the previous path and, again, retrieve Dungeon.
Make your way back south and cross to the previous island using Dungeon. That done, place Ship into the orb on the right. This will create a path back to the very first island in this area, which you'll need to use Dungeon to reach. Cross through Ship and Robb will note that you need all three fragments to proceed any further, and you can get Ship back by using Beach and Dungeon on the eastern island to loop back around. Confused yet?
Backtrack the way you came, retrieving both Dungeon and Ship as you go, then head east. Follow the southeast path and you'll find a chest containing Nectar. Along the northeastern path you'll run into Flying Mouths, which aside from their annoying AOE attack can Silence your party members. Past them you'll find a broken path with several orbs, and you'll need to use Beach, Dungeon, and Ship to cross them, in that order.

Beyond Ship you'll run into a Flying Eye, a Flying Mouth, and a Flying Nose. All three are annoying, but the Flying Mouth is the most likely to cause trouble, so take it out first. Near the trio is a chest containing four Meals. To the north you'll need to use Dungeon one last time to reach the end of the area.
After a series of cut scenes revealing Glenn's past - past lifetimes, that is - you'll wind up back at the start, with a new gate open to your right. This area is much simpler than the last, and you can find chests containing two Angel Wings to the northwest and Ambrosia to the east.
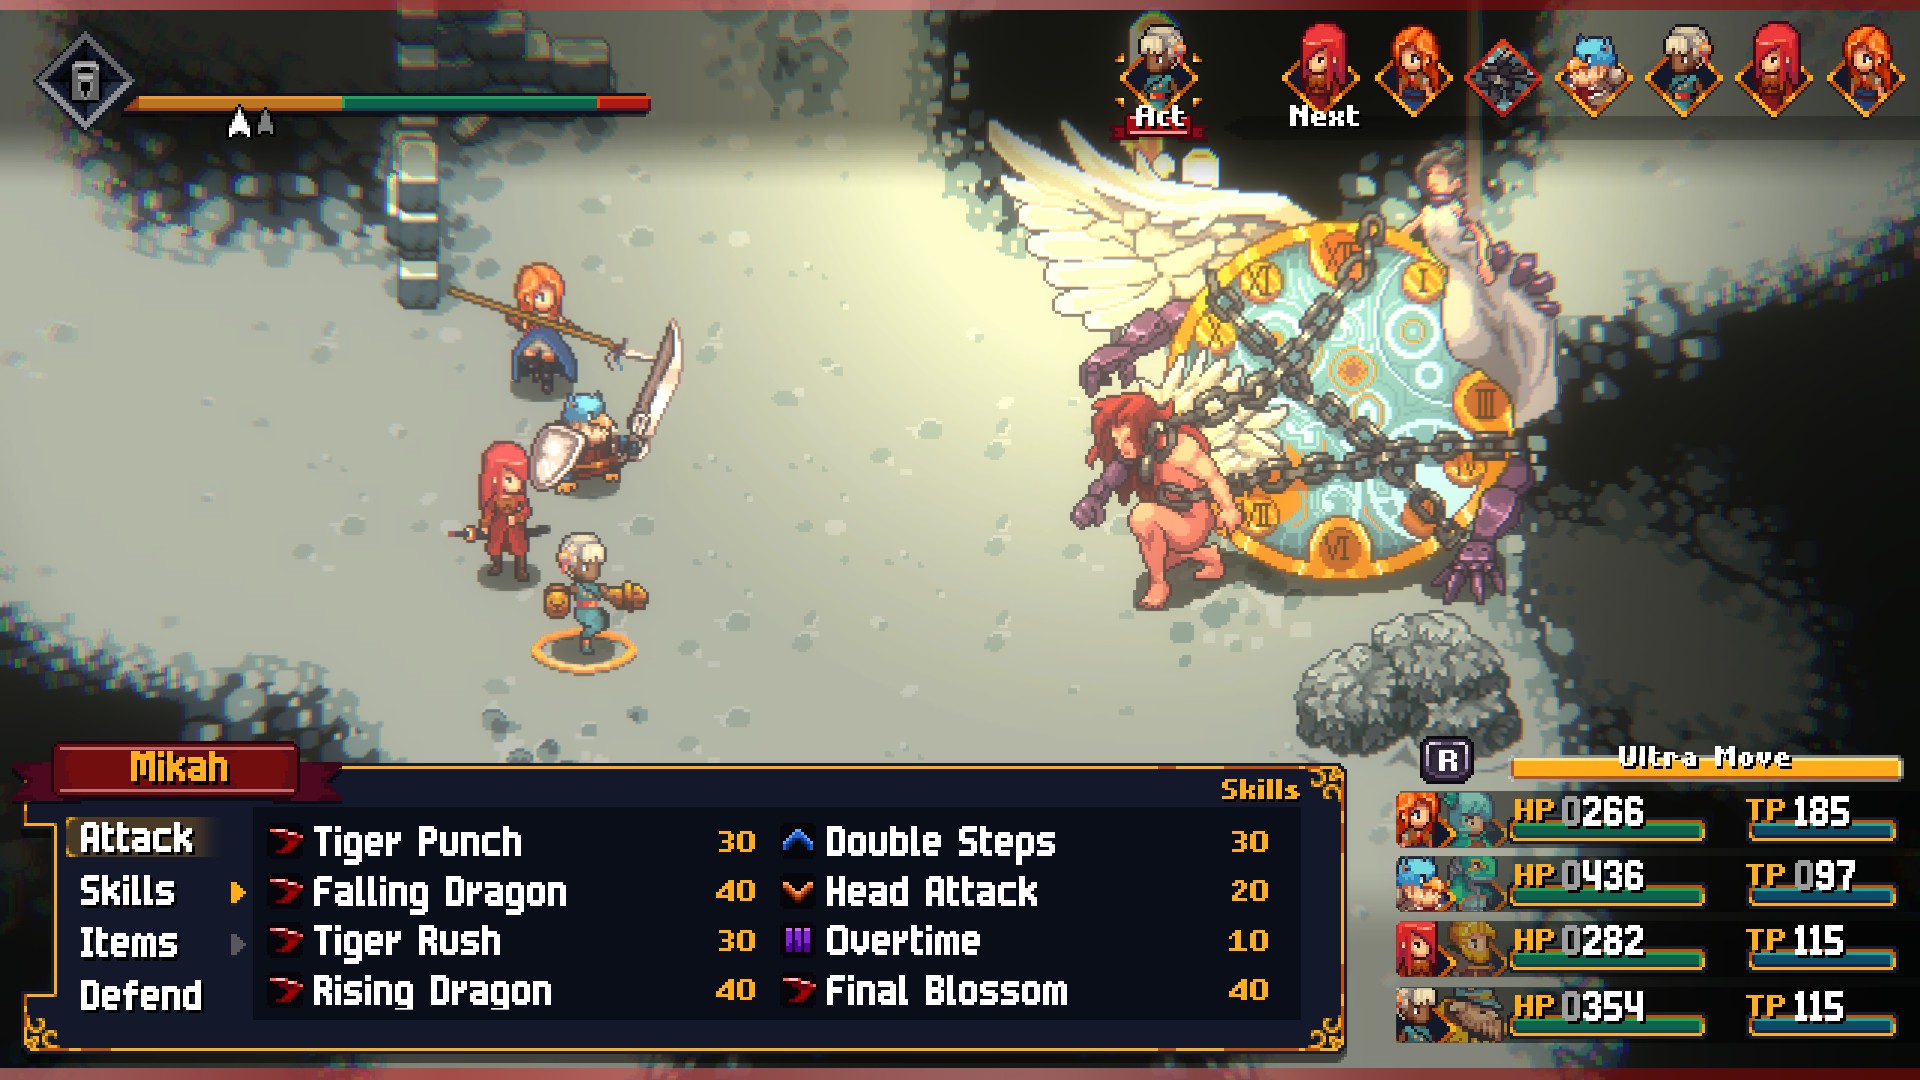
There are also monsters hereabouts - Flying Eyes to the west, Flying Nose to the north, Flying Mouth to the east - and if you get close they will flutter away. Gather all four components and you'll find them in the middle of the area, where they will join into a single, horrifying abomination and attack.

Behemoth
Weakness: Light
Steal: Scholar's Habit
Now that is an ugly monster. Behemoth hits quite hard, and is fast enough to get in a lot of turns unless you spend time buffing your party and debuffing the monster. Expect the following attacks during this battle:
- Glare, a single-hitting attack
- Windy Wings, an AOE Wind spell
This battle is not complicated. All you really need to do is buff your party's speed, debuff Behemoth's speed, and pile on the damage. Heal as needed, bringing in an extra healer if you don't have a way to keep Behemoth's turns low. This creature doesn't have a ton of health, but it can lay on a lot of hurt if your luck is low and it uses Windy Wings several times in a row.
You'll receive a Grimoire Shard for defeating Behemoth. Taking it down will also open a gate to the north, which will lead to more memories, as well as a final gate. Beyond... well, take a look for yourselves.
Strength: Light (Chained Echo) / Dark (Glenn Doppelganger)
Weakness: Dark (Chained Echo) / Light (Glenn Doppelganger)
Steal: Nothing
At last, the kids come out to play in earnest. Chained Echo is no joke, and can make your life a bit hellish with its moves. This is a serious fight, and you'll need to take it seriously to prevail. You can expect the following attacks from Chained Echo:
- Act Twice, which allows Chained Echo to use two moves per turn
- Glare, its normal attack
- Blinding Light, an AOE Light spell
- Consume TP, which steals TP from a single character
- Doom, which puts a Doom countdown timer on one character
- Summoning Echo, which summons three Glenn Doppelgangers
- Twisting Wind, which changes the Overdrive bar
Chained Echo will begin by using Act Twice, allowing it to take two actions per turn. It will then alternate between Glare and Blinding Light to assault your party. Do enough damage to the boss and it will summon in three Glenn Doppelgangers, all of which largely use physical attacks to harry your party. You'll occasionally see Doom from Chained Echo at this point. Continue to attack and eventually Chained Echo will use Twisting Wind to mess up the Overdrive Bar, removing the orange sections entirely. Late in the battle Chained Echo will call in more Doppelgangers.
Start off by buffing your characters, particularly their speed. Chained Echo and its minions are going to add a lot of stress to the Overdrive Bar with their attacks, and you need plenty of moves to keep it nice and low. Debuff Chained Echo as much as you can, then smash it with Dark Skills. Ba'Thraz is great for this, and a Rune Knight can give everybody Dark attacks with Dark Coat. Take out the Glenn Doppelgangers quickly whenever they appear to avoid being overwhelmed, and switch out anyone who gets hit with Doom status. Twisting Wind makes Overdrive maintenance much more difficult, but it's not impossible so long as you aren't also dealing with attacks from Doppelgangers. It's not that complicated a fight, in the long run, but it does take a while, and will regularly tax your TP reserves.

You'll earn a Grimoire Shard for defeating the Chained Echo. Many scenes will follow, with the end result that Glenn is, again, back in the party.