Part 21: The Kindreld Monastery - Leviathan's Trench
Need some quality headphones to connect to your PC? Try the JBL Tune 720BT, now available on Amazon! As an Amazon Associate I earn from qualifying purchases, at no additional cost to you.
A couple of dangerous areas later, the team has arrived at the Kindreld Monastery. They've been trapped insie by bounty hunters, so hopefully there's a way out that doesn't involve the Black Sun Gang. Watch the cut scenes that follow the team's entrance into the monastery, use up the GS that you just earned in the Leviathan's Trench, and begin exploring.
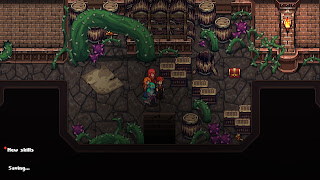
This whole area is choked with huge vines, which isn't a great sign for what's the come. Ignore the red chest that's just out of your reach and head west. You'll run into a merchant - this guy seems to be following you around - and find some stairs. On the next floor you'll find an eastbound path. Check the northern door along the corridor to find a chest containing two Meals, then carry on east. (Note that there's a door leading to a balcony here, as well, though there's nothing of value on it.)
In the north of the earlier chamber you'll see a doorway, flanked by two sets of stairs. Ignore the door for a moment and go up the stairs. They'll bring you outside, and if you go through the next central door you'll find a westbound path that leads to a statue of the Heroes of Leonar. Offering it Sacred Water will put you in a battle against two Seahorse Knights, a White Wine Djinn, and a Red Wine Djinn, all from the Leviathan's Trench. Defeat them to earn the Monk Emblem, sigil of Olivian the Monk.
Go back downstairs and use the central door in the main chamber. You'll wind up at the rear of the monastery. Check the fields to the southwest of the exit to find a chest containing two Tough Rips, then save your game, gear up, outfit anyone who can with Human Killer Skills / Crystals, and head north. After several cut scenes Sienna's problems will finally catch up with her.
Bathusda, Prok, Nos, and Galfried
Strength: Water
Weakness: Wind
Steal: Gold Nugget (Bathusda), Copper Nugget (Prok)
Ah, the Black Sun Gang. This showdown was a long time coming, though it's a bit underwhelming, all things considered. Each member of the bounty hunter squad has their own set of moves:
- Bathusda is a support unit, and can heal or give his team Regen status.
- Prok is a melee combatant, and can hit one or more characters per turn.
- Nos is also a melee combatant, though he also hits with Water Bomb for Water damage.
- Galfried is the group's caster, and will single- or multi-hit Wind elemental spells on your team.
Unless you allow your team to become Overheated this battle isn't terribly difficult. Hit as many enemies as you like with debuffs - Glenn can do this right at the start with his Ultra Move, if you like - then pick one fighter and pick on him until he falls. Bathusda is the obvious choice, as he can heal his buddies, though Galfried is also a top contender since his spells tend to do the most damage. Heal as necessary, taking down each member of the Black Sun Gang one at a time.
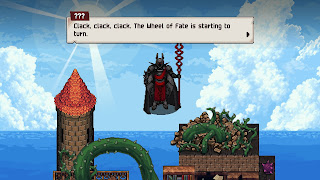
Once the battle is done things will snowball rapidly, and despite the intervention of a mysterious Sky Armor pilot the team will be forced to flee from the forces of General Guston of Taryn. Head back through the Leviathan's Trench, snagging the three recharged Amber Crystals and using the anvil as you go, and return to the Flower Fields of Perpetua. The team will get caught...
... and, after a number of cut scenes, you'll be free to explore a surprise dungeon: The Aurora, flagship of Taryn's armada. Lenne will be stolen away, and it's your job to set her free.


