

Part 16: The Last Mile - White Rose Inn, Fiorwoods
Need some quality headphones to connect to your PC? Try the JBL Tune 720BT, now available on Amazon! As an Amazon Associate I earn from qualifying purchases, at no additional cost to you.
Monsters
- Alpha Wolf - Strong to Earth, weak to Wind - Drops Bad Luck Charm, Yak Grass Fiber
- Forest Wyrm - Drops Dragon Spore
- Gazer - Strong to Earth, weak to Water - Drops Gazing Eye, Hard Shell
- Vin - Strong to Wind, weak to Earth - Drops Mane - Can steal Beast Pelt
- Wolf - Strong to Earth, weak to Wind - Drops Bad Luck Charm, Yak Grass Fiber
- Banana
- Branch
- Dahlia
- Dragonfly
- Garment
- Metal Frog
- Root
- Simple Leaf
- Spring
- Yellow Snail
Eastern Fiorwoods
With one foul innkeeper in his grave and the party reunited, you can finally head towards Tormund. The western path through the Fiorwoods is still blocked off by a soldier, forcing you to take the road north out of Iden. The section he's guarding is blocked to you - but not for long.
There's a bridge ahead when you enter this section of the Fiorwoods, but it has a big gap in the middle, forcing you west. Here you'll find a pair of Vin, boar-like creatures that use straightforward physical attacks. If you walk south of the Vin, through the trees, you'll find a westbound path that will lead you to a chest containing two Antidotes. Further west you'll enter another section of the Fiorwoods., though we're going to take a detour before we explore it.

Camp - Southern Fiorwoods
West of the entrance to the central section of the Fiorwoods you'll run into three more Vin. From here the path splits in three directions, and we'll start by going south. A chest on your left containing three Silph's Fans. Further south you'll enter the southern section of the Fiorwoods, the area blocked by a soldier. Head southeast and you'll find a hidden path leading south, to a chest containing Shielded Mail.
Done? Not quite. Check the wall of trees to the east of the chest. There's another secret passage running south that will bring you out behind the soldier that was barring your path. Head west and you'll enter the Camp, which is full of scientists. At the moment there isn't a ton to see, though there's one important landmark: A statue of the Heroes of Leonar, at the end of the Camp's southern boardwalk. Offer it Sacred Water and you'll do battle with three Vin and a Gazer, from the scenarios earlier in the game. Defeat your foes to earn the Vampire Emblem, sigil of Cardilo the Vampire.
The Camp has a Fast Travel Crystal, so the odds are excellent that you'll be coming back here at some point. For now, though, head back to the central section of the Fiorwoods.

Central Fiorwoods
Head back to the intersection where you fought Vin before. The path branches in two new directions. We'll start by looking to the west, where you'll promptly run into a Gazer. Northwest of the clearing where you fight the Gazer is a chest containing three Debuff Overdrives. To the west you'll find an exit to the western Fiorwoods.
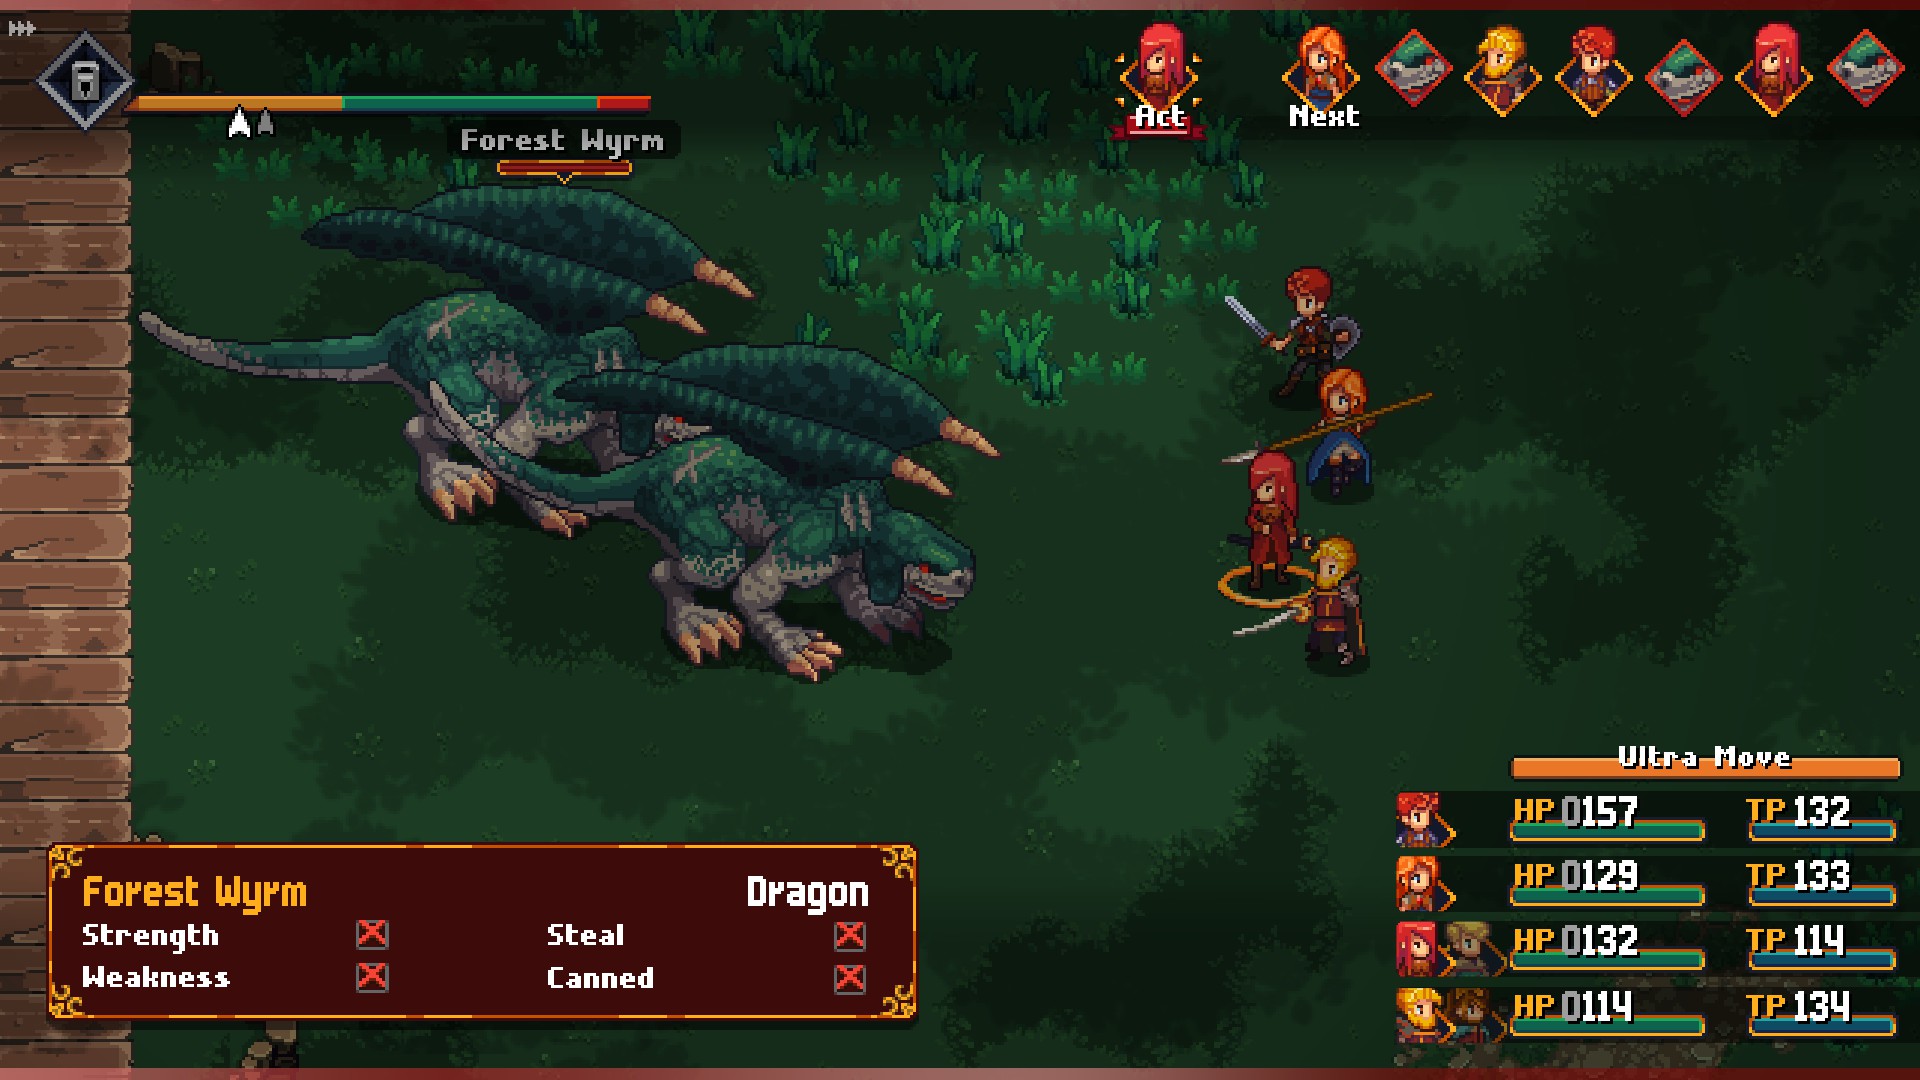
If you want you can enter the western section of the Fiorwoods now, and you'll find an area with raised, wooden walkways. Unfortunately this area is also crawling with enormous Forest Wyrms, and they will slaughter your party at this point in the game. Even one is too much for you to handle. You can slink between the two groups of Forest Wyrms to get at a chest containing four Hard Shells and a hidden cave containing 900a, but you're not getting any further by going this way. Head back to the central section of the Fiorwoods.
If you go north from where you fought the Vin in the central Fiorwoods you'll climb some handholds and wind up near a westbound path. Look northeast from the top of the handholds to find a chest containing 1,000a, then head west. At the end of the path you'll see a clearing to the south, with a small pond separating its two halves. A buried treasure marker here points to a cluster of mushrooms on the right side of the clearing where you'll find an ATK Up Crystal.
Head to the final section in the north and you'll run into three Wolves and an Alpha Wolf. East of them is a chest containing two Bolas. North of them you'll find the exit to the northern section of the Fiorwoods, where you can, if you wish, finish up your trek through this area. There's more to explore, though, so this guide is going to head back south and enter the western section of the Fiorwoods first.

Northern Fiorwoods
You'll hit some rainy weather in the north of the Fiorwoods, which is an ominous sign given the name of your current quest. This area is littered with cut trees and can be tricky to navigate, though if you steer between the tree stumps you can find chests containing a Miranda Bolero in the southwest, 219a in the northwest, two Sweets in the east, 750a in the northeast, an Angel Wing in the east, and a Metal Jerkin in the southeast. The paths between the stumps can be difficult to find at times, but you can get all of these items now if you're persistent.
In the north of this area the path will split in three directions. If you go east you'll be forced back, and if you go west you'll wind up in another area populated by Forest Wyrms. There's only one dead ahead, and you can beat it if you hit it with enough debuffs and status ailments, but there's no point... because behind it are two more that you can't beat.
Ah well. That leaves going north, which will take you right into Tormund. At last! Get ready for a bunch of cut scenes, because the story is about to ramp up.