Part 15: Crossing Mountains - Sienna - Rockbottom
Need some quality headphones to connect to your PC? Try the JBL Tune 720BT, now available on Amazon! As an Amazon Associate I earn from qualifying purchases, at no additional cost to you.
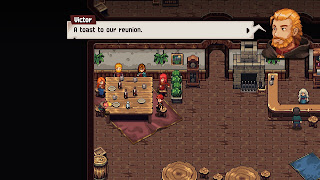
Three harrowing adventures later, the gang is back together, safe and sound at the White Rose Inn. You'll regain control of Glenn, and you'll need to speak to everyone and see how they're feeling about the reunion. A creepy tale will follow, thanks to the innkeeper, and everyone will go to bed...
... only for Lenne to disappear the next morning. So much for the reunion. Before you leave the inn, check the lower-left room on the second floor for a red chest. It contains a Lava Gorget. Reequip your party members if you messed with their equipment during the three scenarios, then head west from the inn.
Southeastern Fiorwoods
Monsters
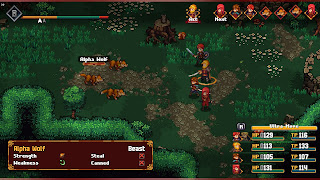
- Alpha Wolf - Strong to Earth, weak to Wind - Drops Bad Luck Charm, Yak Grass Fiber
- Wolf - Strong to Earth, weak to Wind - Drops Bad Luck Charm, Yak Grass Fiber
- Banana
- Branch
- Dahlia
- Dragonfly
- Garment
- Metal Frog
- Root
- Simple Leaf
- Spring
- Yellow Snail
Head north into the Fiorwoods. Almost immediately you'll run into a group of two Wolves and one Alpha Wolf. The Alpha has more health and can heal its pack, so you may want to target it first. Beyond here things branch out a bit.
If you take the southern path that leads west out of the area you'll see arrows pointing to buried treasure. If you follow the path west you can find a Paralyze Hit Crystal hidden against the roots of a tree that makes up the 'corner' of the woods, just before you leave a screen and next to a smaller, free-standing tree and some bushes. Continuing west to the next screen will run you into a roadblock, though you can find a chest containing two Angel Wings before heading back.
Backtrack east and take the northern path. You'll see a faint pattern in the black space along the wall of trees to your left. You can travel through these trees to find a chest containing two Sweets. Follow the path north and you'll find another pack of Wolves. Northwest of them you'll run into a cloaked (?) figure who claims to have not seen Lenne. Not helpful, and ominous.
Keep following the northern path and it will bring you to the tiny village of Iden. A Fast Travel Crystal will activate shortly after you arrive. There are a few items to gather before you get down to business:
- On the west side of the village are two houses, one with a red roof and the other with a blue roof. Walk between them to find a chest containing a Long Feather.
- Near the Fast Travel Crystal is a tavern. The bartender is also a merchant, though the stuff he has to sell is nothing special. In the upper-left corner of the ground floor you'll find a chest containing two Weathered Bones. On the second floor you'll find 66a and Bolas, at the east end of the hall.
- In the north of Iden is a home with two doors. Pop inside and check the bedroom for a Snack, then go through the eastern door. You'll find a mushroom field outside, and beyond them is a red chest containing a Black Tippet.
- Inside the village's eastern-most home you'll find a Silph's Fan, as well as a geography lesson.
- On the east end of Iden you'll find a stream with a path leading down into the water. Follow it south and you'll find a circuitous route that will lead you to a chest containing three Utility Overdrives.
You now need to speak to the villagers and see if they know anything about Lenne.
- The man standing outside the eastern-most home will have a few things to say about Daimbert, the innkeeper of the White Rose Inn.
- In the north of the village is a lizardy fellow who also has some things to say about the innkeeper, and they're not complementary.
- Last, speak to the porcine innkeeper behind the bar at the tavern, near the Fast Travel Crystal. He, too, warns you about Daimbert. Uh oh.
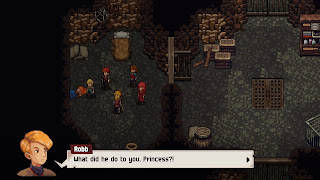
Everyone will gather up and decide it's best to head back to the White Rose Inn. Make the trip back and you'll see Daimbert disappearing into the rear of the inn. Skirt around the western edge of the building to follow him and you'll wind up in a basement, where, it appears, Daimbert has his own private dungeon. Make your way deeper into the catacombs, grabbing two Jute Fibers and reading Daimbert's journal entries as you go. You don't need to worry about any ambushes...
Monsters
- Pudding - Strong to Earth, weak to Wind - Drops Snack
Strength: Fire
Weakness: Water
Steal: Gold Nugget
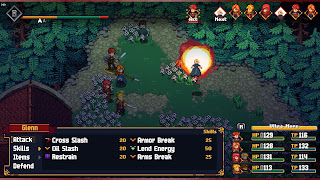
- Fire Flower, which hits one person for minor Fire damage
- Blooming Fireworks, which hits everyone for minor Fire damage
- Stagger, which Staggers one person and prevents them from taking their turn
- Third Eye, which causes all damage to be absorbed by Arlette instead
- Soul Infusion, which boosts all of Arlette's stats

