

Part 14: Crossing Mountains - Victor, Kylian, and Robb - Wygrand Mines
Need some quality headphones to connect to your PC? Try the JBL Tune 720BT, now available on Amazon! As an Amazon Associate I earn from qualifying purchases, at no additional cost to you.
Assuming you've been doing the scenarios in order, you've already witnessed the fates of Glenn, Lenne, Victor, Kylian, and Robb, post-Sky Armor detonation. All that leaves is Sienna, the hapless thief, who is now stuck by herself in the middle of nowhere. How will she get out of this one?
Leaving Sienna until last is wise. Not only will she have two GSes to allocate, you'll also have collected plenty of treasure from the previous scenarios. Sienna is fighting this battle on her own, and she'll need all the help she can get. Make sure to outfit Sienna with the Cleric Emblem if you're low on healing items. (Hopefully not.)
A pair of unaware soldiers make it painfully clear that Sienna can't worm her way out of her obligations to the party, so off we go. The soldiers have the north blocked, forcing you south. You should already be familiar with this area, and your next destination is to the east. Do not go west, or you'll get into a battle with several enemies that Sienna cannot beat on her own.

When you enter the next screen to the east you'll see a patch of grass just south of you. Check the right end of it for a hidden Herbal Collar. Then make your way east and north. There's an Amber Crystal to trigger to the northwest, and to the northeast there are some slumbering Horn Lizards. This battle is more winnable than the last one, but Sienna is still better off avoiding them entirely. Head north.
The trail will veer east. Before you go too far east, inspect the rock wall to find a conspicuous lump of boulders. You can bash through them to find a chest containing 856a. Carry on east to exit the area.
Rockbottom
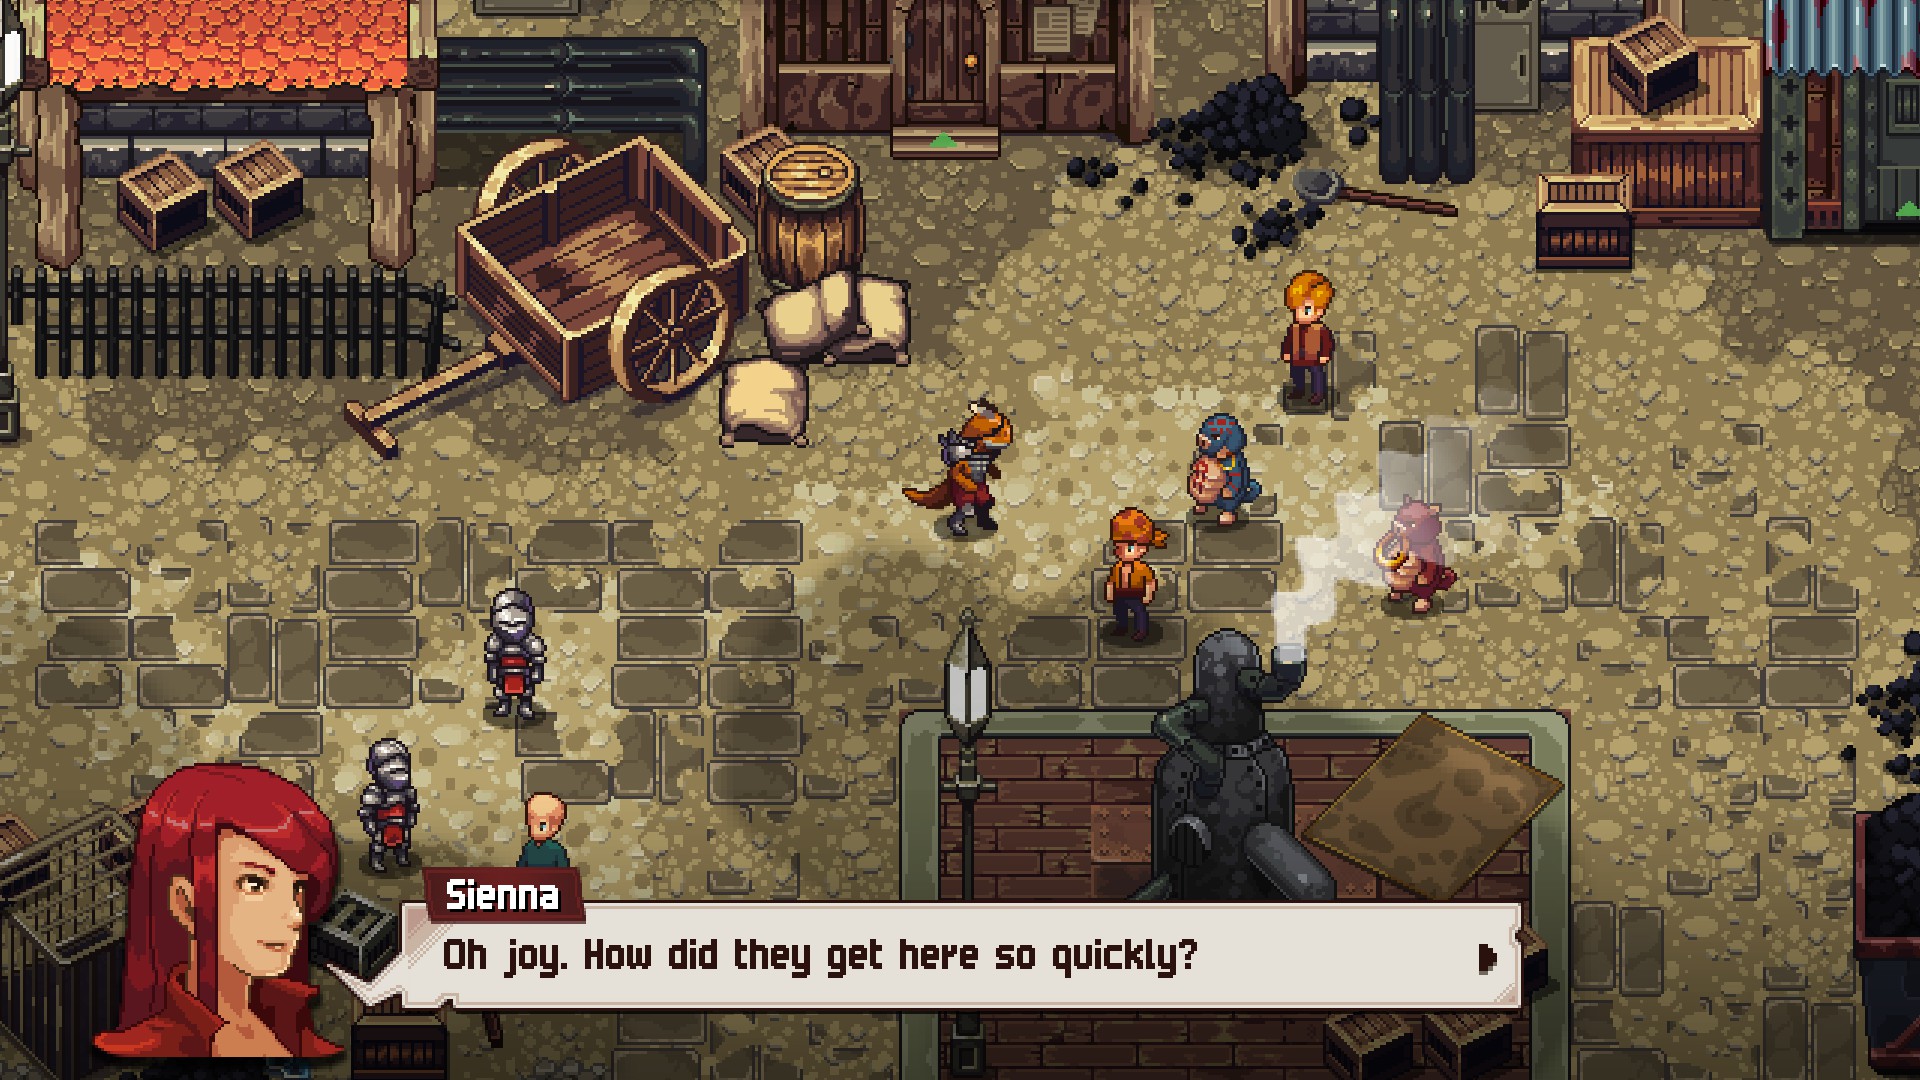
Heeeey, civilization. It's just a shame that it's full of enemy soldiers... and the members of the Black Sun Gang that Sienna is so keen to avoid. Head into town, but keep to the west side, along the edges of the houses. No one seems interested in having Sienna around, and she'll get the cold shoulder wherever she goes.
Make your way to the northwestern house and step inside. The woman here will order you to deliver a Miner's Lunch to her husband. Accept, then enter the mines down the stairs and on the east side of town. The worker inside will recognize the lunch and let you through. Head south to exit the mine shaft, grabbing the HP Up Crystal off the floor on your way.
You're now on the mine tracks, and to the west you'll wind up at an intersection of tracks. Check to the south first to find a chest containing three Jute Fibers. Next, head north and into the mining shaft you find. There are two Amber Crystals in here to plunder, as well as another HP Up Crystal. (Bernd is also here, if you want to give him his lunch. Don't expect any thanks. These people suck.) There's an elevator here, but you can't operate it without a key.

Head back to the intersection and go west. Again, you'll wind up in the mines, and again, you can grab an HP UP Crystal, on the ground to the northwest. Leave this tunnel to the west and you'll be back in town. Head north to activate Rockbottom's Fast Travel Crystal, and check the houses on your left to find some rocky handholds to climb. They lead to a chest containing a Human Killer Crystal.
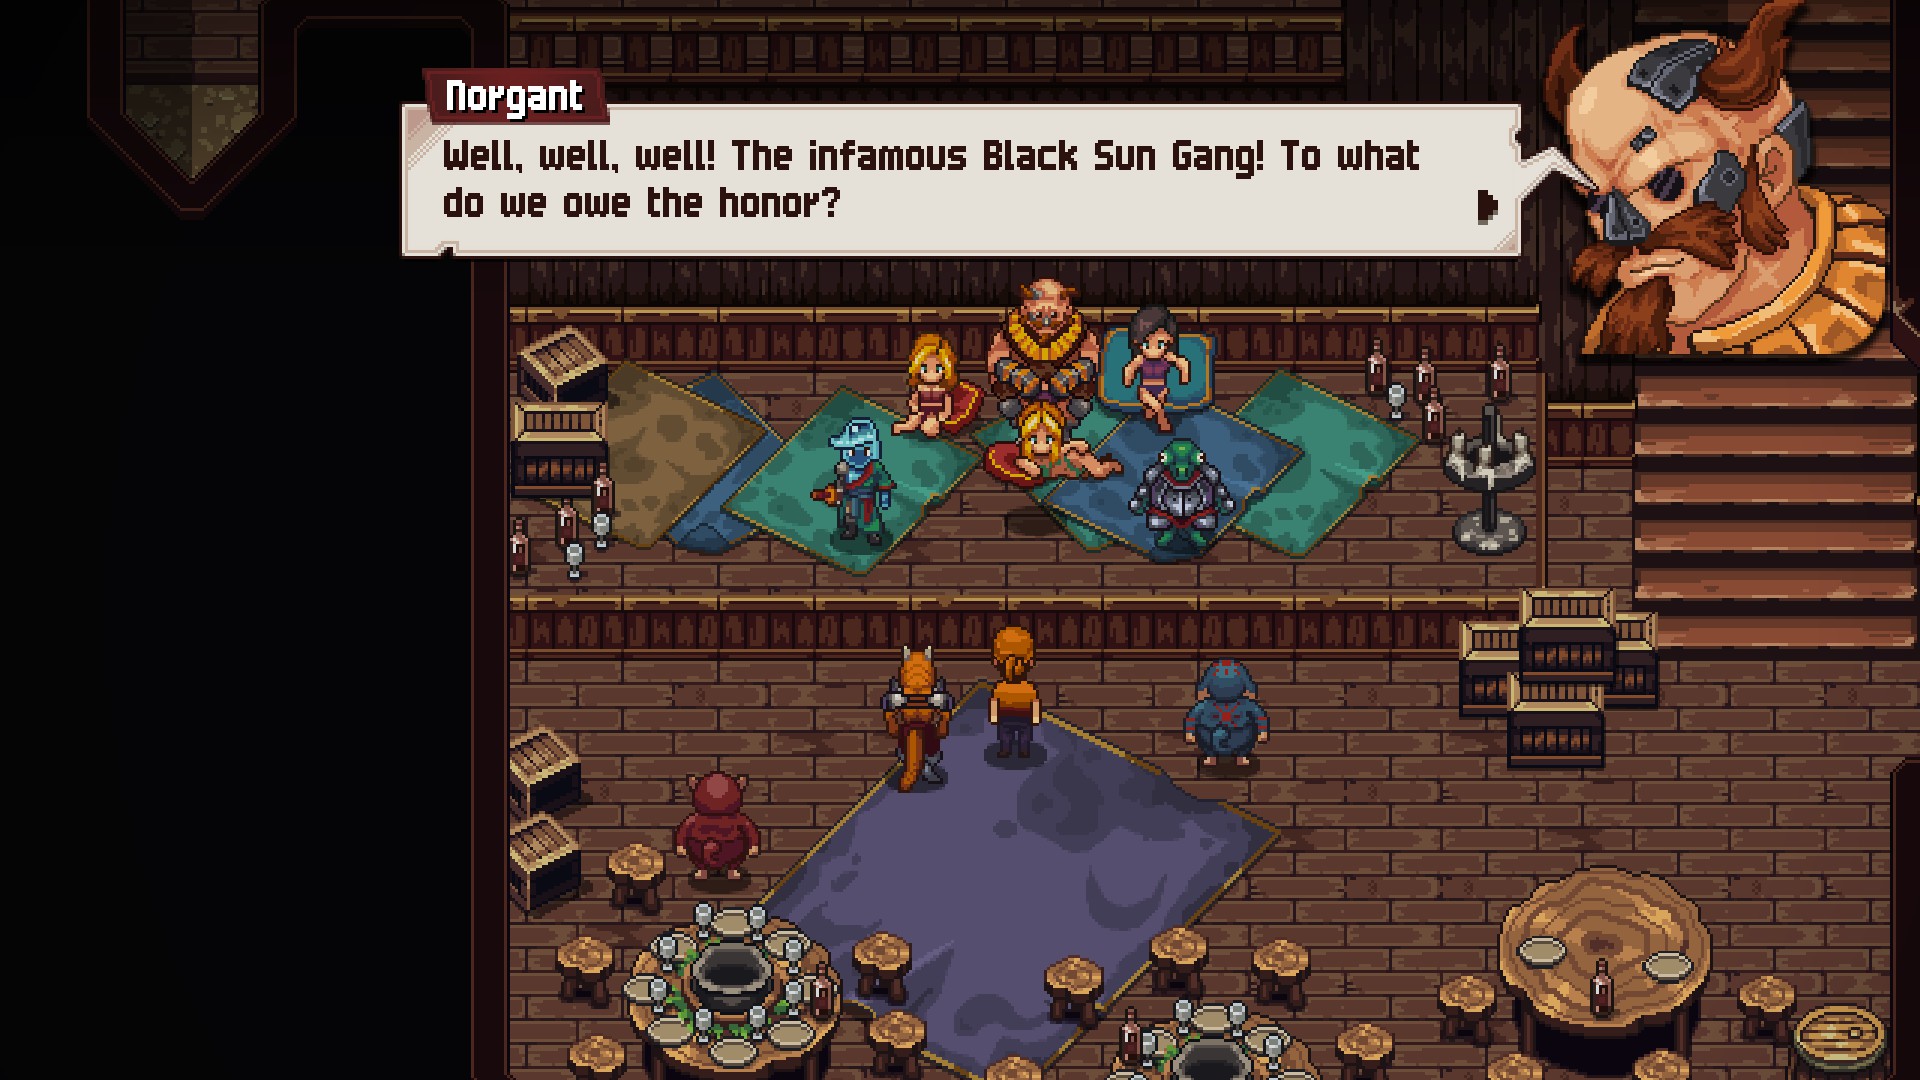
Use the anvil near the Fast Travel Crystal to upgrade Sienna's equipment, if you wish, then enter the large building in the north. (The entrance is a bit finicky. I found running into it while hitting the button worked to get me in.) You'll catch the Black Sun Gang speaking to Norgant, head of another gang, about Sienna. Not good. Climb the stairs next to them without getting too close and you'll find a tavern. At the counter is a man named Ba'Thraz, who is quite obviously important, but he won't lift a finger for Sienna without a strong infusion of coin - or something else of great value.
Check the northeast of the tavern, near the innkeeper, to find an exit to an outside ledge. Here you'll find a chest containing 500a. Climb the stairs near the innkeeper to find a storage room, then exit via the door in the wall. This will take you back outside. Climb the stairs on your left, then head east along the building's facade. You'll find a chest containing two Horns at the end. Snag them, then backtrack to the stairs and enter the nearest door.
Head through the room full of equipment and exit on the left. Back outside. Check south of you to find a chest containing two Waterbombs, then go through the door on the right. Inside you'll find a hole in the floor. Jump into it to find Norgant's treasury. Sienna will help herself to ample cash - and an amulet of some kind - and head back upstairs.

Return to Ba'Thraz. He'll happily accept Sienna's coin, and will join the party. Ba'Thraz isn't just some temporary hire, so make sure you allocate his GSes and upgrade his equipment a bit at the anvil. Ba'Thraz will come in handy, and makes a good candidate for the Cleric Emblem for this scenario.
Head to the roof of the tavern again, via the storeroom north of the innkeeper, and check the soldier to the east. Ba'Thraz will suggest going to a clothing store for disguises, but what he means is the equipment room you saw earlier on the way to Norgant's treasury. It's back to the west and up the stairs. Go there and Ba'Thraz will filch some outfits for the duo, and reveal his powers in the process.

- Mountain Bibi - Strong to Wind, weak to Earth - Drops Bamboo Fiber, Magician's Hat, Silver Ore

- Petal Storm, which inflicts middling damage to one character
- Double Wind Slash, which hits one character twice
In the aftermath of the fight Ba'Thraz will take his leave, miffing Sienna quite thoroughly. This will nevertheless get her out of hot water, and the scenario will end successfully. If you've got any scenarios left, then you'd best move on. If you've been following this guide, however...