
Flamesgrace Side Stories

Lianna and Eliza
Prerequisite: Complete Chapter 4 of Ophilia and H'aanit's stories
Location: First room on the left in Flamesgrace Cathedral
Reward: 11,000 leaves, Bishop's Staff
- Speak to Lianna in Flamesgrace Cathedral. She is worried that the people of Wispermill remain harmed by her actions. Fretting, she will decide to return to Wispermill to atone. (You may want to Purchase / Steal the Bishop's Staff she's holding. You'll get another one at the end of this quest, but having two is wise. They're great Staves for Clerics.)
- Head to Wispermill. Lianna and Eliza are standing just west of the windmill in the east of town. The pair want to further investigate the altar Mattias used in Ophilia's fourth chapter, but someone keeps stealing their supplies. Eliza mentions the Forest of Purgation as the possible home for more of Matthias' followers, bent on keeping anyone from learning the truth.
- Head to the Forest of Purgation. It's a Danger Level 58 dungeon located in the far west of the Western Wispermill Flats, and one of the more dangerous areas in Octopath Traveler. Follow the torchlit path through the area until you find a second save point. There's a Remnant Leader standing in front of a pedestal at the end of it. Challenge / Provoke him - he likes elemental Skills, but isn't a huge issue overall if you bring along a Warrior with a good Polearm - and you'll complete the quest once he goes down.

Sir Miles, Servant of the Flame (I)
Prerequisite: Complete Chapter 1 of Ophilia's story
Location:
Reward: 1,500 leaves, Nourishing Nut
Unlocks: Sir Miles, Servant of the Flame (II)
- Look around Flamesgrace for Miles. He's standing between the Inn and the Armorer in the south of town. He's a new inductee into the Knights Ardante, and is distraught over his father, who is said to have abandoned his fellow knights years earlier.
- Head to Flamesgrace Cathedral. There's a Former Knight Ardante in the top-right pew. Inquire / Scrutinize him for the Rumors of a Knight Ardante info. Take this back to Miles to earn your reward, and set him out on a journey.

The Innocent Inmate
Prerequisite: Complete Chapter 1 of Ophilia's story
Location: Jail cell to the west of the road leading up to the Flamesgrace Cathedral
Reward: 1,500, Tough Nut
- Speak to the Accused Man in Flamesgrace's sole jail cell. He claims that he's innocent of the crime of murder, and that he just happened upon a bloody body.
- There are two ways to free the man. The first is to head to the Tavern. There's a Drunken Soldier complaining about his job inside. You can Steal a Dungeon Key from him. Give it to the Accused Man and he'll escape, ending the quest in your favor.
- The alternative is to look for a Witness. She's standing right in front of the Armorer, and you can Inquire / Scrutinize An Eyewitness Account out of her. Take the information to the Accused Man to set him free.

The Slumbering Giant
Prerequisite: Complete Chapter 1 of Ophilia's story
Location: The Tavern in Flamesgrace
Reward: 4,500 leaves, Calamity Spear
- Head to Flamesgrace's Tavern and speak to the Diligent Student standing at the bar. He is studying giants, but can find no proof they ever existed in these lands.
- Leave the Tavern and look a short ways west. There's a Muttering Codger looking over the fencing at the Cathedral in the background. Inquire / Scrutinize him for the Where the Ice Giant Sleeps info. You'll need this to make a monster appear.
- Head to the Western Flamesgrace Wilds and enter the Hoarfrost Grotto, a Danger Level 25 dungeon, located in the south of the map. You'll find the aforementioned monster in the northeast of the dungeon, right after a save point, and it's ready to brawl.

Jötunn
Weakness: Sword, Axe, Fire, Lightning
Weakness (Snow Elemental): Dagger, Staff, Fire, Light
Get ready for an unhealthy dose of Ice damage. Aside from a normal physical attack the Jötunn deals exclusively in Ice Skills, and can batter one or more members of the party on a regular basis. When it goes into Boost mode the Jötunn will use Absolute Zero on its next turn, reducing everyone's health to one. In addition to its own moves the Jötunn can summon Snow Elementals, which also use Ice Skills to batter your party.
Buffing everyone's elemental defenses via a Cleric isn't a terrible idea for this fight, given the Jötunn's damage output. Otherwise, you will have a much easier time if you bring a Scholar or two along for the ride. Using Fire Storm will reduce any Snow Elementals to little pools of water, and will quickly break the Jötunn's defenses and leave it vulnerable. Heal as necessary. The Jötunn will gain more defensive shields each time you break it, up to a maximum of eight, though with Fire Storm going off regularly this shouldn't be an issue.
You'll receive an Ice Soulstone (M) and a Jötunn Horn for defeating the Jötunn. Return to the Diligent Student in Flamesgrace to hand over the horn and receive the remainder of your reward.
Stillsnow Side Stories
Arianna Again (I)
Prerequisite: Complete Chapter 4 of Primrose's and H'aanit's stories
Location: In front of Stillsnow's General Store
Reward: None
Unlocks: Arianna Again (II)
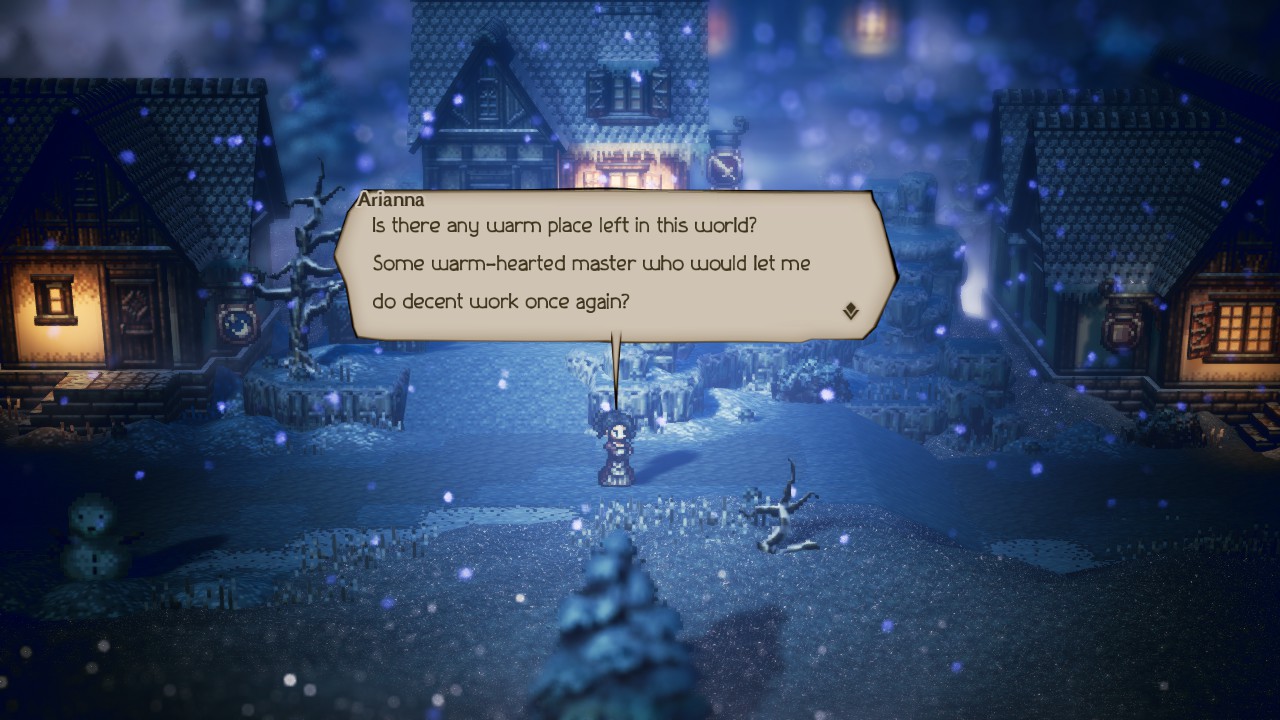
- Look for Arianna in Stillsnow. (She's easy to find.) She seems to have been freed from her obligation to sell her body, though she doesn't know what to do with her life, and no one is willing to hire her.
- Allure / Guide Arianna and take her to Stonegard. Travel to Natalia's home in Stonegard Valleys, beside the Armorer. Speak to Natalia to trigger a cut scene that will place Arianna in Natalia's employ.

Arianna Again (II)
Prerequisite: Arianna Again (I)
Reward: 11,000 leaves, Adamantine Dagger
- Once Arianna is secured in Stonegard Natalia will mention that she needs a stagecoach driver. Got anybody in mind?
- Head back to Stillsnow. You'll find Oren, the driver from Primrose's second chapter, along the southern road through town. He needs a new job. Guide / Allure him to Natalia's home in Stonegard, and speak to her to give Oren a new job. Your reward is forthcoming, as well.

Let There Be Warmth
Location: Inside Stillsnow's Tavern
Reward: 4,800 leaves, Nourishing Nut, Sharp Nut
- Speak to the Ingenious Inventor inside the Tavern. He's working on a portable heat source, but he needs a few more pieces of equipment before he can create a prototype. You can Purchase / Steal the three items he needs from NPCs throughout Stillsnow:
- The Satisfactory Coal is held by the Villager who watches the path to the Trail to the Whitewood, in the northwest of Stillsnow.
- The Adequate Flax is held by the Villager who welcomes you to Stillsnow.
- The Portable Pot is held by the Townsperson hiding behind the snowman in the southeast corner of Stillsnow, beside the brothel dormitories.

Setting Out
Location: Next to the Tavern in Stillsnow
Reward: 3,300 leaves, Alluring Ribbon
- Speak to the Pensive Girl on the right side of Stillsnow's Tavern. She wants to leave the village and become a singer, but her family's debts prevent her from going anywhere.
- There are two ways to complete this quest. The first is to travel to Quarrycrest and head to the Tavern. The Tavern Proprietor on the right is looking for a girl who can carry a tune. Guide / Allure him and take him to the Pensive Girl to solve all her problems, and relocate her to Quarrycrest.
- The alternative route is to Challenge / Provoke the Pathetic Father, who is hanging out by the stage in Stillsnow's Tavern. Beat him up to bring him to his senses - to an extent, anyway - and complete the quest.

Sir Miles, Servant of the Flame (II)
Prerequisite: Sir Miles, Servant of the Flame (I)
Location: Just outside Stillsnow's Tavern
Reward: 6,600 leaves, Nourishing Nut (M)
Unlocks: Sir Miles, Servant of the Flame (III)
- Look for Miles in Stillsnow. He's busy keeping Stillsnow safe, though he wants to pursue justice for his father as well. He discovered during his journey that he needs more practice to be successful as a Knight Ardante, and he begs your help. Challenge / Provoke Miles (Polearms work nicely) to earn your reward once you've beaten him up.
Northreach Side Stories

Location: Outside Northreach's Inn
Reward: 9,000 leaves, Sharp Nut (L)
- You'll find Byron the Noble, the subject of this quest, on the right side of the Inn. He speaks of the nobility of his family - and how they've fallen a great ways since their glory days.
- There are two ways to complete this quest. The first is to track down the ring that Byron mentions selling. Head to Grandport, then to the Grandport Markets. On the left side of the market stalls is a Master Jeweler. Steal / Purchase Byron's Ring from his inventory and take it back to Byron for your reward.
- The alternative method is to travel to S'warkii. Just south of the General Store is a Highbrow Historian. Scrutinize / Inquire him and you'll learn about the Byron Family Lineage. Take what you've learned back to Byron for your reward.

Here Be Dragons
Location: Along the northbound road leading the Armorer in Northreach
Reward: 11,000 leaves, Dragon's Scarf
- Speak to the Traveling Author in the middle of Northreach. He's planning to write a book, and needs more research material on dragons. He requests your assistance in the matter. To complete this quest you'll need to travel to three towns and Inquire / Scrutinize some specific NPCs:
- The Veteran Mercenary in Stillsnow knows about the Dragon of the Frostlands. He's standing to the right of the Tavern, facing north.
- The Affable Merchant of Orewell knows about the Dragon of the Cliftlands. She's standing down the steps to the south of the Tavern.
- The Cheerful Storyteller of Cobbleston knows about the Dragons of the Highlands. He's standing on the right side of the Tavern.

Ogen's Epilogue
Prerequisite: Complete Chapter 4 of Alfyn's story
Location: In the center of Northreach, north of the Inn and the Tavern
Reward: 9,000 leaves, Double Tomahawk
- Speak to Ogen to trigger a cut scene between him and one of his patients. He'll leave once it's done. You'll find him again in Northreach: Lorn Cathedral, in the north of Northreach, looking at his wife's grave. He wants a particular type of flower to lay at her gravestone.
- Travel to Victors Hollow. There's a Flower Girl standing just south of the Provisioner, and she claims she found the flower Ogen wants. Steal / Purchase the Mind-me-always from her, and take it back to Ogen for your reward.

Sir Miles, Servant of the Flame (III)
Prerequisite: Sir Miles, Servant of the Flame (II)
Location: In front of Northreach's Tavern
Reward: 11,000 leaves, Ardante Attire, Nourishing Nut (L)
- You'll find Miles dead ahead when you enter Northreach. He's busy with his duties - but has also heard that a sword once belonging to his father is somewhere in Northreach. He wants help tracking it down.
- Head to the north of town. Just before you enter Northreach: Lorn Cathedral you'll meet a Refined Merchant, near the Armorer. He's holding the Memorial Sword. Purchase / Steal it and take it to Miles to end his questline.