Danger Level: 50
Location: West Everhold Pass, down a secret path a short distance southeast of the save point
Another of the advanced job shrines, the Shrine of the Runeblade is as short as the other three, and ultimately just as dangerous once you reach the boss. When deciding on a party you'll want to be able to target Axe, Bow, Light, and Dark, and ideally multiple members of the party will be able to exploit each. A Scholar / Sorcerer, Cleric, Dancer, and just Alfyn in general are good candidates for what's to come.
You'll run into the following enemies while exploring the Shrine of the Runeblade:
- Animated Armor - Weak to Axe, Staff, Ice, and Light. Buffs its party, and can use Horrific Claw to inflict terror and lock away Boosting. A significant pain in large groups.
- Ice Remnant Mk. II - Weak to Sword, Polearm, Axe, and Fire. Strong melee opponent with an Ice leaning. Try to get them stunned first.
- Ice Revenant - Weak to Sword, Bow, Staff, and Fire. Powerful golem that buffs itself and hits hard. Get it stunned as quick as you can.
- Wind Remnant Mk. II - Weak to Sword, Polearm, Axe, and Ice. Wind version of the Ice Remnant Mk. II.
- Wind Revenant - Weak to Sword, Bow, Staff, and Ice. Wind version of the Ice Revenant.
- Light Remnant Mk. II - Weak to Sword, Polearm, Axe, and Wind. Light version of the Ice Remnant Mk. II.
- Light Revenant - Weak to Sword, Bow, Staff, and Wind. Light version of the Ice Revenant.
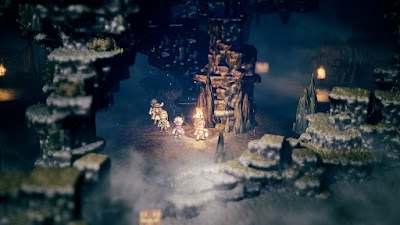
Follow the main path past the save point and around some stone columns. To the north is a chest containing an Inspiriting Plum Basket. Southeast of here you'll find a grassy patch, and if you head west from here you'll find another chest, this containing a Healing Grape Bunch.
Go further east and you'll find a set of stairs. To the right of the stairs is a path leading north. Follow it north to find a chest containing 50,000 leaves, then go south past the way you came down to find a chest containing a Revitalizing Jam. That's all for the shrine, so head back up, ascend the stairs, use the save point at the top, and make your way to the mountaintop pedestal. Touch the icon once you're ready and the battle will begin.
Balogar, the Runeblade
Weakness: Dagger, Axe, Bow, Light, Dark
Well isn't this an irritating fight. Despite how his sprite looks, Balogar favors elemental Skills that cover the full spectrum of elements. The attacks are painful enough on their own, but most of them also have a strong chance of inflicting either a debuff or, worse, a status ailment on your party members. Rune of Ice can put someone to sleep, Rune of Thunder inflicts unconsciousness, Rune of Wind debuffs your defenses, Rune of Light debuffs your speed and evasion, and Rune of Darkness, unsurprisingly, can inflict blindness. Things only get worse when Balogar reaches half health, as he'll go into a permanent Boost mode, allowing him to use Runestorm versions of his Skills. These attacks will hit everyone in the party with one of these status ailment-inducing attacks, and by this point Balogar will be able to act twice per turn. When the 'elements are united' Balogar will use Runelord's Resolve, which will hit one character six times with every element, unless you break him before his next turn. Ouch.
Annoying, yes? It gets worse. Balogar doesn't change weaknesses like some bosses, but he will lock away most of his weaknesses at the beginning of the fight. At first this means only Axe and Dark are unlocked, though later in the fight it can become Bow and Light. This leaves you with few options for bringing Balogar to his knees if you didn't know this coming in.
That said, Balogar is one of the easier shrine bosses - not easy, but easier - so long as you can cover his unlocked weaknesses, as well as hold off any status ailments. He only gets up to nine defensive shields, which you can easily break in one round if you're using the right setup. Put the Resist Ailments Skill on your whole party before the battle begins, and make sure your healer can cover 2,000+ points of damage. Then just target Balogar's weaknesses, saving up your BP on melee characters so you can break him again quickly whenever he's no longer stunned. Your Scholar / Sorcerer and Alfyn's Concoct Skill can cover the elemental weaknesses, and more so if you use Aerlfric's Auspices to make Skills go off twice. Balogar starts off somewhat easy and gets much more difficult once he can use Runestorm twice per turn, so you may want to delay him using the Hunter's Leghold Trap Skill. Have Alfyn use Concoct to get rid of status ailments should anyone wind up unconscious or asleep. The final moments of the battle come down to more than a little luck, so don't be surprised if you need to try this fight a few times even if ninety percent of it goes well.
You'll earn a Refreshing Jam for defeating Balogar, the Runeblade. In the aftermath of the battle the god will bestow upon your party the Runelord job, making the user a master of the six elements. Very handy.


