Main Walkthrough
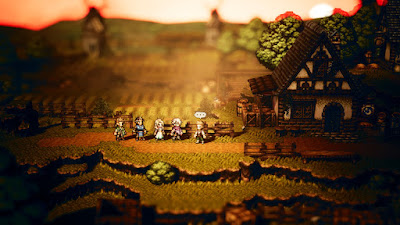
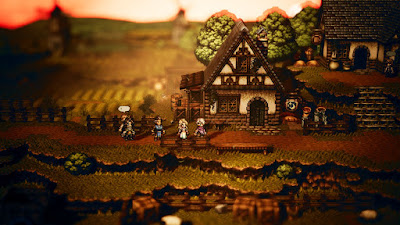
The final leg of Ophilia's journey takes her to Wispermill, a dreary, quiet little village in the north of Orsterra. You'll reach Wispermill by heading north along the Western Noblecourt Flats, then following the path through the Western Wispermill Flats steadily east. The monsters along the way are a bit vicious so make sure your party is well into the 40s before you make the trip.
Wispermill is a small location, but given the advanced level at which you reach it there are still things to see and do before you begin Ophilia's fourth chapter:
- Out front of the General Story, to the right of the Inn, is a chest containing a Thunder Soulstone (M).
- There's a... oh, no, there isn't. Okay, just open the chest.
In truth the people of Wispermill are very tight-lipped - conspicuously so - and you can only Scrutinize / Inquire them. Neither command will yield much of use. Once you've completed Ophilia's quest you can get a little more out of this quiet crowd. In the meantime, head to the Tavern if you skipped the chapter trigger, speak to the Tavern Keeper, and choose Hear a Tale to begin Ophilia's chapter.
Ophilia's Chapter
Ophilia arrives in remote Wispermill on the tracks of her adoptive sister, Lianna, who has stolen the sacred ember. Someone named the 'Savior' promises to bring their father back to life, and Lianna apparently fell for the idea. Ophilia receives no help from the villagers of Wispermill, however, and they seem downright hostile to their unwanted guest.
Head towards the east side of town. A Villager will pop out of a house and ask for help. This is, of course, a trap, and Ophilia will be cornered inside the woman's small home. Ophilia gets thrown in jail... and a familiar face, none other than Mattias, is waiting for her there. He's the self-styled Savior, and is clearly responsible for many of the evils that plagued Ophilia's tale. He explains his plan then leaves Ophilia to stew in her cell.
You can wander around the tiny cell as much as you like, but ultimately you'll need to approach the door and choose 'Wait and see what happens'. Lianna will show up when you do, and set Ophilia free - though she's clearly been tricked by Mattias' promises.
Leave the jail and head west through town. You'll overhear some of the villagers talking about a cave outside town. Guess you know where to go. Head back east, towards the windmill, then down the southern path to the Ebony Grotto.
Ebony Grotto
A haunting - yet somewhat beautiful - cavern, the Ebony Grotto is the last trial standing between you and the end of Ophilia's storyline. There are, of course, enemies aplenty within:
- Zealot I - Weak to Sword, Dagger, Axe, and Light. Uses melee attacks and Greater Fire Soulstones to cause damage. The Soulstones can do a lot of damage in a short period of time, so try to stun these guys before they get a turn off.
- Zealot II - Weak to Sword, Dagger, Axe, and Light. The same as Zealot I, only they have more defensive shields and use Greater Dark Soulstones.
- Dark Elemental - Weak to Fire and Light. Dark-wielding Skill user. Magic is best, whether you're targeting its weaknesses or not.
- Vampire Bat - Weak to Sword, Polearm, Bow, and Ice. Can put your whole party to sleep. Shouldn't be a huge deal by now, though you should still make a point to stun groups of them quickly.
- Mortal Mushroom - Weak to Axe, Lightning, and Light. Can cause a lot of trouble with status ailments, but is very easy to stun. Do so on your first turn, if you can.
The first save point is right by the entrance. Wander north of it and you'll see a chest containing an Olive of Life (M) nearby. There's another chest on your right, blocked by stones; check along the edge of the stones for a path that will take you to it. The chest contains a Giant's Club.
Follow the northern path to the east until you see a chest among some rocks to the south. Check along the left side of the rocks to find a path inside. The chest in the north of the rock pile contains an Energizing Pomegranate (M). Head back out, then loop around the rocks to the right side and look for another hidden entrance. This one will lead you to a southern chest containing a Refreshing Jam.
Head generally east - there are two paths you can take to the same place - and you'll come to a save point. Beyond it you'll reach a deeper area of the Ebony Grotto, where the enemies you face change a little:
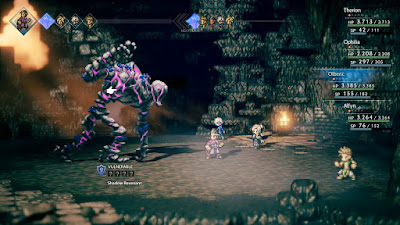
- Shadow Remnant Mk.II - Weak to Sword, Polearm, Axe, and Light. Doglike foe that can buff itself and hit you with some painful attacks. A priority enemy to stun, especially in groups.
- Shadow Revenant - Weak to Sword, Bow, Staff, and Light. A powerful - but rare - enemy that is basically a miniboss. Has a lot of defensive shields, but it also has a lot of vulnerabilities - and you'll only fight them by themselves.
Dead ahead from the entrance is a chest containing a Healing Grape Bunch, as well as another save point. Walk a little ways further right of the save point, then go south and to the left to find a chest containing an Energizing Pomegranate (M). Return to the save point, head north, and check along your left to find a path to another chest, this containing an Inspiriting Plum (M).
You'll see another chest to the northwest. Follow the northern path until it bends west and you'll find a Thunderstorm Amulet between the stony columns. Double back and walk east, past the next torch in line. There's a large rock formation just south of the torch that you can enter via a hidden path. Beneath it you'll find a chest containing an Antidote Stone.
Head back to the torch and look to your right. You'll see a southbound path, but before you follow it check the side of the path to your right. You'll find a hidden route that will bring you to a chest containing an Olive of Life (M). Head south and you'll see a purple chest on a ledge above you; wander around behind the rocks on the right side and you'll find the path up to it. The purple chest contains an Adamantine Hat.
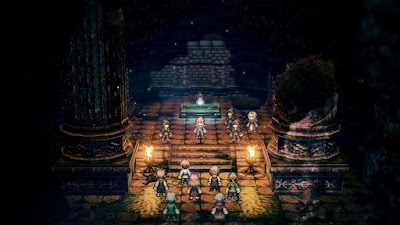
Head east until you see a save point to the north. Check to your right and you'll find a path leading to one final treasure chest. It contains 30,000 leaves. Head north to the save point, use it, heal up, and carry on north. Mattias and his flock of converts are dead ahead - and, predictably enough, the ceremony that follows does not go well for Lianna. Or... anyone, actually. Once the cut scene is through you'll need to fight two Mattias' Minions and a Mattias Follower - both types are weak to Sword, Dagger, Axe, and Light - and after you take out these buffed-up cultists, Mattias himself will step in.
Mattias
Weakness: Sword, Axe, Ice, Light
Weakness (Senior Cultist): Dagger, Bow, Fire, Light
Weakness (Black Matter): Staff, Lightning, Wind, Light
Weakness (Augmented Remnant): Polearm, Dagger, Lightning, Light
What a tool. Mattias is a powerful opponent, capable of using elemental damage and buffs to bedevil your party. His moves are not that crazy... though his ability to call in the help of summons can cause you some trouble. He'll call in two of the monsters listed above after breaks, and so long as the monsters exist Mattias' weaknesses will be locked away from you. He'll also use Infernal Flame, which locks up your multi-hitting elemental Skills, making the process of whittling down enemies a pain, and it won't go away until you break Mattias. Mattias will gain more defensive shields each time he breaks, up to a maximum of eight. Once Mattias' health gets low enough he'll start to go into Boost mode, and once it ends he'll use Black Thunder if he's not broken. This powerful move inflicts heavy Lightning damage on your whole party and can knock party members unconscious for several turns. Very painful.
Mattias has too much health to realistically kill him before taking out all of his summons, and if you try to fight him too quickly he'll start using Black Thunder while his weaknesses are blocked, preventing you from stunning him and breaking the move. You're better off just ignoring Mattias whenever he isn't alone and focusing on his buddies, stunning them quickly and taking them off the board as quick as you can. Only hitting Mattias with normal attacks so you can save your Boost levels for his cronies will make it easier to avoid their Skills. Once Mattias has summoned help three times he'll run out of minions, and you can proceed to beat the ever-living snot out of him. At only eight defensive shields it's pretty easy to break Mattias when he's by himself. Heal whenever you get into trouble, and have Ophilia use Sheltering Veil or Reflective Veil to deaden the effects of enemy fire whenever she's not healing. Every enemy except for the Augmented Remnants will use a lot of elemental Skills. Keep in mind, too, that Ophilia (and other Clerics) cannot heal your party while Infernal Flame is active, so either have Alfyn available to Concoct healing abilities or use Healing Grape Bunches.
You'll receive Mattias's Scepter for defeating Mattias. He'll go down for good, and the group will be zipped back to Flamesgrace to complete the Kindling. Once that's done, use Guide on Lianna to drag her out into Flamesgrace, then climb up onto the rocky hill on the northwest side of Flamesgrace. You'll trigger the final cut scene, and Ophilia's chapter will draw to a close.
... buuuuut we're not done yet.
Wispermill
Remember all those sour, silent folks in Wispermill? Now that Mattias is gone, they're willing to speak to you - and they're subject to your Path Actions. Now you can properly have a look around:
- The Villager at the entrance of town has the More Plentiful Provisions info if you Scrutinize / Inquire him.
- The Rumormonger out front of the Inn has an Enlightening Bracelet to Purchase / Steal. The Troubled Villager to the right of the Inn has a powerful Death Cleaver, and if you Scrutinize / Inquire him you'll find an Inspiriting Plum Basket over by the town's windmill.
- The Villager to the left of the General Store has a Slippery Nut (L) and a Nourishing Nut (L) to Steal / Purchase.
- Inquire / Scrutinize the Villager in front of the Tavern and you'll make a Commemorative Coin appear in the jail cell where Ophilia was kept captive earlier in the chapter, on the east side of town.
- There's a Slender Farmer out front of the windmill who will trigger a Side Story. She has a Light Nut (L) to Steal / Purchase, among other things. The other Villager near the windmill will give you the Discount at the Inn info when Inquired / Scrutinized.
- Just west of the entrance to the Ebony Grotto is an Elderly Woman who has a Sledgehammer and a Stimulating Necklace to Purchase / Steal. Scrutinize/ Inspect her for the Guide with Ease info.
Main Walkthrough


