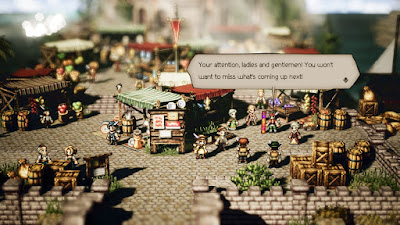
With Eldrite in hand Tressa is on her way to Grandport, the final leg of her trip around the world. Grandport is located in the far east of Orsterra, on a peninsula shared with Goldshore. If you keep going north along the West Goldshore Coast you'll find the West Grandport Coast, and Grandport itself is a quick jaunt east.
Tressa alone completes her journey in Grandport, so there will doubtless be lots to see when you first arrive in town. You probably won't be ready for just how much you can get from the population of Grandport, however, so make sure you have your Path Actions ready to go. (Especially Therion's Steal. He can get so much stuff from this place.) We'll start by searching the southern half of Grandport:
- The Merchant by the entrance of Grandport has an Adamantine Shield, a Hill Cleaver, a Justice Breaker, and a Victor's Spear to Steal / Purchase. The first guy you meet. Hoo boy.
- The Passionate Peddler outside the Provisioner has Tales from a Faraway Land that you can Steal / Purchase. It's part of a Side Story.
- The Merchant outside the Armorer has a bunch of decent items to Steal / Purchase, though the best is probably his Blade of Bravery. If you Inquire / Scrutinize him you'll reveal a hidden Revitalizing Jam in a blocked house on the other side of the bridge, which we'll get to in a moment. Also near the Armorer is a Bookworm Girl with an Introduction to Adventuring.
- Across the bridge from the Armorer is a Merchant with an Angel Saber, an Imperial Helm, and three decent accessories to Steal / Purchase.
- There's a Townsperson guarding a house on the other side of the bridge, as well. If you Challenge / Provoke him and win - he's strong, but you must be pretty strong yourself if you can reach Grandport - you'll gain access to the house. There's an Elderly Woman with a bunch of decent accessories to Steal / Purchase inside, including a Blizzard Amulet. Inquire / Scrutinize her and you'll learn the Thieving Tips & Tricks info, which is especially handy in this town.
- To the left of the Tavern, hidden behind some baskets, is a chest. It contains an Inspiriting Plum Basket.
- There are three patrons to check in the Tavern, though the one of most interest is the Merchant in the middle. He has five Nut (M)s to Steal / Purchase: Nourishing, Fortifying, Magic, Slippery, and Light. Nice haul.
- Just north of the Tavern is the exit to the Grandport Markets. The Townsperson standing near the exit has a Silver-filled Pouch to Steal / Purchase.
- There's a Bazaar Shopper just east of the western beach. He has a Silver Clock and a Heavy Coin Pouch to Steal / Purchase. Just to the left of the Bazaar Shopper is a Merchant with a number of decent items, the best of which is a Revitalizing Jam. Beside this Merchant's stall is a chest containing an Empty Coin Pouch.
- Down on the beach is a good, good dog. That is all. (Well, that and a woman named Lara, who has the Lara's New Life info if you Scrutinize / Inquire her. She's part of a Side Story.) Check to the left of the chapel on the beach for a chest containing a Silver-filled Pouch.
- Heading north through the market again, you'll find a Merchant on the right with a bunch of great Polearms - the Scourge Lance and Rune Glaive are particularly noteworthy - and the Master Jeweler on the left has a Byron's Ring that's part of a Side Story. Just north of this pair is a Creepy Antiquarian who has a Sword of Sokrath, also part of a Side Story.
- On the east side of the market, across from the Creepy Antiquarian, is a Bazaar Shopper with a bunch of Swords to Steal / Purchase and a Merchant with several Daggers. Inquire / Scrutinize the Bazaar Shopper to make a Heavy Coin Pouch appear to his left.
- South of this pair is a Bazaar Shopper with a Dazzling Artwork to Steal / Purchase that's worth a pretty penny when sold. Right next to them is another Bazaar Shopper with a Commemorative Coin that's worth even more than the Dazzling Artwork. This second Bazaar Shopper will provide the Discount at the Inn info when Inquired / Scrutinized. Next to this pair is a Merchant with a bunch of Axes to Steal / Purchase.
- To the south, just west of the pier, are three NPCs with a variety of good things to Steal / Purchase, though best is the Bazaar Shopper who has a bunch of items you can sell, including another Dazzling Artwork.
- There are two Merchants on the eastern pier. The one in red has some decent armor to Steal / Purchase, while the one in black has a Brilliant Bow, a Master's Longbow, and an Ultimate Breaker, among other things. Just east of them, on the far right side of the screen, is a chest containing a Bottle of Sleeping Dust.
- That brings us back to the southern entrance, where the final Townsperson has a Light Nut (L) to Steal / Purchase. Inquire / Scrutinize her for the New Weapons for Sale info. (Though after everything you just discovered, you may not need any of the new gear that appears in the shop.)
- Aside from all that, there are also two NPCs in the north, just outside the Grandport Bazaar. The Guard outside the Bazaar entrance has a Protective Necklace to Steal / Purchase, while the Merchant to the left of the Bazaar has a Forbidden Shield to Purchase.
- The Merchant on the left side of the arena has a Sledgehammer, a Morning Star, a Fur Cap, and a For Coat to Steal / Purchase. Inquire / Scrutinize him to reveal a hidden Articulate Stone in the Bazaar's back rooms.
- The Aristocrat on the right side of the arena has a Heavy Coin Pouch to Steal / Purchase. Inquire / Scrutinize her for the Smarter Bartering info.
- Check the back rooms of the Bazaar. There are two chests, one containing 25,000 leaves, the other one last Dazzling Artwork. If you're not rich by now then you are one heavy spender.
Tressa's Chapter
Tressa arrives in Grandport in time to participate in the Merchants' Fair, a gathering of merchants from all over Orsterra. Soon after her arrival she spots Mr. Wyndham, a wealthy aristocrat who's in the market for something fancy for his daughter. The competition revolves around being the one to satisfy Wyndham - and the prize is a billion leaves. Yikes.
Tressa then meets up with a young woman who can't seem to walk properly. Her name is Noa, and she's quite happy to make the acquaintance of Tressa. She's in Grandport to find something she'll treasure forever, and once her butler shows up it becomes obvious that, yes, Noa is the daughter. Someone ominous will peek in on the conversation, and then you'll regain control of the party.
Head to the Grandport Markets and walk to the left. Tressa will take in the wares of the many vendors, taking notes as she goes. As she does the mystery woman from earlier will come up, ask to see Tressa's notebook, and then brazenly steal it. Heading back into the market to catch the thief, Tressa discovers that Ali, too, has made the trip to Grandport. After some ribbing he agrees to help Tressa track down the culprit...
... and then they immediately spot her about fifteen feet away. Head towards the Bazaar in the north to learn that the woman's name is Esmerelda. She hands the notebook off to a mystery man, and they decide to leave town - by entering the Bazaar. Bizarre. Watch a cut scene, then head up on stage to see Esmerelda and the man. Ali will distract the guy, giving Tressa a chance to pursue Esmerelda as she heads into the Grandport Sewers. Prep your team, then give chase.
Grandport Sewers
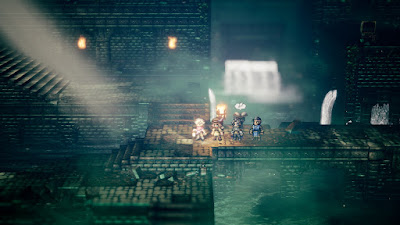
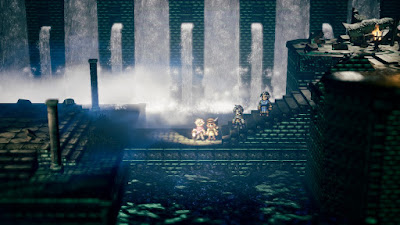
What a nasty place to end off Tressa's final chapter. The Grandport Sewers don't have a ton of enemies, but they're all fairly nasty:
- Obsidian Executive I - Weak to Polearm, Axe, Bow, and Dark. Powerful, evasive melee combatants who, mercifully, stun easily. Put them under as quickly as you can with Skills.
- Obsidian Executive II - Weak to Sword, Ice, Wind, and Light. Similar to the lesser Obsidian Executives, though even stronger - and even more prone to stunning.
- Vampire Bat - Weak to Sword, Polearm, Bow, and Ice. Can suck health out of your party members and put everyone to sleep. Wipe these things out with an area attack as quick as you can.
- Gooey Slug - Weak to Dagger and Light. Can inflict terror on your characters, and their lack of weaknesses and high HP just make them a pain to fight. All you can do is debilitate them and whittle them down.
- Black Scissors - Weak to Dagger and Light. Primarily annoying because they can poison your party in one move. Otherwise a little underwhelming as enemies go.
- Thunder Sentinel Mk.II - Weak to Sword, Polearm, Axe, Staff, and Wind. Likes Wind Skills. Can be broken in groups very easily by Tressa's Trade Tempest Skill.
- Thunder Curator Mk.II - Weak to Polearm, Bow, and Wind.
- Thunder Guardian Mk. II - Weak to Sword, Dagger, Bow, and Wind. Likes melee attacks and Lightning Skills. A bit tough to break compared to other enemies down here, but overall not a massive concern.
- Sea Aneomone - Weak to Axe, Lightning, and Dark.
- Red Blade: Target cannot use Attack
- Blue Blade: Target cannot use physical Skills (Level Slash, Cross Strike, HP Thief, things like that)
- Violet Blade: Target cannot use magical / elemental Skills (Tradewinds, Holy Light, Fire Storm, etc.)
- Black Blade: Places a timer over the target, and when the timer runs out the target dies - Can also use Black Blade Rush, which inflicts this effect on everyone in the party, with each character receiving a different timer length


