Danger Level: 50
Location: Southeast corner of the Eastern Marsalim Sands
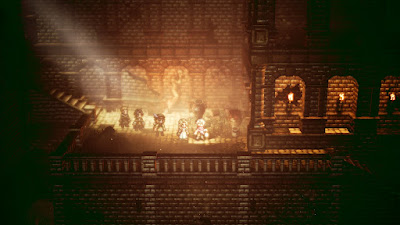
A dangerous mausoleum tucked away in the Eastern Marsalim Sands, the Marsalim Catacombs are a nice little treasure trove for adventurers. It doesn't take long to traverse, and if you want you can skip right to the boss moments after entering the dungeon. The rest of the treasures are worth grabbing too, though, so don't neglect the dungeon's side passages. You'll run into the following enemies in the Marsalim Catacombs:
- Sand Lizardking II - Weak to Sword, Bow, Ice, and Dark. Buffs itself and uses strong melee attacks. A definite threat, though mercifully not that difficult to stun.
- Sand Lizardking III - Weak to Dagger, Staff, and Lightning. Powerful melee enemy that can dish out a lot of hurt. Get these stunned fast.
- Warrior Bones - Weak to Axe, Staff, Fire, and Light. Fairly standard skeletal enemy that can hit single targets pretty hard. Nothing special.
- Brawler Bones - Weak to Axe, Staff, Fire, and Light. Decent melee enemy that is quick and easy to stun.
- Dire Skull Roller - Weak to Dagger and Lightning. Buffing melee enemy with few weaknesses that can poison your party. Not a huge deal, but annoying to bring to zero health if you don't have Lightning.
- Light Elemental - Weak to Ice and Dark. Likes Light Skills, unsurprisingly. Use elemental Skills of your own for the best results.
- Desert Worm - Weak to Polearm, Axe, Wind, and Light. Melee enemy that can drain you of health. A little overmatched by the time you can come through here, though still a threat.
Trek east from the entrance, past a save point and up to a wide set of stairs. Up the stairs you'll find a purple chest containing a Viper Dagger. Walk along the stone wall to the right of this chest and you'll find a hidden passage that will bring you to a chest. The chest contains a Revitalizing Jam.
Keep following the main path to the east. There's a large chamber ahead, and if you attempt to approach it you'll be hit by an overwhelming sense of danger, which means the boss is inside. There's still more to see in the Marsalim Catacombs, so we'll skip this fight for the moment and keep going east.
To the right of the boss chamber are two sets of stairs. Take the rightmost stairs to start. They'll guide you down three levels, and you'll find two chests along the way. One contains a Refreshing Jam, the other an Energizing Pomegranate. You can see a third chest from here, as well, though you can't get to it.
Head back up and take the stairs on your left. They'll guide you west, and at one point you'll pass three archways. Dip under the archways and check the right wall to find a secret passage. It leads to the chest you couldn't reach earlier, which contains a Calming Stone. Return to the main path and keep going west to find a dead end, where you'll also discover a chest containing a Healing Grape Bunch. There's another chest visible from here on your left, and you can reach it by heading back a bit and checking along the wall to the north. There's a hidden passage up here. The chest contains an Angel Saber.
That's all for the Marsalim Catacombs, except for one last spot: The chamber you passed earlier. Head on up and face your foe.
Lord of the Sands
Weakness: Polearm, Bow
Well that's hideous. Appearing alongside two Desert Worms, the Lord of the Sands is a pretty problematic customer if you didn't happen to bring along a Polearm or a Bow. Despite its weaknesses the giant worm is pretty resistant to physical attacks, and it'll use Gather Strength to make its own physical attacks sting quite a bit. Expect any hits that land to do around 2,500 HP of damage, depending on who's targeted. Even worse is Sandstorm, which can hit for upwards of 4,000 HP on everyone, and will probably blind any survivors. Yikes. Wipe out the Desert Worms quickly, then focus all your energies on breaking the Lord of Sands. Thousand Spears and Rain of Arrows are your best bets. If that doesn't work fast enough you can also try to brute force your way through its HP with elemental Skills, and applying poison will speed up the fight considerably. Regardless of your approach, Hired Help - Mercenary will protect your crew from its normal attacks.
Once the Lord of the Sands is dead you can enter the chamber it was protecting. At the far end, half-buried in sand, is a chest containing a Master's Spear. That's the last of the items you can find here, so feel free to teleport away and get yourself healed up.


