

Part Eight: Guldove (Another World)
NOTE: This article assumes that you chose to try and save Kid no matter what when prompted by Korcha. None of what follows happens if you decided that nothing could be done to save her. Feel free to skip to the next.
Once you decide to leave Guldove Korcha will ship the team back to the mainland on his boat, and he will join the party temporarily. From Termina you need to head all the way back south to Opassa Beach, near Arni Village. Once you arrive you'll find a green dimensional distortion, and after a bit of discussion you can use the Astral Amulet Kid gave you to activate the distortion. It will blast you out of Another World...
... and back to Home World, where Serge started the game. Fancy. So long as you have the Astral Amulet in your possession you can return to Opassa Beach and use the distortion to jump and back between worlds. There are plenty of differences between them. (Taking Leena to meet herself in Arni Village provides for a bit of comedy, if you recruited her in Another World.)
Doc said that you needed Hydra Humour to cure Kid. There's no better place to look for it than the Hydra Marshes, east of Arni Village.

Hydra Marshes
Every wanted to wade through a swamp, Serge? Now's your chance. Not nearly as bad as the Hydra Marshes in Another World, Home World's Hydra Marshes are still pretty gross. You'll run into the following monsters exploring the marsh:
- Potpourri - Green Innate. Does nothing until you hit it enough, at which point it releases a Toxic Burst that will Poison a character and cut their health in half. It then dies. You can avoid these completely if you want - just walk around them. If you must fight one in a battle with another enemy, save them until last.
- Swarmp Bug - Blue Innate. A hovering helicopter bug that favors normal attacks. Pretty easy.
- Beeba - Yellow Innate. Calls in reinforcements until there are four Beebas. Otherwise just tries to smack you around with an umbrella. Not a big deal unless they multiply too quickly.
- Daffy Dwarf - Yellow Innate. Little dwarfish warriors who apparently use barrels as clothes. Interesting. They're not a big deal.
- Daggy Dwarf - Yellow Innate. A stronger version of the Daffy Dwarf. Still isn't very strong, though Hi-Ho War Cry can get annoying. Focus on these first if you need to choose.
- Quadffid - Green Innate. Will look familiar if you recruited Nikki earlier. Uses Green Innate Elements, including its unique move Devour, to do damage. Yellow Innate all the way.
A man near the entrance will explain the Hydra Marshes to you a bit, including the weird, green tendril that will bend into a makeshift rope when you touch it. Take a right from the entrance and through the water to find a chest containing a Feather, then backtrack and go west. Serge will see something spectral wandering off along a log to the west. Go east to grab a nearby Bone, then follow the specter west.
(This bit is optional, though it does earn you a new party member. If you're not interested, go north from the first screen and ignore the specter. Be warned, though - you can never recruit this character again if you don't get her now.)

Razzly
You'll find yourself on some twisted-looking branches. Follow them north to find a chest containing a Brace Element, then go west. You'll come to an odd creature named a Beeba, who at first seems sheepish, then becomes aggressive. The singular Beeba isn't a big deal, but if left alive for too long it can call in up to three other Beebas, and fighting four of them can get a bit rough. Green Innate Elements will save the day.
Beat the Beeba and it will leave behind a Beeba Flute. You can blow it here, though it doesn't work (but doing so will earn you a funny little scene of reproach). Use the save point, then take a right in the north. You'll be back on branches. There's a Beeba wandering to the north, in front of a treasure chest, that you can challenge to a fight. Beat it and you'll find a Bushbasher Element in the chest.
Go down the northeastern branch. You'll find a wide-open space. Use the Beeba Flute in the middle of it and a Wingapede will show up. Serge will try to feed it... and it won't like that.

Wingapede
A Green Innate beastie, the Wingapede doesn't hit terribly hard but is still capable of causing trouble. It has an Acidic Gas attack that can Poison everyone in the party, and hits for a decent amount of damage to boot. It can also use Aero Saucer and Aero Blaster for some sizable Green Innate Damage. The Wingapede can also use Tornado, though there's a good chance you won't see it if you go on the offensive immediately.
This isn't a tough fight. The Wingapede uses Acidic Gas quite often, so trying to heal Poison on your party is a losing effort. Focus instead on beating the Wingapede down with Yellow Innate Elements and normal attacks. Heal as necessary, avoiding Green Elements whenever you can. Defeating the Wingapede shouldn't take too long with a focused offensive.
You'll earn 164 g and an Aero Saucer Element for defeating the Wingapede. Defeating it will also put you on the path to reaching another location, though that won't happen until much later in the game.
Backtrack, save where you fought the Beeba, and return to the wide open space. In the middle of the platform where you fought the Wingapede you'll now see a big crack. One of your party members will caution you not to step on it. Ignore them and step right on. The ground will give way, dumping you into the den of a massive Pentapus. Look in the southeast corner of the Pentapus' den and you'll see a cage with a fairy inside. Inspect it and the Pentapus will wake up, consider you a fine meal, and attack.

Pentapus
A Blue Innate monstrosity, the Pentapus makes for a nasty fight. It only has a few attacks, one of which is a normal battering from its many tentacles. Every now and then it will also use Whop, which slams one character for extra damage. Pentapus' most dangerous attack, however, is Hexahitter, which it uses every time one of your characters hit it with a Red Innate Element. Hexahitter can easily kill a character.
The solution? Don't use Red Elements, tempting though it may be. Avoid Pentapus' glaring weakness and use any other Element (besides Blue) to whittle away its health. Heal often, and use any strong Techs you have. Placing Blue Innate characters in your party will grant you some extra defense, though you may also want Red Innates (basically Greco at this point in the game) for a boost in damage.
Defeating the Pentapus will earn you 606 g and the Aqua Ball Element. You'll also earn the gratitude of Razzly, the fairy in the cage, and she'll join the party as thanks for saving her. Check behind Razzly's cage for a Recover All Element.
Back to the main path. If you saved Razzly you can drop back into the swamp from the Pentapus' lair. If not, head north from the entrance of the Hydra Marshes, grab the Cure Element on your left, and use the green tendril to advance further north. There's an Aero Saucer Element to the right of the exit from this screen.
Take a right on the next small screen and you'll find a more open patch of swamp with a nearby save point. Go south of the save point and east to find an Antidote Element in a chest, then backtrack to the save point. There are a few Dwarves over to the right; approach them and they will announce their intention to protect the Hydra to their final breath.

Dwarves
Yep, it's a line of Dwarves. All Yellow Innate, the Dwarves will, until one of them is defeated, use Hi-Ho Chorus to hit everyone in your party for a moderate amount of damage. Defeat the Dwarf coordinating the rest and the Daggy and Daffy Dwarves will use their normal attacks, the worst of which is Hi-Ho War Cry.
The solution is simple enough: Take out the Daggy and Daffy Dwarves and leave the just plain Dwarf alone. Hi-Ho Chorus is a bit painful, but you'll only be facing one occasional attack rather than constant attacks from the whole crowd of dwarves. Once the peons are out of the way their leader won't present much of a threat.
You'll earn a Star Level, 650 g, and a bunch of common items for defeating the Dwarves. Follow the chieftain as he runs off, but before you go all the way down the path check along the water to find a hidden pathway to a chest containing a Medicine Element. Save, then head back and go down the northeastern path to find your quarry, the Hydra.

Hydra
For such a simple enemy the Hydra sure is dangerous. Sticking almost exclusively to physical attacks, the Hydra will spend the fight beating the snot out of your party, typically doing around 30 points of damage per successful hit. Occasionally it will use Putrid Odor on everyone, and if it sticks your characters will be hit with Dizzy, lowering their evasion. When its health is low the Hydra will use Wave of Fear on your party to lower everyone's defense, and Spirits Up to raise its own defense. Everything it does is tailored towards making the most of physical hits.
Aside from keeping your health up - preferably above 100 points for everybody - you need to take the Hydra down with your strongest Green Innate Elements. The fact that the Hydra usually just attacks will work in your favor, as you can quickly turn the Field Effect Green and maximize the damage of each attack. That said, Green Innate characters probably shouldn't join the fight, as the Hydra does too much damage per attack. (Which means, yes, you might want to switch Razzly out if you stuck her in the party.)
You'll earn a Star Level, 740 g, and the Upheaval Element for defeating the Hydra. Inspect the Hydra's body after it's defeated for the Hydra Humour needed to revive Kid. (Razzly will note that the Hydra was pregnant, so the species will be fine, apparently.)
The Dwarves will clear out of the Hydra Marshes after the Hydra is defeated, and you'll automatically jump back to the first screen. Technically there's more to explore where you were, but there are no more items in this version of Hydra Marshes, so...

Curing Kid
Make the trek back to Opassa Beach and use the distortion again to leap to Another World. Return to Termina and Korcha's boat will be right where you left it. Use it to sail back to Guldove. You'll find Doc at Kid's bedside. Use the Hydra Humour as a key item and Doc will prepare an antidote for Kid. A lengthy cut scene follows...
... and when it's done, Kid will be back in the party... but, er, all the Elements she had in her Element Grid are gone. Korcha's sister Mel has stolen them. You can opt to do this later, but you might as well chase Mel with Korcha and Kid now. Speak to the guard out front of Chief Direa's tower to learn that Mel hasn't been this way, then head towards the Residential Tower in the east to spot her. Head over and the team will corner Mel and retrieve the Elements.
Go back to the docks, but take the long route and make a stop at Orlha's bar. It's now open, and you'll find a Dwarf inside. Keep speaking to him and he'll give you a Green Tinkler. You'll need this item for navigating the Hydra Marshes in Another World. Korcha will officially leave the party when you speak to him at the docks...
... though you'll almost immediately need him again, after an encounter with Glenn near the entrance of Termina. Trek back and he will ask... Kid... well, watch it yourself. Once the nonsense is done Korcha will lend you his boat, and he'll ask if you want him to join the party permanently. Might as well!
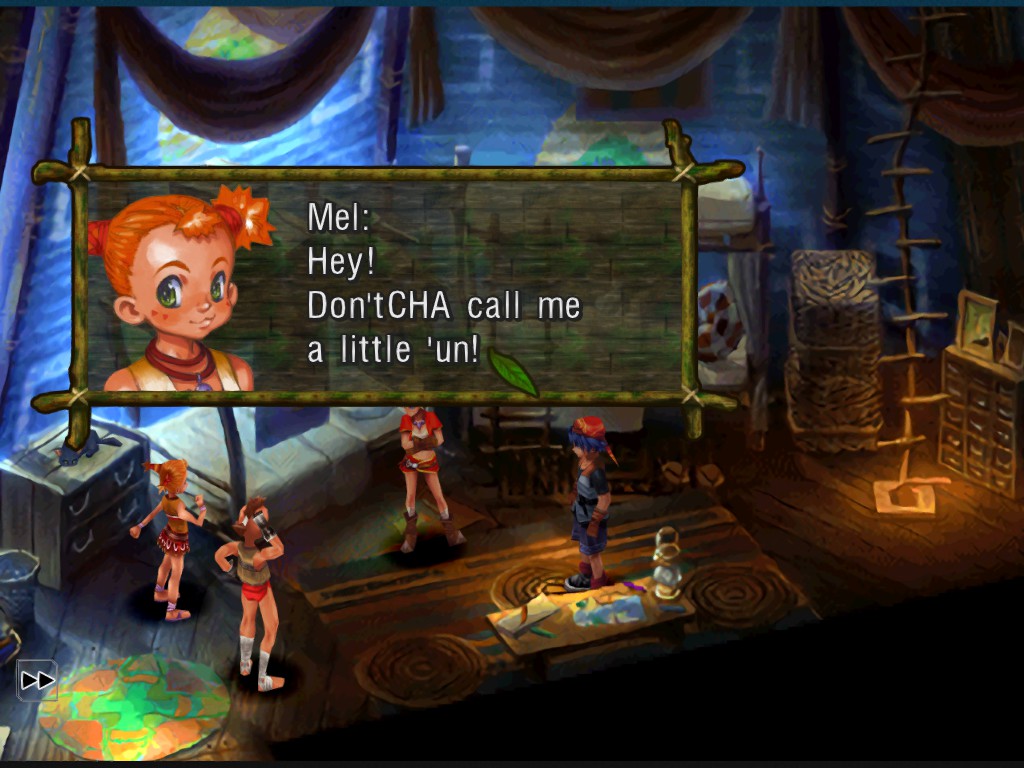
Mel
With Korcha's boat at your disposal you can now roam the seas of the El Nido Archipelago, opening up quite a few places to explore. First, though, head right back to Guldove. Speak to Mel in her room, where you left her. If Kid is in the party Mel will discuss... something... with her, and join the party. She'll even throw in the Guldovian Stitch Custom Frame as an extra bonus.