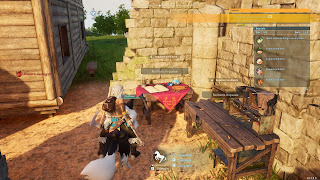
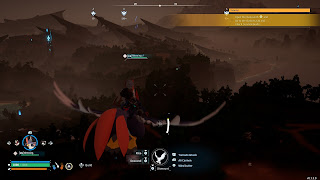
Hoofing it across the landscape is all well and good in Palworld, but the more you explore the more you'll realize that Palagos Island is huge. It would be nice to have some way to move more quickly... and, fortunately, there is. Care to ride your Pal around for a while?
This guide will teach you how to ride your Pals in Palworld. As with most things in the game, there are two components to the problem: Building up Technology levels, and finding the right Pal for the job.
Step 1: Build a Pal Gear Workbench
In order to create the gear needed to ride Pals you'll need to build a Pal Gear Workbench. This is a level 6 Technology, available for the low price of 10 Paldium Fragments, 30 Wood, and 2 Cloth. It shouldn't take too long after starting the game to unlock this Production structure, and as you attempt to level your base you'll be told to build one anyway.
Setting up the Pal Gear Workbench is the easy part, unfortunately. Now you need to find a Pal that you can ride.
Step 2: Finding Rideable Pals
Each of the Pals you catch in Palworld comes with a Partner Skill. Inspect the Party submenu of the mani menu and you'll see what each Pal can do. in some cases you'll see a prerequisite covering the Partner Skill, which generally means that you need to craft an item before you can use it. Most of the time (but not always) this means that you can use the Pal as a means of transportation, in one form or another.
Most Pals cannot be ridden. The ones that can must be caught before you'll reveal the Technology that unlocks the item for riding, which is always called a Harness. Here are some early-game examples of Pals that you can ride, assuming you started in the Windswept Hills:
- Melpaccas - Spawn near the Grassy Behemoth Hills
- Direhowls - Occasionally Raid your bases, and spawn in the Ravine Entrance area (west of the first Rayne Syndicate Tower)
- Kllamari - Appears in dungeons (used as a glider, not a normal mount)
- Eikhyrdeer Saddle - Spawns near the first Rayne Syndicate Tower
- Nitewing - Spawns near the Small Settlement (west of Grassy Behemoth Hills)
There are more examples later on in Palworld, as well, though these do for an early-game start. Get out there and catch any one of these creatures. The associated Technology will appear on the Technology menu, and you can unlock it. This allows you to create the item at a Pal Gear Workbench.
Unlike most pieces of equipment, items linked to Partner Skills are regarded as Key Items. You'll only ever need to make one, as they apply to all of your acquired Pals automatically. They also don't weigh anything, and you won't drop them if you're defeated in combat.
Step 3: Saddle Up
That's the hard part done. Now all you have to do is put the appropriate Pal in your party and get close to it. Stand still for a moment and hold down the X button / F key. After a few seconds you'll hop onto the Pal.
While mounted on the Pal you'll have access to its moves. The key prompts for using each one appear at the bottom of the screen. You can also use your own weapons, as normal, and cycle between them. You can't deploy another Pal while you're mounted, so this approach is generally not recommended for prolonged combat, such as fighting a boss. Hold down the X button / F key to dismount your Pal.
Important note! Your running Pals can move around all day, if you like, but your winged Pals are restricted by a Stamina meter. Fly even a few feet off the ground and its Stamina will slowly drain. Once the meter runs out the Pal will return swiftly to ground level. You won't take damage, but you may wind up in bad situations if you don't plan your descents properly.


