Lasgus Mountains - Enemies
- Black Balloon - 5,100 HP - Weak to Light
- Cockatrice - 7,200 HP - Weak to Fire
- Flyray - 4,000 HP - Weak to Fire
- Kobold King - 6,000 HP - Weak to Fire
- Savant - 5,550 HP
- Sorceress - 2,400 HP - Resists Fire, Wind
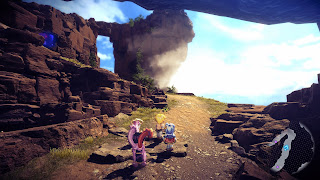
The first optional area you're likely to discover in Star Ocean The Second Story R, the Lasgus Mountains can be ignored completely if you would rather get on with the story. They're important to three quests:
- If you're trying to help exorcise the dragons off of Ashton's back, you'll need to come here to complete the quest
- If you're trying to help Ashton save Eleanor, the sick girl from Harley, you'll need an herb from this area (Rena only)
- If you're trying to help Bowman save Eleanor, you'll also need to come here (Claude only)
That said, the Lasgus Mountains serve another purpose: They are an early power-leveling area. Although the enemies should be far too powerful for Claude and Rena to defeat immediately after leaving Salva, you can win fights with a bit of trickery, quick thinking, and stunlocks on Claude's part. Your preference should be the Black Balloons, as they're largely interested in stealing MP, and aren't difficult to defeat.
The other enemies are... problematic. Some notes:
- The Cockatrices can Petrify your characters. Hit them from afar, and preferably from behind.
- The Flyrays can Paralyse your characters. Always annoying. They're also airborne, so they're harder to hit.
- The Sorceresses use the Eruption Spell, which is quite painful, but their more dangerous move is Blood Scylla, which syphons HP out of a single target. A lot of HP. Go after these Sorceresses first whenever you see them in a battle.
- The Savants and Kobold Kings are not terribly difficult enemies on their own, but they tend to appear in packs - and will try to surround you. Don't let this happen, as they're great at absolutely pummelling your characters.
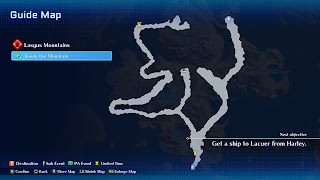
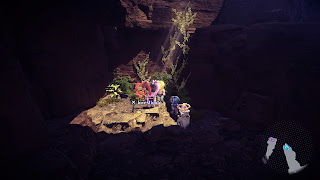
The path up the mountains splits immediately at the entrance, shortly after you pass a Save Point. If you go northeast from the split you'll come to a small cave. Inside here you'll find the Metorx needed for Ashton / Bowman's quest to save Eleanor. The herb won't spawn unless you're on the quest. Take it back to Harvely to complete the quest.
To the right of the cave containing the Meteorx is a path back to the world map, where you'll find a desert full of enemies that drop valuable crafting items. They're a bit stronger than what you've faced on the Lasgus Mountains, though if you come here around level 20 you should be fine. (Watch out for the Raid battle. It will mess you up.) If you check around the south end of the desert you'll find the Ruins in the Desert Unique Spot, which will earn you a pair of Twin Splicers+.
If you take the northwestern route from the entrance you'll climb some stairs and find another divide in the path. If you take a right you'll climb stairs up to an Enemy Leader Chain Battle. Wipe them out and you'll find a chest containing a Flare Ring+. This is a great item if you want to level on this mountain, as it negates Fire attacks.
If you take the left path you'll find a circuitous, but otherwise straightforward, trail up to the top of the Lasgus Mountains. There's a Save Point near the top which won't prove too useful unless you've made the trek as part of Ashton's quest to exorcise himself. Inspect the Monarch's Roost Unique Spot for three The Bestiaries, then approach the huge nest at the end of the trail to trigger a battle.
Zinae
HP: 116,400
Resists: Fire, Wind
That's a hefty bird. Physically the largest enemy you've encountered in the game, Zinae has a lot of health and can really bedevil your party. Zinae uses the following attacks:
- Light Cross, an AOE Light Spell
- Eruption, an AOE Fire Spell
- Crushing Charge, a rushing attack
Zinae spends ost of the fight flying slowly around the arena, either casting Spells or performing the odd Crushing Charge at a target. He takes a long time to stun with normal attacks and Special Arts alike, and can inflict a ton of damage under the right (wrong?) circumstances. Zinae also counts as a flying enemy, so your physical attackers will need to jump to hit him with normal attacks.
Your best bet here is to play as Claude and use his Headsplitter attack. This will zip you straight across the arena and slam into Zinae, distracting the bird away from your casters. Get on the opposite side of Zinae as Ashton and rip into the beast, following Zinae as he flies around. Do your best to distract Zinae away from your casters and, gradually, you'll get rid of his shields. This gives you an opportunity to rip into Zinae's health for a while before he recovers. The fight takes a while, but it's not terribly difficult, so long as you can revive defeated characters now and then.
Zinae's most dangerous attack is Eruption, and if you clump up your party members this Spell can wipe your party in an instant. Aside from keeping your party divided as much as possible, the solution to this is to equip the Flare Ring+ you (hopefully) picked up earlier on your most important party member. They will be immune to Eruption, making the battle that much easier.
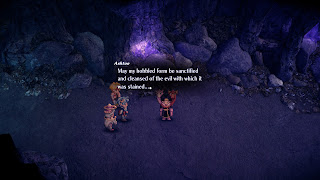
You'll receive a Lunar Talisman and / or a Lunar Charm for defeating Zinae. You'll also receive the King's Tears needed for the exorcism ceremony, which needs to take place back in The Dragon's Lair section of the Salva Mines, where you first recruited Ashton. (The Deep Lair Fast Travel point will zip you right there.) The end result of this shouldn't be too surprising, and your team's relationship with Ashton will grow.


