Mountain Palace - Enemies
- Archer - 3,000 HP - Weak to Wind
- Fudd - 4,950 HP - Weak to Light
- Hound - 4,440 HP - Weak to Fire
- Petri Gerel - 3,900 HP - Weak to Earth
- Sandglass - 7,200 HP - Weak to Fire
- Slime Pool - 8,000 HP - Resists Water, Earth
- Thieving Scum - 100 HP
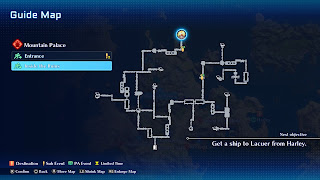
A crumbling - yet still intimidating - structure on the Lacuer Continent, the Mountain Palace is an optional dungeon. It's located on the huge mountain range between Krosse City and Kurik, more on the Kurik side, and accessible by a winding path that branches off of the road to Kurik. Once you find a circular lake near the top, you'll know you're next to the Mountain Palace. (I recommend using the Bunny Call Super Specialty, as walking here normally takes a while.)
A guard stands watch over the entrance, barring your passage inside the dungeon. There are only two situations in which you can gain entrance to the Mountain Palace:
- You're trying to help Ashton exorcise the dragons attached to his back. You'll need to visit the Elder's Home in Marze first, and inspect the bookcases in his bedroom, before you can ask permission to enter the Mountain Palace. Look for the 'On Exorcism' entry, which only appears if Ashton is in the party. (No Private Actions, in other words.)
- You're trying to find Opera. To do this you'll need to have not recruited Ashton. You'll also need to complete the Lacuer Armory Content. Head to Hilton and check the Bar to trigger a cut scene with Opera. Follow her back to the Lacuer Continent.
Once you gain the king's permission the guard will step aside. If you speak to him again he'll allow you a free rest, just like an Inn, and there's a Save Point right next to him. He'll also warn you of Petrification and Paralysis, some sage advice when facing the monsters ahead. Some notes about what you'll battle:
- The Petri Gerels will Petrify your characters, true to their name. Try to approach them with Special Arts or Spells rather than just hacking away at them willy-nilly. They can replicate themselves, so try to eliminate Petri Gerels first, before their numbers explode.
- Slime Pools will Paralyze your characters. This is less problematic than Petrification, since Paralysis wears off on its own, but you'll still want to heal the problem with items if you can. Again, use ranged attacks, or try to catch them in a combo that they can't escape.
- Fudds can Poison your characters. They're the least problematic of the enemies, though sometimes you'll run into big crowds of them where you'll want to watch your back.
The Mountain Palace splits off in two directions at the entrance, and although the paths do link up at one point they are, generally speaking, their own entities. We'll look at the paths individually.
Eastern Path (Opera)
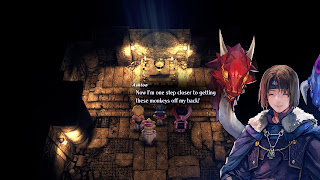
If you head east from the entrance you'll be sent north. Assuming you're here looking for Opera, you'll run into her shortly after embarking down this route. She's searching for her buddy Ernest, and decides to tag along with the party. Opera is a long-ranged attacker, so long as you keep her stocked up with MP, and works quite nicely as support for Claude. Don't forget to allocate her SP and BP before you set out. You'll receive the Fiery and Fixated Aristocrat Achievement for recruiting Opera.
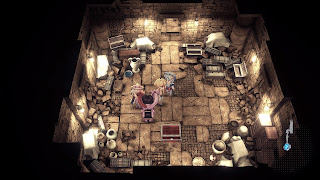
Continue north. A path on your left will try to shuttle you to the western half of the Mountain Palace, so ignore it if you wish to continue down this route. (Though if you dip west a bit and check to the north you'll find a room containing four Resurrection Elixirs. Worth the trip.) About halfway along the northbound path you'll see a southbound route, and you'll find a treasure room at the end. The chest inside contains a Faerie Elixir.
Just past the treasure room the route will split in two directions:
- If you go east you'll come to a long, thin room with doors on either end. Both take you to enemy battles (the tougher one is to the south, where you'll find an Enemy Leader) and treasure rooms. The chests in the northern room contain an X Clip Kit and Silver Greaves, while the chest in the southern room contains a Foot Insignia+. The Foot Insignia+ is a great accessory for your frontline fighters.
- If you go north you'll continue along the main path.
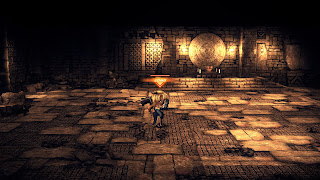
Heading north will take you to a Save Point. Continue past here and you'll get into a tough boss battle.
HP: 19,200
Weakness: Water
Resists: Fire
Phew. Nasty battle. East of the boss room the path splits again, and you'll see a route leading north. This leads to a room guarded by an Enemy Leader fight, and clearing the enemy out will allow you to open a chest containing Fruit Syrup.
Carry on east after you head back south. The remaining corridors will, after several twists and turns, bring you to what appears to be a living area. At the end of the path you'll find a room with a chest containing a Warrior Idol, as well as the A Strange Laboratory Unique Spot. Inspect it to receive three Hermetic Philosophies.
If you have Opera in your party you'll trigger some cut scenes in these rooms. It appears that Ernest isn't here. Opera's search continues - though she'll stick with the party for the foreseeable future.
Western Path (Ashton)
If you head west from the entrance you'll soon be swept north, where you'll hit a four-way intersection with a chest. The chest contains a Ring of Healing, an excellent restorative item, though grabbing it will summon two monsters to bar your path forward. The three doors lead in the following directions:
- If you go east you'll link back up with the eastern path. This also leads to the room with the four Resurrection Elixirs, noted above.
- If you go west you'll wind up being swept gradually north. Keep your eye on your left as you walk and you'll find a side path leading to a treasure room. The chests down here contain three Hot Syrups and 2,000 FOL. This eventually links up with the northbound path from this room.
- If you go north you'll find a quicker route to another linkage with the eastern section of the dungeon, though you'll skip the treasure found in the west.


