Welcome to Star Ocean The Second Story R! An action jrpg set in a semi-3D world, the second iteration of Star Ocean starts off under calm or dire circumstances. You can't tell which it will be right off the bat, as the first thing you need to do is choose your main character, and your choice dictates how the story flows.
Character Selection
You're given two characters to choose from when you begin a new game of Star Ocean The Second Story R: Claude C. Kenny, a cadet in the Terran Alliance, or Rena Lanford, a young woman living in a backwater village. Most of the game will play out the same regardless of which you choose, though there are some differences:
- Claude is a close-range swordsman, and he'll have an easier time with the first section of the game. His introduction is also a little longer than Rena's. If you choose Claude you'll permanently recruit a pint-sized spellcaster named Leon about halfway through. You'll also get the opportunity to steal useful items from an area that Rena will never see.
- Rena is a martial artist with healing abilities. She can fight close up, though most of the time you'll likely have her heal your other characters from the back row. If you choose Rena you'll permanently recruit a powerful swordsman named Dias about halfway through. She also has access to some mid-game clues earlier than Claude.
There is no 'wrong' choice here, and given how you can only recruit half of the party members in any one playthrough you'll likely wind up going through Star Ocean The Second Story R twice.
Once you've chosen your character you'll be given a few more options. Most are aesthetic in nature, though you'll want to choose your Difficulty with care. If you've never played an action RPG before, then you may want Earth; otherwise, Galaxy is a good balance of challenge and leniancy. Only choose Universe if you're a Star Ocean veteran. Note that you can change the difficulty at any time via the Settings menu.
What happens at the beginning varies between the two characters:
- If you begin the game as Claude you'll start off on the Calnus, a spaceship on a mission to a remote planet called Milokeenia. You'll receive the Phase Gun Special Art, and then you'll have to explore the outside of a huge dome. Check the panel on the right side of the dome's front door to get it open, then approach the sparking capsule in the north.
- If you start off as Rena you'll begin in Arlia, her home, and you can look around a bit, though ultimately you'll need to head south.
From this point on you'll periodically receive Achievements for completing tasks in the game. If you're playing as Claude you'll receive Visitor from Afar, and if you're playing as Rena you'll receive A Fateful Encounter.
Sacred Forest - Combat Tutorial
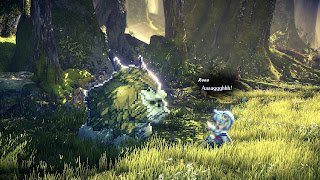
Upon returning to the Sacred Forest you'll discover that it is infested with monsters, and you can now battle them. Unlike the original Star Ocean: The Second Story, which forced you into battles randomly, the remake has the monsters roaming the map. You can avoid them or charge head-on into danger as you see fit. This gives you your first taste of combat in Star Ocean The Second Story R.
Your goal in any battle is straightforward: Defeat the enemy and avoid defeat yourself. Your characters all have Hit Points (HP) and Magic Points (MP). HP displays a character's life energy, while MP is used for spellcasting and combat moves. If a character's HP is depleted they will be knocked out, and you'll need to use a Spell or an item to bring them back. If your whole party gets knocked out you'll get a Game Over.
At first blush combat is pretty simple. You have complete control over your lead character, and you rush up to enemy characters and smack them (controls vary). The range of your weapon varies from character to character. Once he gets a sword Claude will have a medium range, for example, while Rena always has a short range with her fists.
Your active character targets the closest enemy automatically, and any moves you make will center around the targeted enemy. You can change this in the menu, allowing you to move your character around more freely without focusing on one enemy. This will make it a bit harder to land hits, however, as targeting a foe will cause your character to zip in on it whenever you hit the attack button.
Each enemy has a row of shields above their heads. This represents their defenses, and when you fully deplete their shields - usually through the use of a particularly powerful attack - they will be stunned for a short while. All hits are critical during this time, and completely ignore enemy defenses. Stunning enemies will make battles much easier.
In addition to normal attacks you have several more advanced options:
- Before even entering combat, you can get the jump on enemies by approaching them from the rear while on the map. This will trigger an ambush that stuns the foes for a short while. Note that getting caught from behind by monsters gives them the advantage instead.
- Using either menu or the bumper buttons on your controller (varies for PC) you can use Special Arts (combat attacks) or Spells on enemies, or to restore your own party members. Your characters will learn more abilities as they advance in level, and their abilities get more powerful with use. You can view your abilities in the menu, and choose which moves correspond to which buttons on your controller / keyboard, for quick use. Note that characters like Rena can use their Spells outside battle, to heal other party members.
- Enemies will flash red for a moment before unleashing an attack. If you hit the proper button (varies between systems) before the attack goes off your character will zip behind the enemy, avoid the attack, and perform a counterattack. The timing for a counterattack varies from enemy to enemy, as some attack much more quickly than others.
- During combat you can use items via the menu (button to open it varies). Items can affect your party or the enemy. Whenever your character uses an item they will undergo a short cooldown, during which time they can't use another item.
- As you head east towards the forest's largest clearing, where Claude and Rena first meet, you'll see a little side path leading north. At the end is a chest containing Fruit Syrup.
- If you check the east side of the huge clearing you'll find a small side area with another chest. This one contains 300 FOL (the game's currency).


