Part 31: Riddle of the Sands
Main Walkthrough
Drake's Fang - Enemies
- Black Mastiff
- Orcish Fodder
- Orcish Mesmerizer
After several introductory cut scenes - and an important character introduction - you'll be set loose in the mines of Drake's Fang. Creep inside and it won't be long before Clive is interrupted by some Orcish Fodder. Despite their fearsome looks these guys are truly fodder, and shouldn't give you any trouble.
Supplies clog the middle of this chamber, though there's a gap beneath a box on your left that Clive can use to proceed. Beyond you'll run into more orcs, as well as Black Mastiffs. They're typical doggish foes, so no big deal. Across the room is a gate, with a lever on its right to open the way forward.
You'll find three pinches of Magicked Ash in the next chamber, and grabbing it will alert more orcs. Here you'll face down three Orcish Mesmerizers, the magic users of the orcs. They used ranged single-target and AOE attacks, and won't be much of a hassle without melee support. Check the left side of their room, from the way you came in, to find a side chamber. Inside it is a chest containing ten spools of Steelsilk, ten Bloody Hides, and ten pinches of Magicked Ash. In the room on the opposite side of the combat chamber you'll find a Potion.
Check the doors in the center of the chamber where you fought the Orcish Mesmerizers and you'll find a gap. Slip through and you'll find a wide, seemingly-empty area... though as you walk up the slope you'll attract attention from three waves of orcs. It's a basic battle, though at one point a Mesmerizer will pop up on an elevated surface. They are small enough enemies that you can use Deadly Embrace to pull him down and finish him off.
Follow the tracks on the right side of the room up the slope to find a closed door. Use the lever to open it up, revealing another wide chamber. Check beside some barrels to your left as you enter to find a chest containing The Favor of Lightning (Lightning Rod), and snag the Potion across the room. The door out of the mines is on your right.
Climb the stairs ahead, taking out the orcs on the first landing and grabbing the two Sharp Fangs on the second landing. Go through the door you find to run into more sizable trouble.
Orcish Warlord
A teleporting fiend who moves around more quickly than you might suspect, the Orcish Warlord is your first major test in Drake's Fang. He uses the following attacks:
- A swing of his greatstaff
- An overhead slam of his greatstaff
- A series of magical homing bolts
- A cluster of red bolts that appear around Clive and swirl in on him after a few seconds
- An AOE explosion centered around the warlord
- A series of landmines that appear under Clive's feet as he runs
This fight isn't a huge deal. The Orcish Warlord moves around by teleporting, and will either appear at a distance and try to blast Clive with magic or appear in his phase and try for a greatstaff attack. Neither approach is terribly difficult to avoid, at least at first, though things get trickier after you Stagger the Orcish Warlord, prompting him to use his homing attacks more often. You'll often find yourself avoiding magic and sliding straight in front of the greatstaff.
It is possible to Parry the Orcish Warlord - and is pretty easy if you use Limit Breaks - but for the most part you should just dance away from his melee slams and use the opportunity to smack at his side. Use shorter Eikonic Abilities for chipping away at the warlord's Stagger bar, saving the longer-winded moves for when he's stunned and can't interrupt your attacks. The only time you really need to get away from the warlord is when he's charging up for his wide AOE attack, and the rest of the time you can stay beside or behind him.
You'll receive Meteorites for defeating the Orcish Warlord. Check behind his body after the battle and you'll find a huge gate, as well as a lever to open it up. Beyond you'll find Kupka's palace, and on the runup to the front door you'll find three chunks of Wyrrite, a High Potion, and a Potion. At the end of this straight walk is a gate, and beyond...
Undertaker
A hulking beast of a figure that looks similar to previous enemies, the Undertaker is nevertheless an enemy of its own. You'll need some careful timing - not too slow, not too fast - to avoid this massive hulk's fists. The Undertaker uses the following attacks:
- A charging shoulder tackle
- A backhand swing, if Clive is behind the Undertaker
- A slow, magically-charged AOE punch
- A stomp that generates a shockwave which Clive needs to jump to avoid
- Spirits Within, a horizontal beam that travels from right to left
- Exhume, an arena-wide attack that stuns Clive for a moment, then begins creating magical landmines
The first phase of this battle requires careful dodging from the front and side. The Undertaker moves from slow to quick in the blink of an eye, and can cross great distances with its charge attack. Stay close when possible and pick away at it, watching its stance. The move you really need to watch out for is the AOE fist slam, as you only get a second to move away before the punch hits the ground. Try to stay on the Undertaker's left side (your right), as that will negate the threat of Spirits Within entirely.
In the second phase the Undertaker will begin using Exhume, which complicates matters. Avoiding the first magical landmine is no big deal - but they will keep appearing and going off for a little while, and the Undertaker will segue into another attack before they're done. Keep dodging to the side and forget about your own attacks until there are no more explosions. Other than Exhume, the fight stays more or less the same as before.
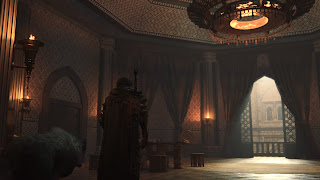
You'll receive The Favor of Lightning (Thunderstorm), Sharp Fangs, and Magicked Ash for defeating the Undertaker. Once you regain control you'll be inside Castle Dazbog, Kupka's personal stronghold.

Castle Dazbog - Enemies
- Lich
- Revenant
- Specter
- Wraith
You'll start off in a spacious foyer. There's a Potion dead ahead, and if you check behind the pillars on your right you'll find a chest containing 100 gil and ten Sharp Fangs. Head up the grand staircase to find a High Potion. Wraiths will appear if you climb to the upper level, so be ready to fight.
Check the side walkways on the upper level to find some Steelsilk and a chest containing 1,600 gil, each on one side of the chamber. Approach the central door at the end of the foyer and a squad of Revenants will appear and attack. Head through the doors to find another group of Wraiths, accompanied by a Specter that casts Bravery. Take out the Specter first to nullify their strength advantage. Reinforcements will show up after the first group is annihilated.
Take a right while facing the throne at the end of the hall and go through the door you spot. There are stairs on the other side, and you'll find two Potions as you climb. At the top is a wide hallway, and you'll be attacked by a Lich and several Revenants. Wipe out the Revenants with an AOE attack so they won't get in the way of your duel with the Lich. This hallway can prove annoying if you're backed up against a wall when the Lich uses Thresh, so mind your orientation and try to stay in the middle of the floor.
The exit door is on the right side of the hall from the entrance, and it'll take you to Kupka's bedroom. Check beside his bed for a chest containing The Favor of Earth (Upheaval), and the side table for three chunks of Wyrrite. The door on the left of the bedroom leads to stairs, and going down them wil bring you to two Potions and another double door.
Beyond the double door you'll find the path to Kupka's Inner Sanctum. There's enough room for a battle, and so a battle you'll receive, against a horde of Wraiths, Revenants, and Specters. Their sheer numbers make this a great time to use AOE attacks, particularly larger ones like Flames of Rebirth. Wipe out two waves of them, then proceed to the final building. The battle that follows is not at all surprising.
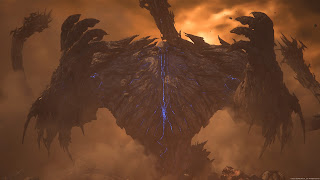
Titan
Whoa. He's big. And slow, fortunately, but... very, very big. Titan uses the following attacks:
- A leaping, overhead ground slam
- A double foot stomp that will stop Ifrit in his tracks if it hits
- Hurled rocks from a great distance that you can destroy with fire blasts
- Geocrusher, a leaping slam that generates an AOE outcropping of crystals
- Voice of the Land, an arena attack that stuns Ifrit and generates landmine magic blasts beneath and around Ifrit
During the first phase of this battle Titan will attempt to close on Ifrit, using his far superior range to crush you with punches and stomps. Use either Wildfire (Circle button) or normal dodging to slip beetween Titan's legs and batter him before he can recover and launch another assault. Dodging away and then using Heat Rush (Square and X) to zip up to his leg is a viable strategy as well. You can see Titan's attacks coming from a mile away, so either approach will keep you safe.
Stagger Titan and he'll add a few new attacks to his repertoire:
- Titan retreats to a safe spot and hurls flurries of rocks at Ifrit
- Stone's Throw, a massive rock hurled slowly towards Ifrit
- A swift shoulder charge
- A kick that turns into a stomp
- Earthshaker, which creates huge lines of crystals across the battlefield
- Stripmine, which hurls a line of five boulders at Ifrit
After you've dodged a number of smaller rocks Titan will chuck a continent-sized boulder at you via Stone's Throw. To destroy this one you'll need to use Brimstone, a new move charged by holding down the R2 and Square buttons. Do this immediately to fend off Stone's Throw. Beyond that, the fight is more or less the same - just expect Titan to zip away from you more often than before. Launch projectiles at him as you approach to get some extra hits, and to destroy any incoming rocks.
Do enough damage and you'll be pulled into two Cinematic actions. Complete them, and...
Titan Lost
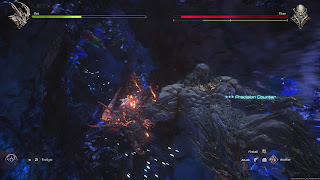
This fight is simpler than it looks, but ridiculous. (In a good way.) During the first phase you need to avoid plain-coloured rocks jutting out of the ground and shoot down any flying rocks encrusted with blue gemstones. Eventually you'll see rocks with blue gemstones sprouting in your way, and your best bet is to just try and avoid them.
After some intense sliding you'll get up and close with Titan's fists. Watch for amber colouration along the ground and get out of the way, then rush in and attack Titan's knuckles and arms. Jump to avoid shockwaves, and dodge to avoid lines of blue crystals and Titan's claw swipes. Wildfire will get you over to Titan's arm quickly so you can deliver punches before it moves away again.
Stagger Titan and you'll face a few new attacks, all of which involving flying stones. If you're facing Stone's Throw then use Brimstone to get rid of the incoming projectile. Otherwise, just dodge to the side and keep firing projectiles. Use Backdraft (three taps of the Square button, ended with the triangle button) to maximize your damage whenever possible.
Stagger Titan again and he'll use Stone's Throw a bit more often. He'll also double up on his claw attacks with a backhand, and you'll see shockwaves more often. Stagger Titan yet again and, after some Cinematic actions, you'll be sent flying into the sky, and you'll have to use projectiles and manual aiming to knock rocks out of your path. Once you get close enough to Titan's giant whip-like appendage, open fire on it until its health runs out. A few more Cinematic actions will finish him off.
... or not.
Titan
Geez, Hugo doesn't know when to quit. The final battle against Titan is a long fall through the earth, and he'll use punches and projectiles in a last-ditch attempt to take Ifrit down. Your strategy in the first phase is simple: Whenever you see something glow yellow, get ready to dodge. All of Titan's attacks glow, and paying attention to the colour will make avoiding them rather easy. Fire projectiles when Titan's at a distance and use punches up close to whittle his health down. Keep in mind that you can still perform Backdraft in the air, and it will demolish Titan's HP.
After he's been Staggered Titan will begin using some of his named attacks from earlier. The only one you shouldn't dodge normally is Stone's Throw, which is best avoided via a well-timed Brimstone. Earthshaker depends on the walls, so simply move towards the wall Titan isn't touching. Get Titan's health down far enough and you'll trigger a series of intense - but simple - Cinematic actions, and completing them will earn you the win. Finally.
You'll receive Earthen Fury and Wyrrite for defeating Titan. Many cut scenes will follow, unsurprisingly, and you'll have to send Clive home to the Hideaway to complete the quest.
Part 33: Out of the Shadow, Letting off Steam
Main Walkthrough

