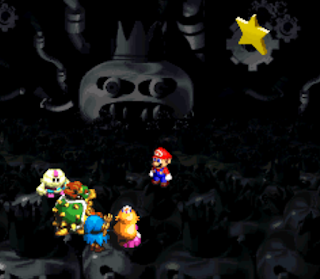
Part 15: Bowser's Keep
Main Walkthrough
At last, you've reached the end of the road. Smithy's Factory, the final dungeon of Super Mario RPG, is a two-part affair, packed with dangerous enemies and even more dangerous bosses. There is no relief to be had for the majority of the dungeon, so make sure your inventory is loaded down with restorative items before you step inside.
You can return to the world map via the springboard at the beginning of Gate, the first area of Smithy's Factory. You do not need to go all the way through Bowser's Keep again to access Gate a second time.
Gate
Enemies
- Ameboid - 220 HP - Weak to Fire
- Doppel - 333 HP
- Glum Reaper - 180 HP - Weak to Pure Water
- Hippopo - 400 HP - Weak to Lightning
- Jabit - 150 HP - Weak to Lightning
- Li'l Boo - 66 HP - Weak to Pure Water
- Machine Made Enemies
- Axem Black - 120 HP - Weak to Lightning
- Axem Green - 80 HP - Weak to Ice
- Axem Pink - 100 HP - Weak to Fire
- Axem Red - 180 HP - Weak to Ice
- Axem Yellow - 200 HP - Weak to Jump
- Bowyer - 1,000 HP
- Drill Bit - 180 HP
- Mack - 300 HP - Weak to Thunder
- Shyster - 100 HP
- Yaridovich - 800 HP
- Mad Mallet - 200 HP - Weak to Lightning
- Ninja - 235 HP
- Pounder - 180 HP - Weak to Lightning
- Poundette - 150 HP - Weak to Lightning
- Springer - 122 HP
- Puppox - 300 HP - Weak to Fire
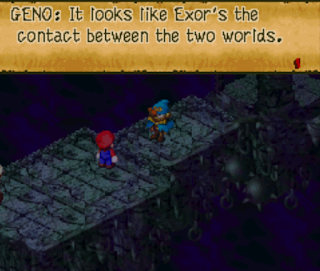
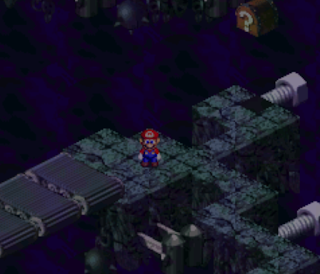
After a quick chat with Geno and Bowser you'll be free to explore. Follow the main path and you'll come to a pair of hex nuts threaded onto a track. Step onto the nuts and hop. This will whirl them a little ways northeast. Keep doing this until you clear the gap in the path. Be careful not to fall or you'll have to start over. There's a save block dead ahead.
The next area features more hex nut hopping, and the path will split after the first track. You can use either hex nut to advance, though it seems a bit easier to avoid enemies if you take the lower path. The exit is in the east of this area. It will bring you to a room with a horde of hopping Ameboids. Avoid or fight them, then hit the button in the north to open a path.
The path leads to a save block. Check the open air to the left of the save block and you'll find a hidden chest containing a full heal. This is the last hidden block in the game, so, congratulations if you got them all.
Beyond the save point you'll find a springboard and a chest. Check the chest to receive the Ultra Hammer. Unless you picked up the Lazy Shell the Ultra Hammer is as good as weapons get for Mario, so, enjoy. Use the springboard to propel Mario upon onto the nearby hex nut track, then use the hex nut to slowly make your way northeast. You'll need to jump to another hex nut before you're in the clear. The springboard at the end will take you to the first major enemy in Smithy's Factory.
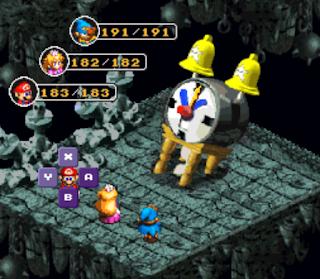
Count Down
HP:
- 2,400 (Count Down)
- 1,200 (Ding-A-Lings)
Weakness:
- Jump, Lightning (Count Down)
- Lightning (Ding-A-Lings)
A trio of enemies who look like one big baddie at first, Count Down and the Ding-A-Lings have a bit of a schtick, but... on the whole they're not a big deal. Count Down and the Ding-A-Lings use the following attacks:
- Crystal, a single-target Ice attack (Count Down, 1:00)
- Ice Rock, a strong single-target Ice attack (Count Down, 1:00)
- Recover, a restorative spell (Count Down, 3:00)
- Aurora Flash, an attack against the entire party that can trigger Sleep (Count Down, 5:00)
- Mega Recover, restorative spells (Count Down, 6:00)
- Water Blast, an attack against the entire party (Count Down, 7:00)
- Take a Break, which does... nothing (Count Down, 9:00)
- Petal Blast, an attack against the entire party that can Mushroomize characters (Count Down, 10:00)
- Corona, a strong attack against the entire party (Count Down, 12:00)
- A melee attack (Ding-A-Lings)
- Dark Star, a strong single-target magic attack (Ding-A-Lings)
- S'crow Bell, a single-target attack that can make a character into a Scarecrow (Ding-A-Lings)
- Doom Roulette, a single-target attack that can inflict Mute (Ding-A-Lings)
- Fear Roulette, a single-target attack that can inflict Fear (Ding-A-Lings)
- Spore Chimes, a single-target attack that can Mushroomize a character (Ding-A-Lings)
This is one of the most predictable battles in Super Mario RPG. As the battle advances the hands on Count Down's face will change time, and when they do it will use a preset move. Which move it uses at which times are listed above. Every move is painful, but at least you know what's coming. The Ding-A-Lings are a little more random, and will typically knock you around with status ailments.
Getting hit by three enemies at once is a little much, so you can either focus all of your early attacks on wiping out Count Down (Mario and Mallow are great at decimating the clock's HP) or try to take out one of the Ding-A-Lings in the first two or three turns. Perhaps the most damaging move in the battle is Dark Star, which both Ding-A-Lings can use, so if you're worried about losing lots of health they may be an ideal first target. The battle gets progressively more manageable from there.
You'll reveal another save block after defeating Count Down and the Ding-A-Lings. Follow the main path northeast and you'll start running into conveyor belts, and they just happen to be conveying some familiar faces. In the next section you'll start running into 'Machine Made' enemies, and they're all bosses that you fought previously in the game. Machine Made foes fight more or less the same as before, and given how far you've come aren't that difficult to defeat.
Your first encounter is with a line of Axem Reds. If you jump onto the upper conveyor that they land on you can get at a chest that will fully restore your health. Beyond here are platforms that will carry you across a chasm, though your first move should be to jump into said chasm. It will carry you down to two rooms with a springboard, as well as chests. The chests contain another full heal and a Flower. Use the springboard to get back up to the main path.
Hop onto the small platform past the Axem Red conveyor belts and use it to hover across the chasm, swicthing platforms halfway. In the next area you'll find three more conveyor belts, and arrows raining down from above will constantly attempt to stymie your progress. If you don't want to get stunned constantly by the arrows - and forced to fight enemies - you'll need to run through this area.
Next up is a string of conveyor belts that will try to force you into the chasms surrounding the platforms. Fall and you'll have to start over. The conveyors are too strong to walk on, so you'll need to run your way northeast until you're back on solid ground. At the other end, past a few Boos, you'll find a chest containing Royal Syrup. Beyond the chest are more conveyors, and you'll need to hop onto a platform at the other end of the conveyors to advance. Try to wedge yourself against the top of the platform before you attempt to jump on.
Once you're past the conveyor jumping you'll find a chest containing a Max Mushroom, a little ways to the northwest of an intersection. Northeast of here is an exit to another area, where you'll find conveyors that act as stairs. Rush up them and you can (hopefully) avoid getting a Bowyer dropped on your head. Past the conveyors are narrow paths guarded by Axem Rangers, and while you can jump over them and avoid battles, it is quite difficult.
Another Bowyer conveyor gauntlet waits beyond the Axem Rangers. Get to the top and you'll find a small room with a save block. In the next area past the save block room you'll find an endless chain of Yaridoviches dropping onto a block. Check in the north of this room for a side room containing two chests - full heal and Flower - then head back and defeat a Yaridovich. This will get rid of the block they were landing on, allowing you to drop to the next boss battle.
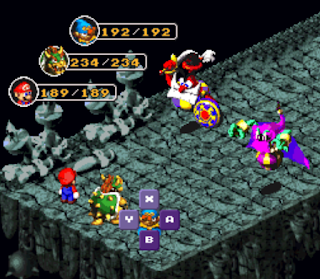
Cloaker and Domino
HP:
- 1,200 (Cloaker)
- 900 (Domino)
- 2,500 (Earth Link)
- 1,500 (Mad Adder)
The final guardians of the Gate section of Smithy's Factory, Cloaker and Domino are a respectable threat - and thanks to a giant, snakeish friend, they can prove rather nasty. Cloaker, Domino, and their serpentine buddy fulfill the following roles in combat:
- Cloaker is a physical attacker, and aside from slicing you up can use Boulder Toss. Nothing crazy, though he has high defenses, making him difficult to beat without Special Moves.
- Domino is a spellcaster, and his repertoire opens up quite a bit if you leave him for second. Expect a lot of elemental attacks, as well as Endobubble, which can inflict Fear on one of your characters. Domino has poor defences and will crumble easily to normal attacks.
- Earth Link, Cloaker's snake counterpart, will focus on inflicting Poison on your characters, as well as lots of damage with Carni-Kiss.
- Mad Adder, Domino's snake counterpart, with use a variety of full-team attacks like Water Blast, Boulder, and Sand Storm.
When the battle begins you'll be facing Cloaker and Domino is stronger-than-average-but-still-fairly-average individual enemies. When you defeat one of them the other will retreat to the huge, robotic snake in the rear of the battle arena, occupying a spot in its cranium. Defeat both enemies to end the battle.
If you want to end this battle quickly you'll want to take out Cloaker first. True, he has more health, but Domino and Mad Adder are a bit lower on the HP side. On the flip side, Domino and Mad Adder have a greater range of attacks and hit a bit harder, so you may want to put up with the longer, more predictable fight against Cloaker and Earth Link. It's your call. (I personally find Cloaker and Earth Link a bit easier to defeat.)
Take out Domino and Cloaker and you'll wind up beside a springboard. Northwest of it is the entrance to the final, final area of the game.
Factory
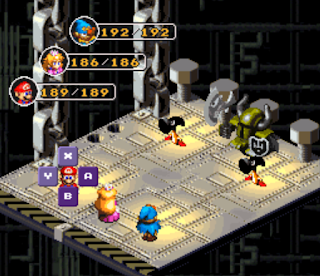
This is it, the last stretch. As you make your way through the assembly floor of Smithy's Factory - which is more or less a straight path - you'll run into a few mandatory battles, none of which are especially difficult, against the following unique enemies:
- Clerk (500 HP)
- Manager (800 HP)
- Director (1,000 HP)
These battles feature a variety of hammer-shaped cronies that help the Clerk, Manager, and Director. The lesser mooks will keep respawning, so you'll need to focus on defeating the, uh, 'upper management' enemies if you want to end the battles.
Once you defeat the Clerk you'll run into Toad, who will serve as the game's final Item Shop. If you need anything else - Max Mushrooms, Mape Syrups, and Pick Me Ups, most likely - Toad is the man for you. He'll also give you a Rocky Candy after your first time in his store. Keep following the path past Toad and you'll eventually wind up at the final save block, which is a sign of what's coming.
Gunyolk and Factory Chief
HP:
- 1,500 (Gunyolk)
- 1,000 (Factory Chief)
Weakness: Lightning, Ice (Gunyolk)
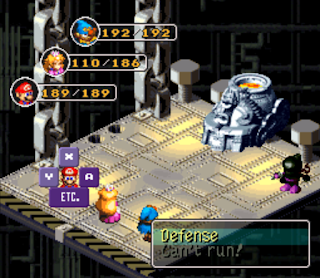
The final line of defense for Smithy, Gunyolk and its Factory Chief operator are... well, they're just kinda there, honestly. Not a big deal. Gunyolk and the Factory Chief use the following attacks:
- Breaker Beam, a strong magic attack against the entire party (Gunyolk)
- Mega Drain, a single-target magic attack (Gunyolk)
- Electroshock, a single-target Lightning attack (Gunyolk)
- Echofinder, which can inflict Mute on a single target (Gunyolk)
- A melee attack (Factory Chief)
- A shuriken throw (Factory Chief)
- Thornet, which can Poison a target (Factory Chief)
- Funguspike, which can Mushroomize a target (Factory Chief)
Surprisingly enough the Factory Chief is the deadlier adversary here, as he can chuck a shuriken and do tons of damage to one target. Take him out first. Gunyolk's Breaker Beam is also quite painful, so use Toadstool's Group Hug to keep the party above 100 HP as much as you can. Mallow is great at trashing Gunyolk with Shocker. On the whole, not a complicated boss.
Take out Gunyolk and you'll reach the end of the road. There's a single, ominous button left ahead, and when you jump on it you'll be headed to the final battles of the game. If you have anything else you want to do before you fight the big bad, now's the time to backtrack and do it. If not... heal up, save, and hop on that button.
Smithy, Round One
HP:
- 2,000 (Smithy)
- 1,500 (Smelter)
- 400 (Shyper)
Weakness: Lightning (Smelter)
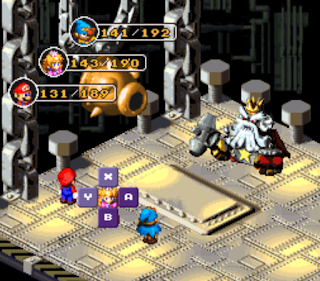
An angry-looking monarch with a truly majestic beard, Smithy doesn't mess around. Wielding a huge hammer and accompanied by his final few cronies, Smithy will force you to give it your all if you want to win. Smithy uses the following attacks:
- Melee hits
- Sledge, a crushing physical attack that hits the whole party (Smithy)
- Mega Drain, a single-target magic attack (Smithy)
- Meteor Swarm, a strong magic attack against your whole party (Smithy)
- Sword Rain, an attack against your whole party (Shypers)
Smithy doesn't have that many moves, though they tend to hurt quite a bit. More troublesome here is the Smelter over Smithy's head, which will occasionally spit out hot metal for Smithy to shape into Shypers. The Shypers will keep coming forever so long as the Smelter is active.
First thing's first: Get rid of the Smelter. It doesn't have that much HP, and the Shypers it creates are a massive pain thanks to their Sword Rain attacks. If you brought Mallow along he can zap the Smelter down to size with Shocker. Otherwise, normal attacks will do. Once the Shypers are no longer a threat you can treat Smithy like any other boss, chipping away at his health until he gives up.
Is that the end, though? Nope! Of course it isn't!
Smithy, Round Two
HP:
- 8,000 (All heads)
- 1,000 (Body)
Weakness:
- Lightning (Tank Head)
- Fire (Treasure Head)
- Ice (Mask Head)
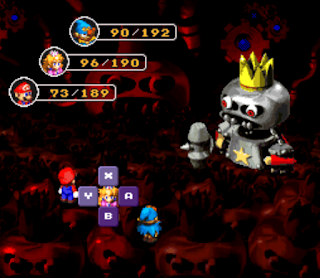
This is it. The final showdown. Smithy's true form is substantially stronger than his previous body, and thanks to his metalworking prowess Smithy can reshape his head into a variety of different forms. Each of Smithy's heads has a different set of attacks:
- A variety of basic hammer and gun strikes
- A painful bullet attack (Tank Head)
- Magnum, which can OHKO a character if you don't use a Timed Hit to defend (Tank Head)
- Dark Star, a strong single-target magic attack (Magic Head)
- Sword / Spear / Arrow Rain, all magic attacks against your entire party (Magic Head)
- Boulder, a strong magic attack against your whole party (Magic Head)
- A randomized attack which can inflict Mute, Scarecrow, Poison, or Fear on your party members (Treasure Head)
- Shredder, which removes any status buffs from your party (Mask Head)
- Recover / Mega Recover, both restorative spells (Mask Head)
Smithy will start off the battle with his 'normal' head, then quickly change into one of his other four heads. The heads all have their own stats, so your attacks will affect them differently. Smithy's body is also an individual enemy, and though it only uses basic attacks it will strike often. If you defeat the body it will come back to life after a few rounds and continue attacking. You'll know the body is active again when Smithy announces that he is 'burning with power'.
By and large your strategy in this fight isn't much different from previous battles - the whole thing is just more intense. Place Toadstool on perpetual healing duty (you'll need her in this fight unless you're way overleveled), then push Mario and your other character at Smithy's head with everything you've got. If you find you're taking too much damage you may want to knock out Smithy's body each time it regenerates, but for the most part Smithy's head should be your target. The types of attacks you use should vary from head to head:
- Smithy's Tank Head has poor magical defenses. Special Moves are the way to go, particularly if you have Mallow in the party to use Lightning attacks.
- Smithy's Magic Head has poor normal defenses. Stick to physical attacks and conserve your FP for healing, as this one tends to dish out the most damage.
- Smithy's Treasure Head has more balanced defenses, though it is a bit weaker to Special Moves. Mario's Fire attacks work well here. Be ready to deal with a lot of status ailments. Group Hug will immediately get rid of the worst of the ailments, Fear, which will otherwise see your party annihilated if Smithy does a group attack.
- Smithy's Mask Head is a defensive wall, and won't take much damage regardless of what you do. Use these rounds to heal your party, and, if Geno's on the team, to buff your stats with Geno Boost. This is also a good round for knocking out Smithy's body.
It's not a complicated battle, it's just long. Smithy has the most health of any enemy by far, and some of his heads just won't take much damage. Expect to run through most of your inventory keeping your party members alive, not to mention stocked with FP. (Though on the plus side there's no saving after you beat Smithy, so if you reload your game you'll still have all your stuff.) Always make sure you have a few Pick Me Ups in case Toadstool gets knocked out, 'cause without her you're in deep trouble.

Defeat Smithy, and, congratulations! You've completed Super Mario RPG: Legend of the Seven Stars! Enjoy the ending! If you purchased a bunch of Fireworks (five will do) from a particular Mole in Moleville the ending gets a bit flashier, so you have a use for all those leftover coins! Have fun!
Main Walkthrough

