Part 6: Moleville and Coal Mines
Booster Pass
Enemies
- Apprentice - 120 HP - Weak to Ice
- Artichoker - 200 HP - Weak to Jump, Fire
- Carriboscis - 90 HP - Weak to Jump, Fire
- Lakitu - 124 HP
- Sky Troopa - 10 HP - Weak to Jump
- Spikester - 50 HP - Weak to Ice
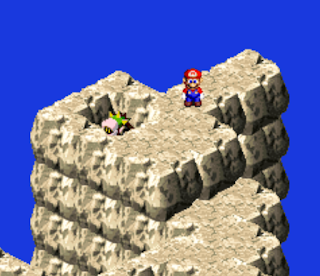
- This is the first place you can actually battle a Lakitu. There's one patrolling through the rocky valley running through the area, and if you get up onto the cliffs you can run, leap, and land on it, triggering a battle. Enjoy.
- On the far east side of the area is a small spot with a lone cactus, like the many littering this region. If you touch this one, however, it will come to life and attack you as an Artichoker. You can get Fright Bombs killing these things.
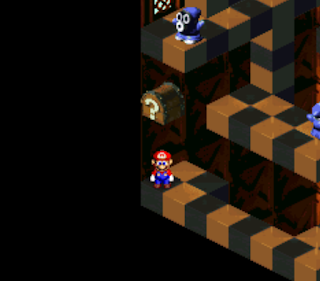
- In the west of this area you'll find an odd dead end. This will be more useful in the future. Climb up onto the rocks and you'll find a lone cactus. There's a hidden chest above the cactus, and it contains a Flower.
- In the north of this area you'll find the exit, up on some cliffs. If you check the air to the left of the exit you'll find a hidden chest containing a Rock Candy.
Booster Tower
Enemies
- Blaster - 120 HP - Weak to Lightning
- Chomp - 100 HP - Weak to Lightning
- Fireball - 10 HP - Weak to Jump, Ice
- Jester - 151 HP - Weak to Ice
- Orb User - 8 HP
- Remo Con - 88 HP - Weak to Fire
- Rob-omb - 42 HP - Weak to Jump, Fire
- Snifit - 200 HP - Weak to Ice
- Spookum - 98 HP - Weak to Ice
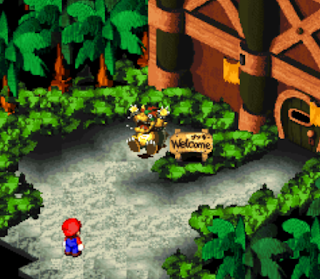
As soon as you approach the front door of Booster Tower you'll run into Bowser, who has been abandoned by his army and is pining for the old days. You'll also get a quick look at Princess Toadstool, who is being held captive at the top of the tower. Check the front door once Bowser leaves to determine that it is locked, then try to exit the area. Bowser will smash down the front door for you...
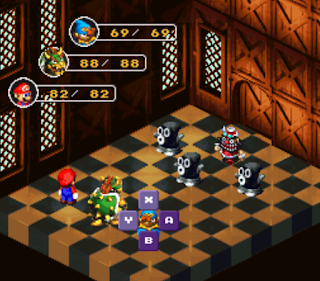
... and join the party! Yes, Bowser is a playable character, and he stays that way for the rest of the game. Bowser is slow, but his health is high and he can hit quite hard. He peters out a bit by the end of the game since his weapons and armor aren't great, but for now Bowser is an excellent addition to the party. You may want to head back to Moleville and buy him some Work Pants, as well as give him an accessory. You'll find a weapon for Bowser shortly.
At this point you'll have four party members, and since you're only allowed to have three active battlers you'll need to leave one of them on the sidelines. Mario must remain in the party, so that means switching out Mallow or Geno if you want Bowser. You can do this via the Switch option in the main menu. Note that inactive party members will still gain experience and level up, so no one is left behind.
In the next room you'll have your first (verbal) encounter with Booster, who will ultimately prove to be just as weird as he looks. Booster will pull away on a toy train. Follow the train to the east end of the hallway and go down the narrow passage where it disappears to find a hidden Flower Tab.
There are more steps in the next room, this time guarded by Rob-ombs. In the west of this hallway you'll find two exits. The first exit leads you to a small platform at the top of a tall drop, near a floating chest. Rather than try to jump for the chest, stand on the white tile at the edge of the platform and jump to the southeast. If you aim correctly you'll land on the seesaw from earlier, sending the Bob-omb on the other end flying up. The end result is popping open the chest, which contains a Masher weapon for Mario.
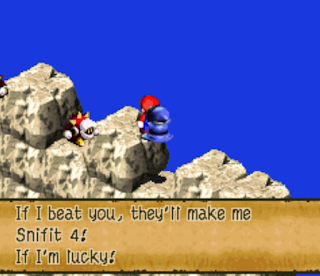
Go through the second exit and you'll find a button. Jump on it and you'll be told to check out Booster Pass. Travel there and check the west side of the screen with the patrolling Lakitu. There's now a doorway leading to a narrow pathway along the cliffs. As you cross the path you'll get into a battle with an eager Apprentice, a Spookum looking to become one of Booster's main Snifits. Apprentices are weak, but if you find a way to lose this battle the Apprentice will relocate to Booster Tower. You can do this with five different Apprentices, and won't get a Game Over as a result. At the end of the pathway you'll find chests containing a Kerokero Cola, a Flower, and a Frog Coin.
The next room over from the button contains a curtained-off area. Step through the curtains, and... well, you'll see. Through the next exit and you'll find a room with several platforms guarded by Spookums. You'll need to hop your way to the top. Up here you'll find a Snifit firing an endless procession of Bullet Bills, and the only way to stop them is to defeat the Snifit.
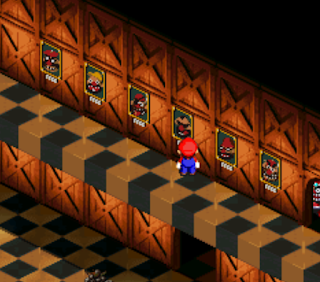
The next room contains a save block. One room over from here you'll find another gallery of Booster's family, though this time the order is all jumbled up. You need to interact with the portraits by order of age. Get it wrong and you'll be forced into a battle, and you'll have to start over. This is the proper order, starting from the left:
- Sixth portrait (far right, wearing glasses and a beret)
- Fifth portrait (wearing a yellow cap)
- Third portrait (wearing an eyepatch, and has his tongue stuck out)
- First portratit (wearing sunglasses)
- Second portrait (wearing a toque and glasses)
- Fourth portrait
Successfully check the paintings in the proper order and you'll receive an Elder Key. You can use this to unlock the door at the west end of the paintings. Inside is a Chain Chomp, and if you run-jump up to it - or try, anyway - Bowser will set the poor beast free. You'll receive a Chomp, Bowser's first weapon.
Climb the blocks in the next room and you'll find a Thwomp on a seesaw. Check to the right of the Thwomp for a chest that will fully restore the party, then jump onto the seesaw. The Thwomp will catapult you into another room, where Spookums will drop into place via parachutes. The dimensions on this room are a little weird, and you'll need to perform running jumps to avoid falling back down to the Thwomp. Check the western-most corner of the room on the lowest floor to find a hidden chest containing a Frog Coin. Near the top is a little blind alley where you can find a hidden Frog Coin.
At the top of this chamber you'll find an exit to a suspiciously-flat room that's full of coins, including three Frog Coins, as well as a Room Key. If you step in the wrong spots you'll be forced into battles. There's no way to detect where the battles are, so your best bet is to just stick to the edges of the room and walk clockwise along the wall, dipping in to grab Frog Coins and the Key. The Room Key opens a door in the northeast, inside which you'll find a chest containing Zoom Shoes.
Use the exit in the northwest and you'll appear in a hallway filled with Chomps. It's not that difficult to avoid them, so long as you jump carefully. In the next room you'll run into Booster again, and he'll start dropping Bob-ombs on your head. You can either hide behind the wall in the east and wait for the Bob-ombs to blow up on their own, or... simply lead via the southern exit. Booster is unhappy either way.
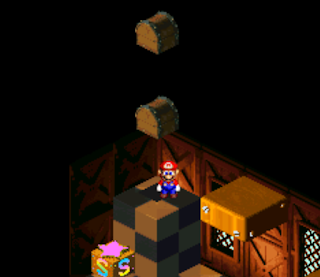
Keep climbing the tower until you reach a save block. Floating on a platform above the save block is a chest, and you'll need to use the orange platforms in the east to hop up to it. Check the corner of the room by the eastern-most platform for a hidden chest containing a full health restore, then hop along the platforms. The visible chest contains a Frog Coin, and if you correctly aim your running jump you can land on top of this chest and find a third, hidden chest. This last one contains a Goodie Bag, which can be used in combat to receive extra coins when you win the fight. You can also sell it for 555 coins, which is likely the better deal. If you check the air near the eastern-most orange platform you can also find a hidden chest containing a full-heal mushroom, which is... less lucrative. (Though still useful.)
Save your game, then head into the room at the end of the hall. This is Booster's room, though he's not in at the moment. Check the door in the southwest and you'll discover that you've reached the top of the tower, where Toadstool is being kept - though she is locked outside, and you don't have the key. You'll need Booster to open it for you, and since he's about to show up...
Curtain Game
Once Booster enters his room Mario will be forced to hide behind four curtains. Booster will chat with his Snifits, and eventually the Snifits will start opening the curtains. At first only one Snifit will do the job, but as the game progresses all three will join in the fun. You'll need to keep Mario behind the curtains until the game is over. Here are some tips for avoiding detection:
- Walk along the curtains so you can see Mario's feet. If you cling to the back wall you may lose track of where you are, and accidentally get caught.
- Hold down the run button (Y). Otherwise you'll run the risk of being intercepted by a Snifit when you're trying to rush to cover.
- Stay still once the curtains are open. If you walk into the line of sight you'll get caught.
- Watch the Snifits carefully before settling on a hiding place. As the game progresses they will swiftly switch spots, forcing you to relocate. As long as there is a drumroll playing in the background, you aren't safe.
Booster
Weakness: Jump
Bringing along his three Snifits for the fight, Booster is a relatively easy opponent - though he can still hit hard. Booster uses the following attacks:
- A strong melee punch
- Spritz Bomb, which inflicts moderate damage to one target
- Loco Express, which inflicts heavy damage to one target
Although Booster is on the field the entire time, he doesn't fight - and can't be targeted - until you take out the three Snifits. They're not a big deal, overall, though their Gunk Ball attacks can Mute your characters. Once the Snifits are gone Booster will begin attacking, and the raw power of his hits can easily knock out your team members. Fortunately, Booster has low HP for a boss at this point in the game, and he's vulnerable to Mario's Jump and Super Jump attacks. Two or three well-timed Super Jumps should put Booster down.
(Fighting Booster is not worth missing out on the Amulet. Still, you may want to save and reload just to try out the battle, as you won't get another chance to stomp this weirdo.)
Booster and his Snifits will open the door to the balcony and leave, regardless of how the curtain game went. Head back into the hallway, heal up, save, and follow Booster. Another boss battle is on the way.
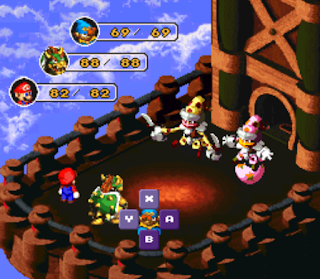
Knife Guy and Grate Guy
- 700 (Knife Guy)
- 900 (Grate Guy)
- Fire (Knife Guy)
- Lightning (Grate Guy)
- Normal melee strikes (both enemies)
- A knife toss (Knife Guy)
- Echofinder, which can Mute a single target (Grate Guy)
- An light bubble attack that puts a single target to Sleep (Grate Guy)
- Crystal, an Ice attack against a single target (combo attack)
- Blizzard, an Ice attack against the whole party (combo attack)
- Meteor Blast, a strong magic attack against your whole party (combo attack)
- Make sure you move from side to side on a regular basis. If you run in a straight line the whole time you'll miss out on opportunities to get ahead, and you'll likely be sideswiped by the Snifits.
- Use the Snifits as springboards. If you time your jumps correctly you can bounce off of their heads, putting Mario a bit closer to Booster. This is the best way to catch up to him, as the Snifits stick with you for more or less the entire course.
- Use the barrels as springboards. This isn't quite as simple as bouncing off of the Snifits, but the barrels can also put you much closer to Booster if you time your jumps correctly. Leap when you're about two body-lengths away from a barrel and you should land on top of it. The barrels stop coming after a while, so make the most of them while they last.
- Try to keep Mario parallel with Booster and Toadstool. Mario will slowly lose ground over time, and if you take too long touching Toadstool after bouncing forward you'll miss out on your chance for a Flower.
- Don't worry about mastering this game too much. You can only get 99 FP total in Super Mario RPG, and there are more than enough opportunities coming up to reach the maximum. If you can manage five or six Flowers in a single run then you did pretty well.

