Part 5: Rose Town and Forest Maze
Moleville
Assuming you skipped the Pipe Vault and Yo'ster Island - or you're done with them for now - your next stop after Rose Town is Moleville. Everyone in Moleville is freaking out over a pair of missing kids, so you won't hear much else if you speak to the townsfolk. Still, there are a few things of note in Moleville:
- The Inn is right near the entrance. Rest up if your party is damaged, as a dungeon is swiftly incoming.
- The Item Shop is north of the entrance. Everyone could use a weapon and armor upgrade, though Geno should take precedence as he starts the game with no equipment. Note that you can get his Finger Shot weapon for free if you speak to Gaz, the son of Rose Town's innkeeper. If you favor offense over defense you'll want to buy Work Pants for everyone rather than their normal armor, particularly Geno.
- Check in the northeast of Moleville and you'll run across a familiar face for a second time. He's, ah, going through a rough patch.
There's more to see in Moleville, though you need to complete a dungeon first. You'll find the entrance in the north of Moleville.
Coal Mines
Enemies
- Bob-omb - 90 HP - Weak to Jump
- Cluster - 60 HP
- Crook - 38 HP
- Enigma - 150 HP - Weak to Jump
- Magmite - 26 HP - Weak to Ice
- Sparky - 120 HP - Weak to Ice
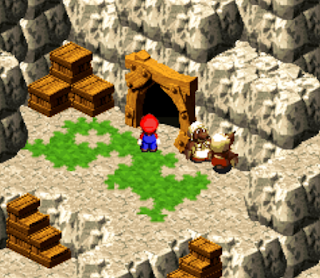
Upon entering the Coal Mines you'll receive an (optional) lowdown on what's happening, and the Moles will beg Mario for his help. Agree and two worker Moles will provide their shoulders as a platform to reach the entrance to the inner sections of the mines.
Proceed through the next two areas - there are enemies and an avaricious Toad, but not much else - until you come to a springboard at a crossroads. There are plenty of tunnels to the east and west of the springboard, but they don't lead anywhere special, aside from to a Mole in the west who needs dynamite. Use the springboard to fly into the air -
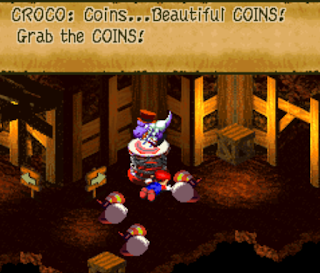
- and you'll slam your head into the ceiling. At this point you'll run afoul of Croco, who has picked up some cronies, as well as every normal coin you own. Chase Croco into the eastern tunnel to learn that he still has explosives on him, then continue to give chase. As you run after Croco he'll turn the tunnels into a big loop with his bombs.
Croco will run through the tunnels, and you need to rush to catch up with him. Before you actually catch him, however, you should make a point to do a total circuit of the tunnels. Croco's Crook buddies are hidiing throughout the tunnels, and you can fight them. A single Thunderbolt from Mallow should take out all three. Each enemy defeated will earn you a Flower Tab. The Crooks are in the following spots:
- Behind the springboard
- One screen west of the springboard
- Behind some crates, one screen east of the springboard
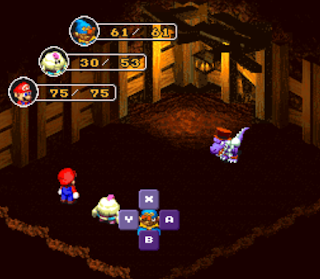
HP: 720
Weakness: Fire
- A single-target, rushing melee attack
- A bomb-lobbing attack that does moderate damage to one target
- Chomp, an enemy-lobbing attack against a single target
Punchinello
HP:
- 1,200 (Punchinello)
- 30 (Microbomb)
- 90 (Bob-Omb)
- 150 (Mezzo Bomb)
- A normal melee attack
- Summons help (Microbombs, Bob-Ombs, or Mezzo Bombs)
- Sand Storm, which damages everyone and can inflict Fear
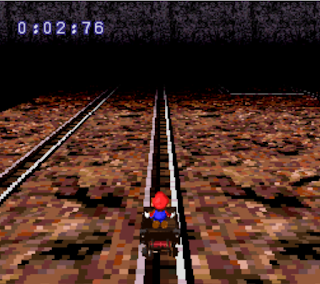
- The speed mushrooms can send you flying off of the track. Be careful when you use them. In general you should save them for looooong stretches of track where you can't send the end coming...
- ... or for the side-scrolling sections. You can blast through these areas with mushrooms and really cut down on your score.
- Although the brakes are intended to get you around tight corners, most of the time you only have to use them on the extreme hairpin turns that occasionally pop up.
- There are a few gaps in the track. Hop over any large, black lumps that you notice.
- Occasionally you can change your path along the track and fetch mushrooms. Be careful doing this, as you're likely to hit a sudden turn and go flying off the track. Have a finger on the brakes.
- Don't worry about this too much. You get very little besides bragging rights if you get a good time.
- Speak to the innkeeper. Assuming you completed the first Toadofsky composition at Tadpole Pond, she'll mention that he went back there. You can now play the Moleville song for him and get another membership card.
- If you check the Item Shop you'll find the avaricious Toad from the Coal Mines. He has opened up a little store that sells some ambiguous items. At the moment you can buy a Lucky Jewel from him for 100 coins. Come back later in the game and you can buy some other stuff, as well, including the best weapon in the game for one of your characters (after you visit a place called Barrel Volcano).
- In the east of Moleville is a house belonging to a woman who will take unwanted Mushrooms and Syrups off of your hands for points. The better the item you trade, the more points you get. You can exchange 100 points for a Fear Bomb, an Ice Bomb, or a Fire Bomb, all useful in battle.
- Inside a house in the west of Moleville is a father Mole who will sell you Fireworks for 500 gold apiece. Buying these will change the ending of the game, so you don't need to purchase any now.
- Near the Fireworks-selling guy's house is a little girl who offers to trade you a Shiny Stone for some Fireworks. This seems like a ripoff now, as the Shiny Stone is seemingly worthless... but if you save it until you reach a place called Monstro Town, you can use it to fight an optional boss, who just happens to be the most powerful enemy in the game. Or...
- ... if you check in the Item Shop you'll find a little girl who will offer to trade you a Carbo Cookie for your Shiny Stone. Do this, then give the Carbo Cookie to the hungry girl outside and to the northwest of the shop. She'll jump off of her bucket and run away. You can hereafter use the bucket to ride the Midas River Course for free. (You can always trade for another Shiny Stone, so don't worry about losing it.)
- If you climb the rocks to the top of the Coal Mines you'll find that a Mole has turned the mine carts into a replayable experience, aka Moleville Mountain. You can either replay it for 10 coins, earning nothing, or wager 30 coins and try to beat your old time. Beat your time so and you'll receive 50 coins.


